Setting up OpenVPN Client
A Virtual Private Network (VPN) allows you to have safe and protected Internet access from your smartphone or laptop when connecting to an unsecured network. All your traffic, in this case, passes through the VPN server. Moreover, it lets you bypass regional restrictions and censorship, as well as hide your location and unencrypted HTTP traffic from an unprotected network. OpenVPN is a powerful and flexible customizable open source software for working with Secure Socket Layer (SSL) VPN. Here we will explain how you can access our OpenVPN server from Windows, Mac OS, Linux, iOS and Android. To do this, you just need to perform a few simple steps.
Installing client configuration files
If you are reading this tutorial, you have just got a client configuration file to set up OpenVPN client on your platform. Now let’s talk about how to install VPN client profiles on Windows, Mac OS, Linux, iOS and Android. The installation process is unique for each platform, so skip platforms you do not plan to use.
The name of the OpenVPN connection depends on the name of your .ovpn file. In our example, it will be client1.ovpn.
Windows
Installation
You can download the OpenVPN client for Windows from the OpenVPN download page. Select the version of the installer you need.
Warning: installing OpenVPN requires administrator privileges.
After installing OpenVPN, copy your .ovpn file to this directory:
C:\Program Files\OpenVPN\config
Run OpenVPN, the client must automatically see your profile.
The OpenVPN client requires running with administrator rights, even for administrator accounts. To run, right-click on the client and choose Run as administrator each time you start the client. This also means that standard (non-administrator) users will have to enter an administrator password to use OpenVPN.
To force the OpenVPN application to always run as administrator, right-click on the client icon and go to the Properties section. At the bottom of the Compatibility tab, click on the Change settings for all users button. In the opened window, select Run this program as an administrator.
Connection
Each time you start the OpenVPN client, Windows will ask if you want to allow the program to make changes to your computer settings. Click Yes. Running an OpenVPN client simply places the application in the system tray, and the connection itself is not automatically established.
To establish the connection, right-click on the OpenVPN icon in the system tray. In the context menu opened, select client1 (this is our profile client1.ovpn) and click Connect.
You will see a status window that displays the connection log. At the end of the connection, you will see an appropriate message.
You can close the VPN connection in the same way: right-click on the OpenVPN icon in the system tray, select the client profile and click Disconnect.
Mac OS
Installation
Tunnelblick is a free open source OpenVPN client for Mac OS. You can download it from the Tunnelblick downloads page. Double-click on the downloaded .dmg file and follow the instructions during the installation process.
At the end of the installation process, Tunnelblick will ask if you have any configuration files. The easiest solution is to answer No and complete the installation of Tunnelblick. Then open Finder and double-click on client1.ovpn. Tunnelblick will install the client profile. This requires administrator rights.
Connection
Double-click on Tunnelblick from the Applications folder to run it. After launching the Tunnelblick icon will appear in the menu bar in the top right corner of the screen. To establish a connection, click on the icon and then Connect. Next, select the client1 connection.
Linux
Installation
Depending on the version of Linux you are using, you can use a variety of programs to establish a connection. Perhaps even your window manager can do this. The most universal way to establish a connection, however, is the OpenVPN software.
In Ubuntu or Debian, you can install it as follows:
$ sudo apt-get update
$ sudo apt-get install openvpn
On CentOS, you can activate the EPEL repository and then enter the following commands:
$ sudo yum install epel-release
$ sudo yum install openvpn
Connection
You can connect to the VPN using the openvpn command as follows:
$ sudo openvpn --config client1.ovpn
As a result, you will be connected to the server.
iOS
Installation
Find the official OpenVPN Connect client in the iTunes App Store and install it. To move the client configuration file to your mobile device, connect the device to the computer. Then launch iTunes on your computer and select iPhone > apps. Find the File Sharing section and click on the OpenVPN application. Transfer your .ovpn file to the right side of the OpenVPN Documents window.

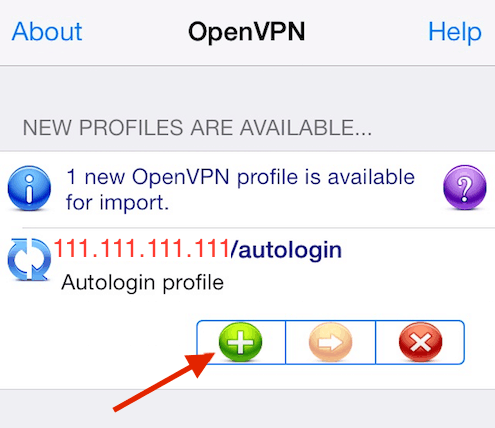
Next, run the OpenVPN application on your iPhone. You will receive a notification that a new profile is ready for import. Click on the green plus sign to import the profile.
Connection
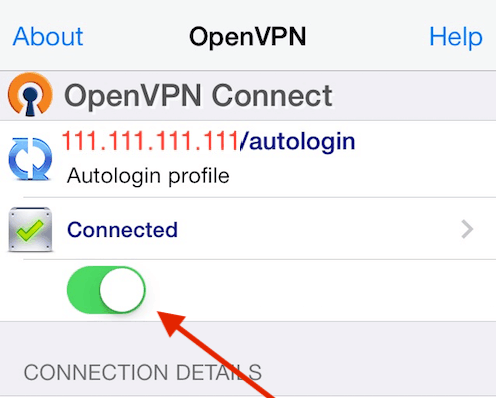
OpenVPN is ready for use with the new profile. To establish a connection, pull the Connect slider to the On state. To stop the connection, move this slider to the Off state.
Attention! You can not use the VPN mode switch in the Settings application to establish a VPN connection. If you try to do this, you will receive a message stating that this is only possible in the OpenVPN application.
Android
Installation
Open Google Play Store. Find and install the official OpenVPN client application — Android OpenVPN Connect.
You can transfer the profile file from your computer to the phone by connecting the Android device to the computer via USB and copying the file. You can also move the file using an SD card by copying the profile to the card and inserting the card into the Android device.
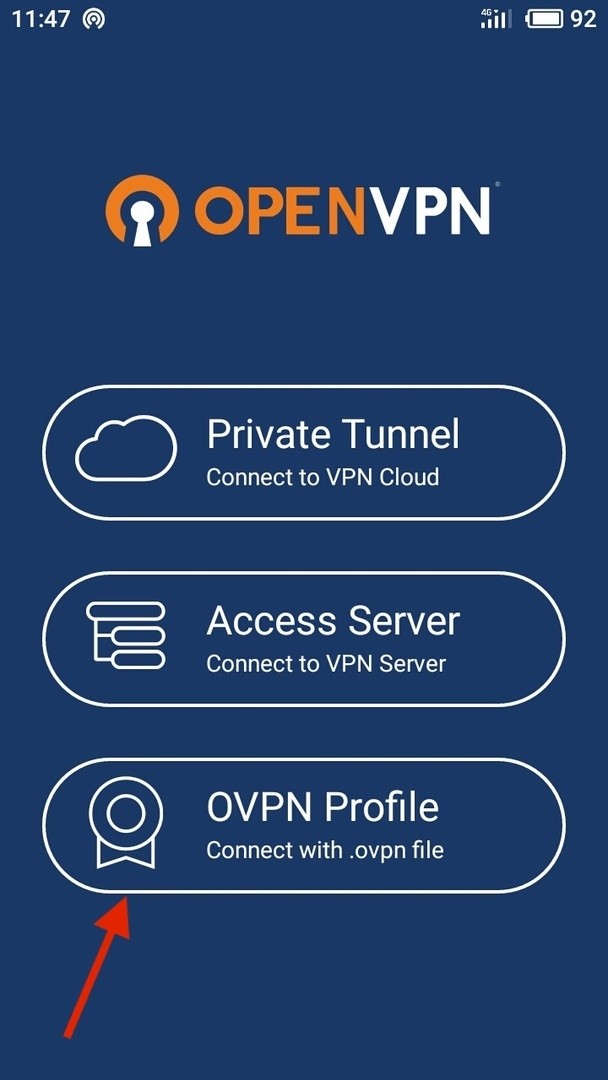
Then launch the OpenVPN application and select "OVPN Profile" on the menu to connect with the .ovpn file.
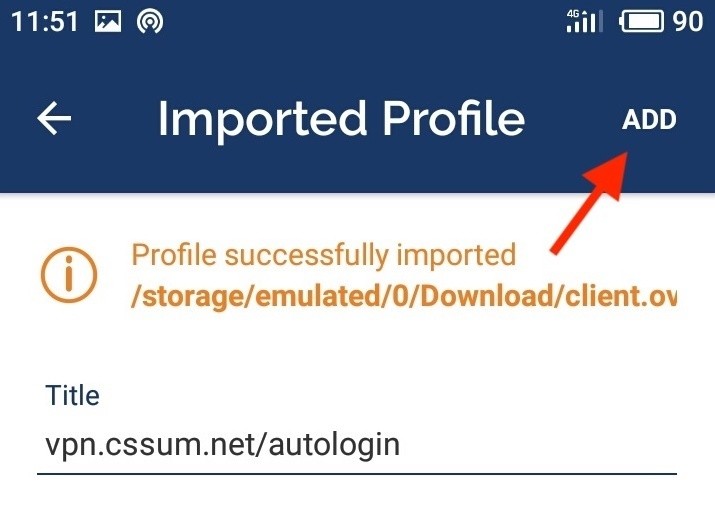
Next, find the .ovpn file in the file system (in our example, this is the /Download/ folder), choose the file and click Import.
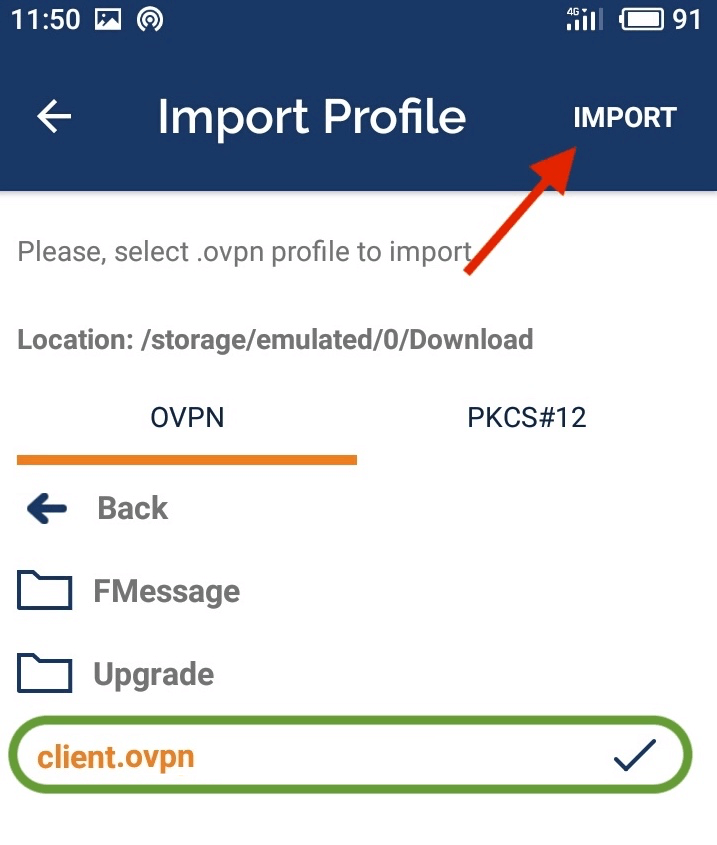
The application will report that the profile has been successfully imported. Click Add to continue.
Connection
To establish a connection, pull the Connect slider to the On state. To stop the connection, move this slider to the Off state.

Conclusion
That’s all! Now you can safely surf the Internet, all your traffic is free from restrictions and protected from intruders.