Create an API via NestJS Part I
1. Setup the project
Firstly we need to install CLI tools for creating the scaffold.
I use the npm for this because the yarn has a bug with node engine version:
npm i -g @nestjs/cli
After that, we must create a new boilerplate project:
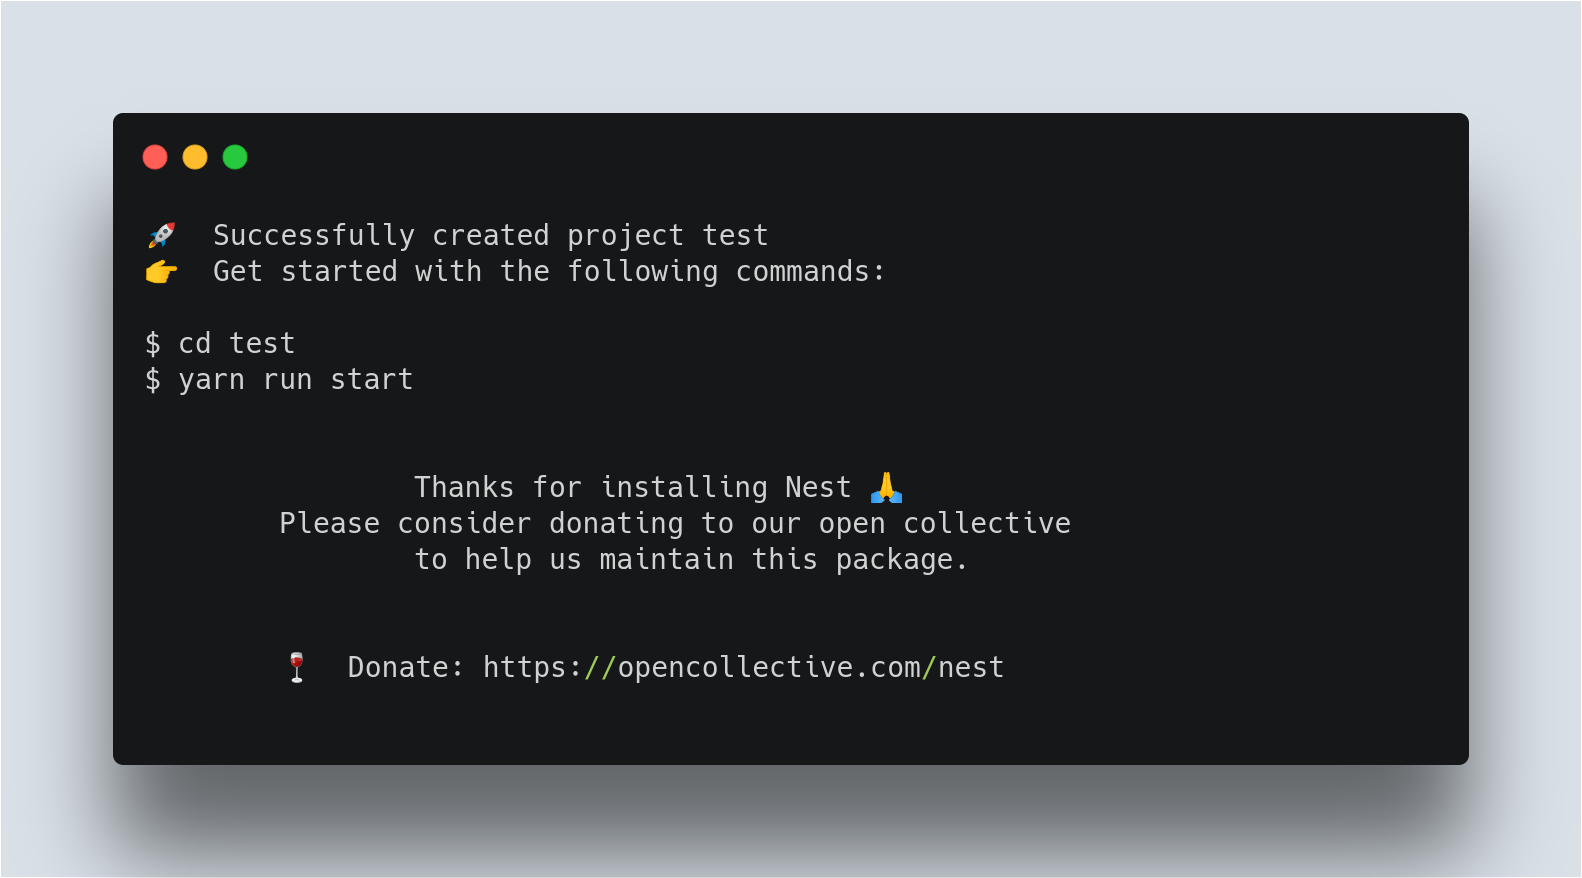
nest new {type your project name here}
This wizard will ask you about which package manager is you prefer:
Which package manager would you ❤️ to use?
>npm
>yarn
I prefer yarn and in this article, I had chosen it.
When installation will be done you will see:
Now we can setting up Prettier:
cd {YourProjectName}
vim .prettierrc
In this file we must wrote something like this:
{
  "useTabs": false,
  "tabWidth": 2,
  "singleQuote": true,
  "trailingComma": "all",
  "semi": true,
  "jsxBracketSameLine": true,
  "bracketSpacing": true,
  "arrowParens": "avoid"
}
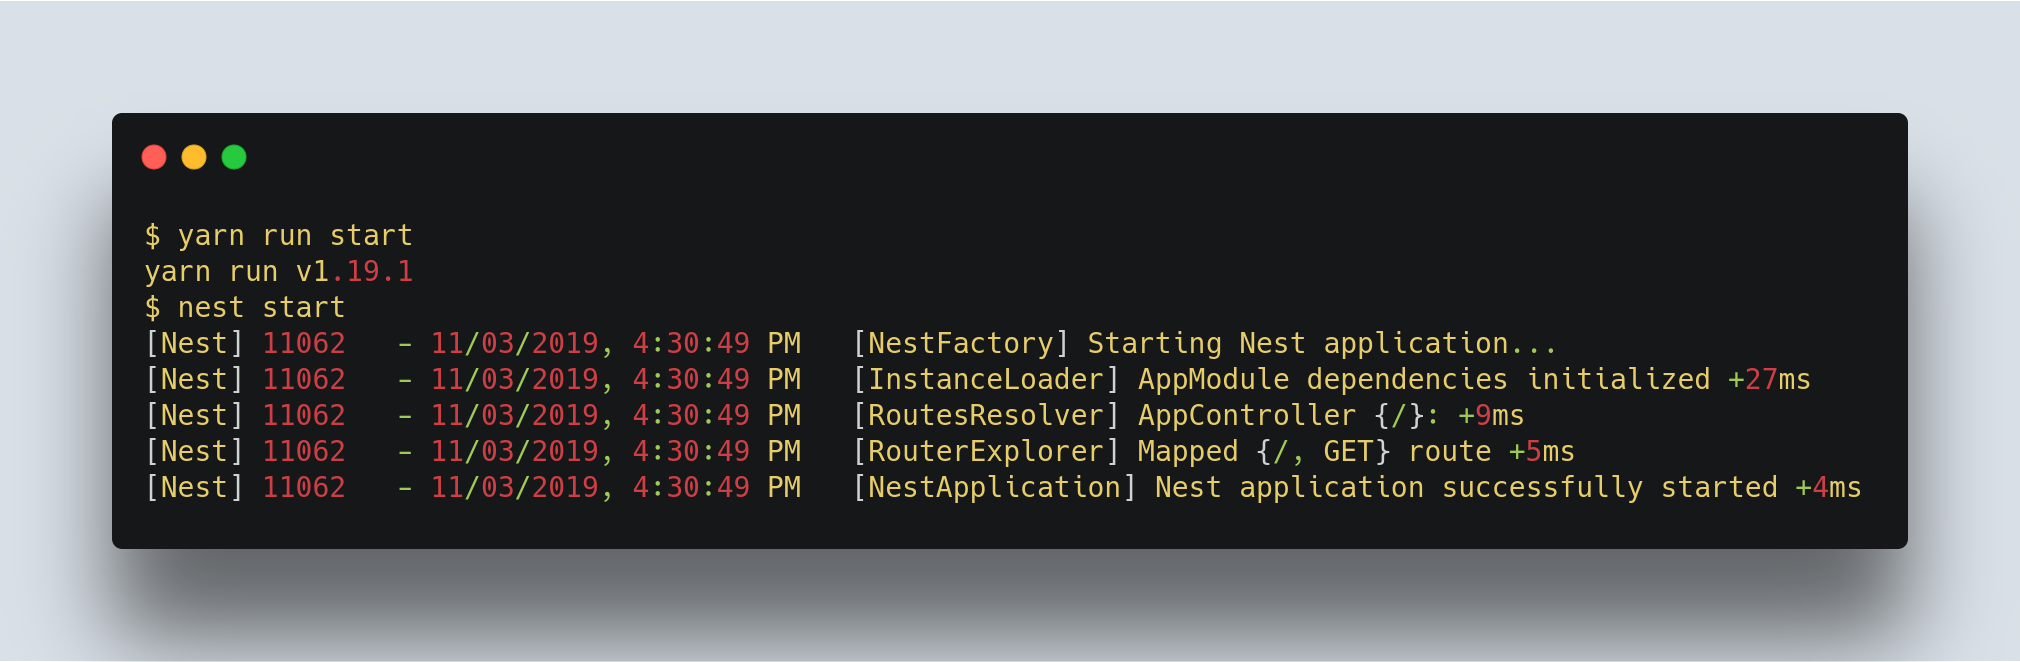
Finally we can start project and have see Hello World message, let's try:
cd {YourProjectName}
yarn run start
When you will see:
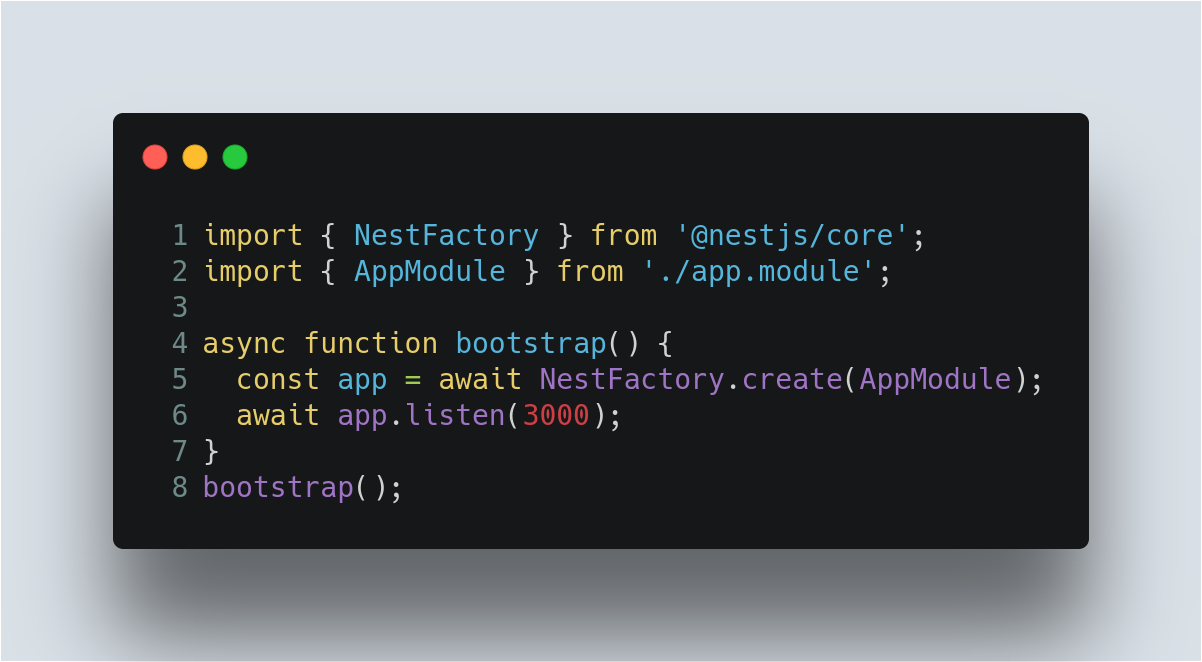
You can check how it's work into your browser on page http://localhost:3000
And now you probably get stuck with :3000, what does it mean? Yeah, it is port of your server, it can be change in src/main.ts file line 6:
It's not beautiful enough, what we have to do if we'll want change it dynamically? Yes, we must pull it into enviroment variable. But how?
The dotenv package comes to our aid, let's add it:
yarn add dotenv
and setup it:
touch .env && echo "PORT=4000" > .env
Now we can use environment variables in our project just like this:
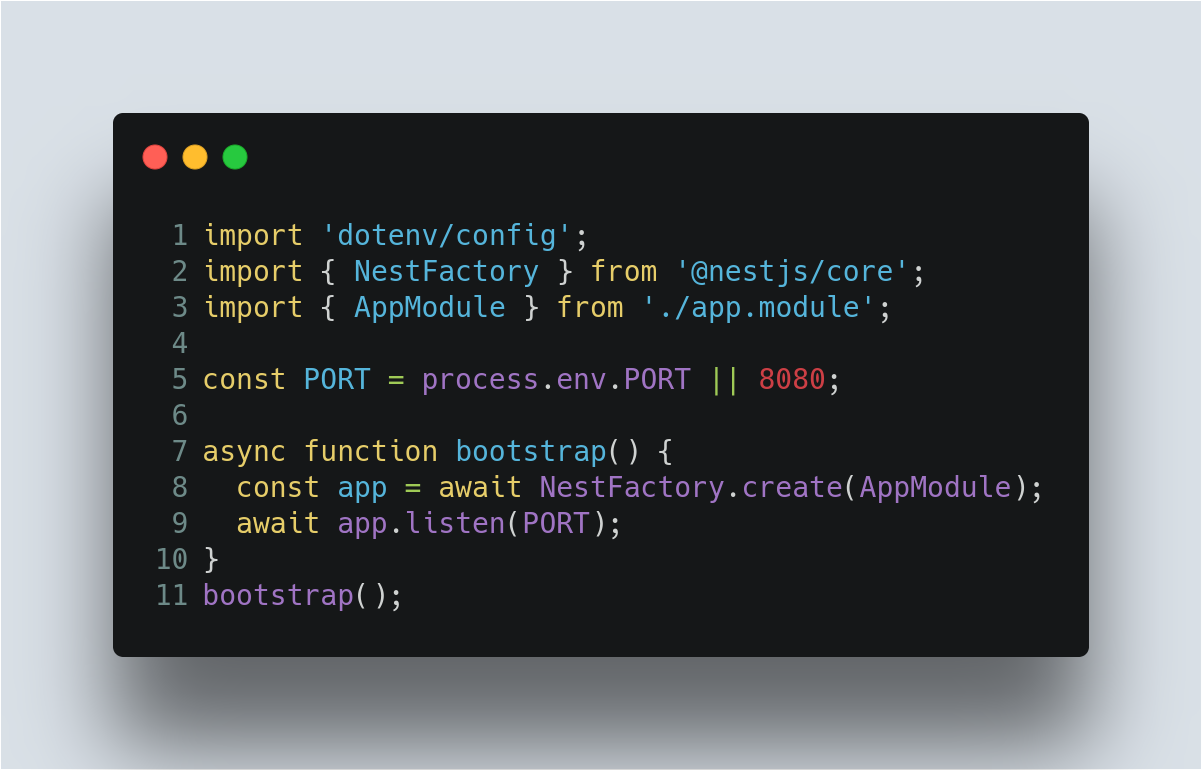
What is we have done?
- Imported package dotenv/config into main.ts
- Created constant with the value from .env file or, if it's empty, 8080
- Used it in the function app.listen()
Now we can check this, go to http://localhost:4000 if we have done everything right, we'll see the "Hello World" message.
Not forget to reload your server, if you want use hotreload you have to use yarn run start:dev instead of yarn run start
Looks good, but how we can know witch PORT used now? We have to write a Logger for our server! Open main.ts file and add this string after app.listen() function:

Now, after you start your server you must see message like this:

2. Install packages to using DataBase
JS packages
In order to work with the database, we need to install some packages:
yarn add pg typeorm @nestjs/typeorm
OS packages
For development we also need Postgres Server and PgAdmin tool, if you are use Ubuntu 18.04 you have to install it this way:
cd /etc/apt/sources.list.d/sudo touch pgdg.listecho "deb http://apt.postgresql.org/pub/repos/apt/ bionic-pgdg main" > pgdg.listwget --quiet -O - https://www.postgresql.org/media/keys/ACCC4CF8.asc | sudo apt-key add -sudo apt-get updatesudo apt install postgresql-11 postgresql-client-11 pgadmin4
For another OS check this page.
After installation instruction:
- Edit the
pg_hba.conffile:sudo vim /etc/postgresql/11/main/pg_hba.conf - Change the line
local all postgres peertolocal all postgres trust - Restart
postgresqlservice:sudo service postgresql restart - Log in into DB and change password:
psql -U postgres- In the postgres=# prompt:
ALTER USER postgres with password ‘new-password’; - Revert the changes:
-
sudo vim /etc/postgresql/11/main/pg_hba.confchange line fromtrusttomd5 - Restart
postgresqlservice:sudo service postgresql restart
3. Setup DataBase
Create a new DataBase
- Login to Postgres
psql -U postgres- Create a new DB
create database quiz;\q- to quit from psql
Connect the DataBase to your project
Create ORM config file
touch ormconfig.js- Edit this file as follows
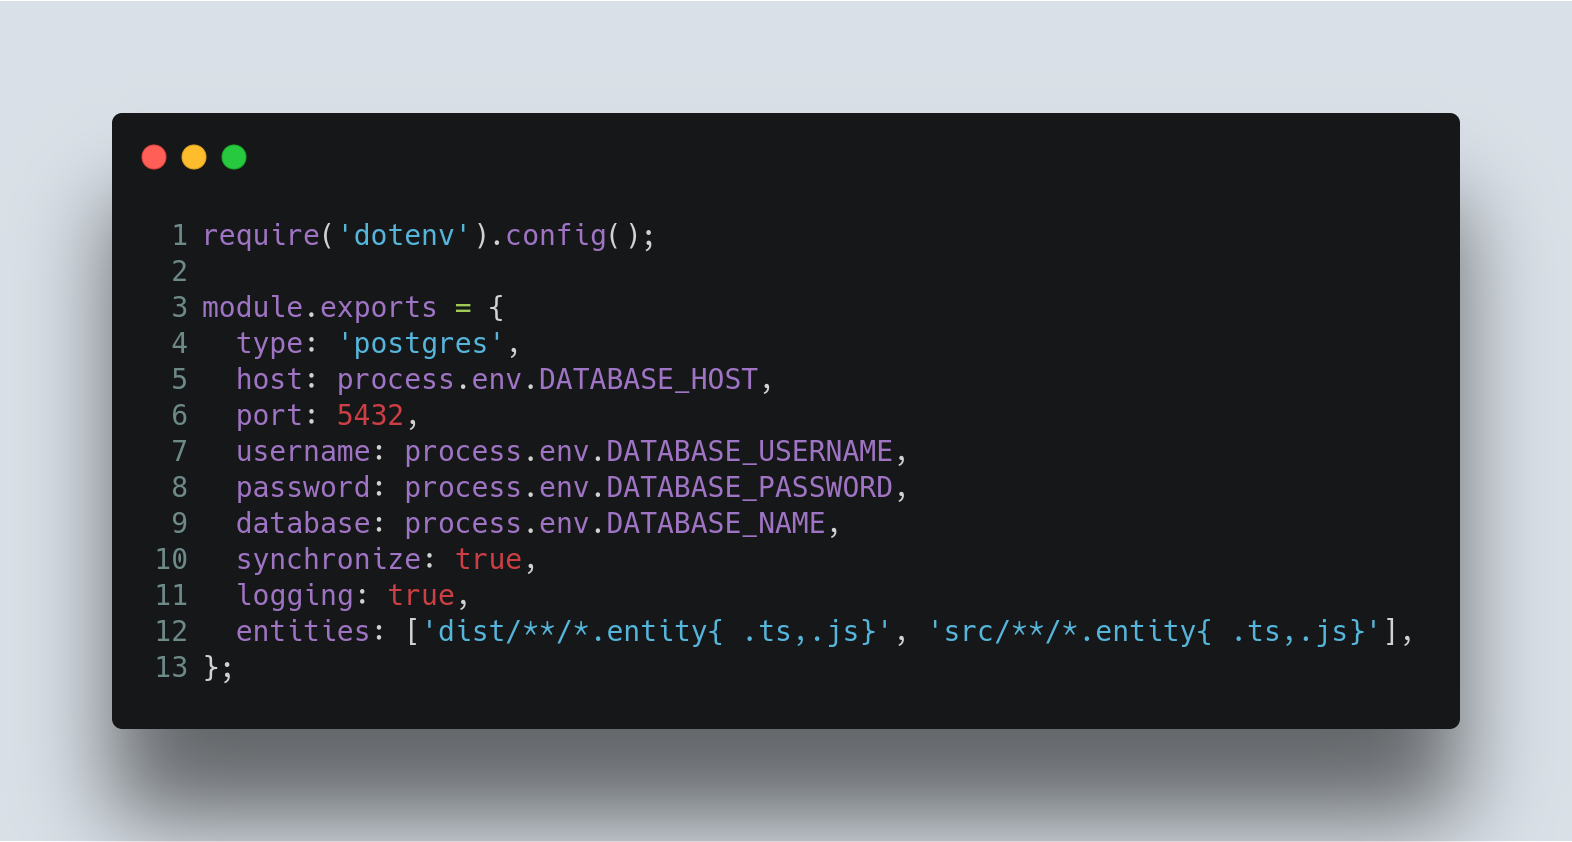
ormconfig.jsWhere fields "host", "username", "password", "database" is your credentials to database which can set in .env file
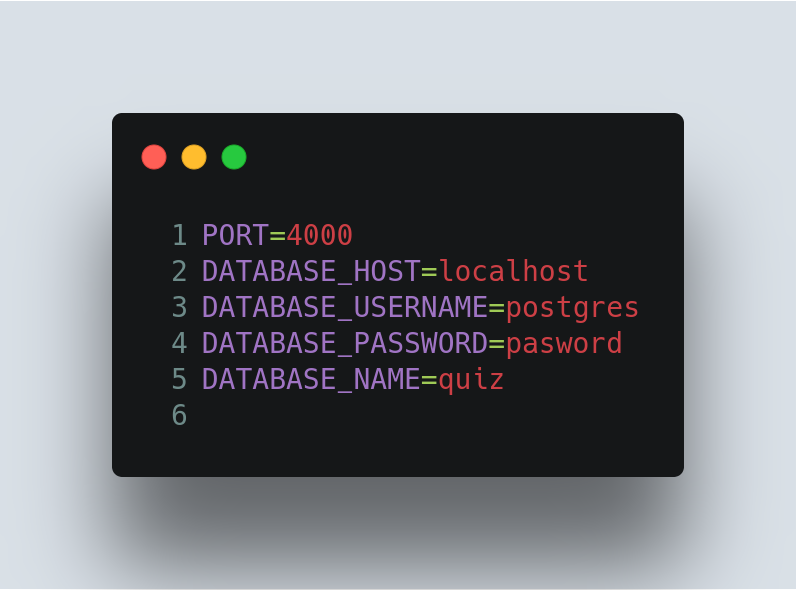
- Set credentials in .env file:
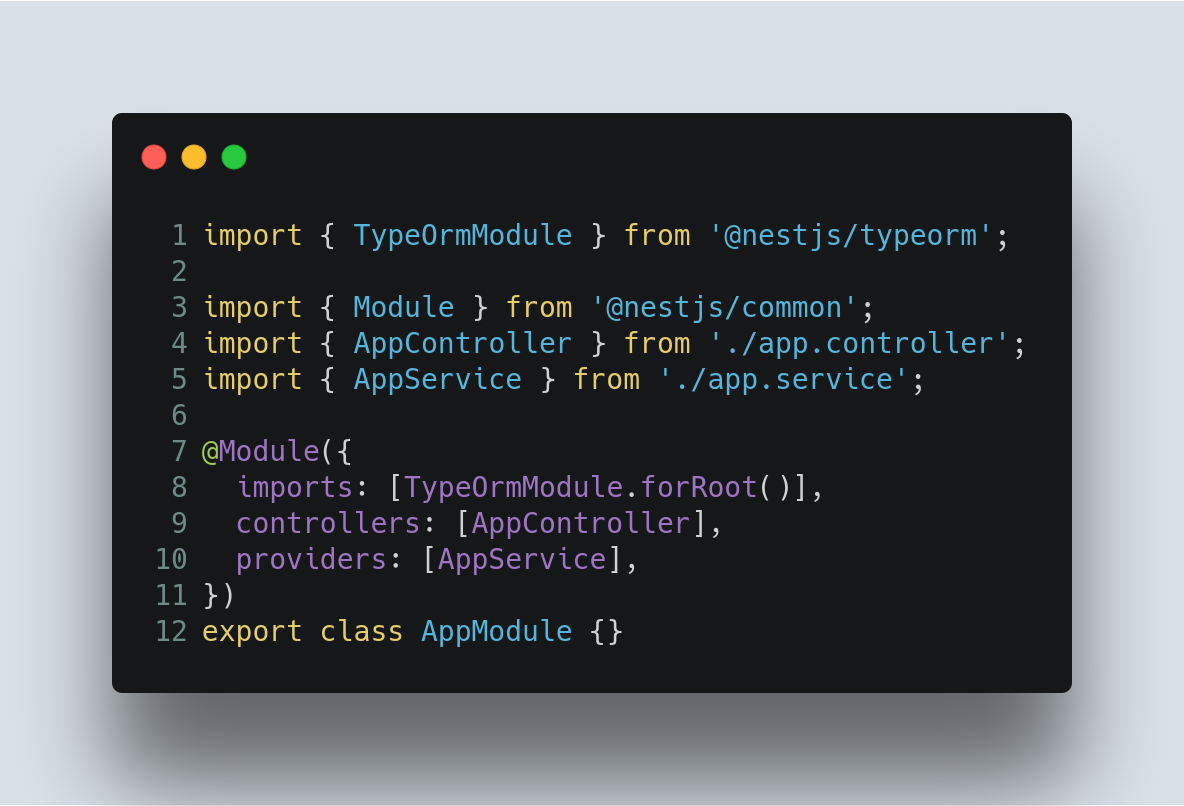
Import ORM module:
- Go to file
src/app.module.ts - Add the following lines:
Start working with DB
Create entities
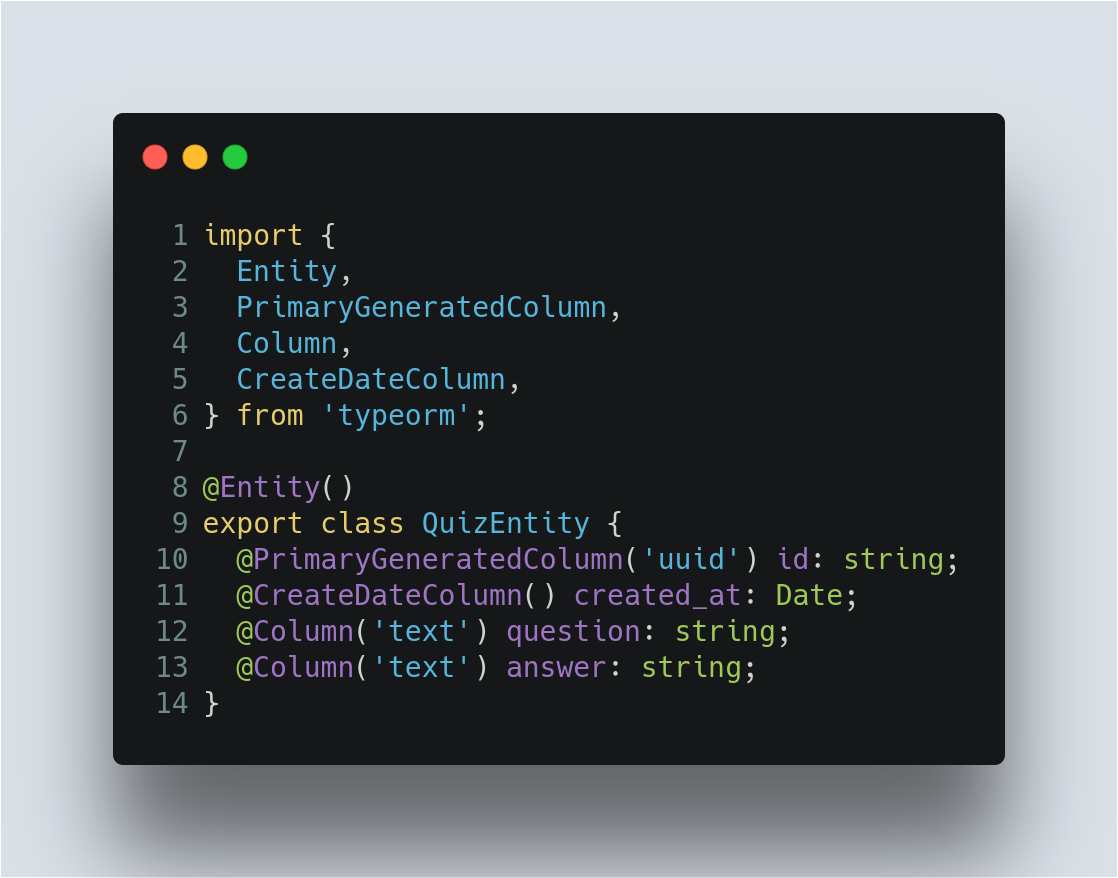
- Create entnities structure
mkdir src/quizcd src/quiz/ && touch quiz.entity.ts- Edit
quiz.entity.tsas follow:
Check if it work
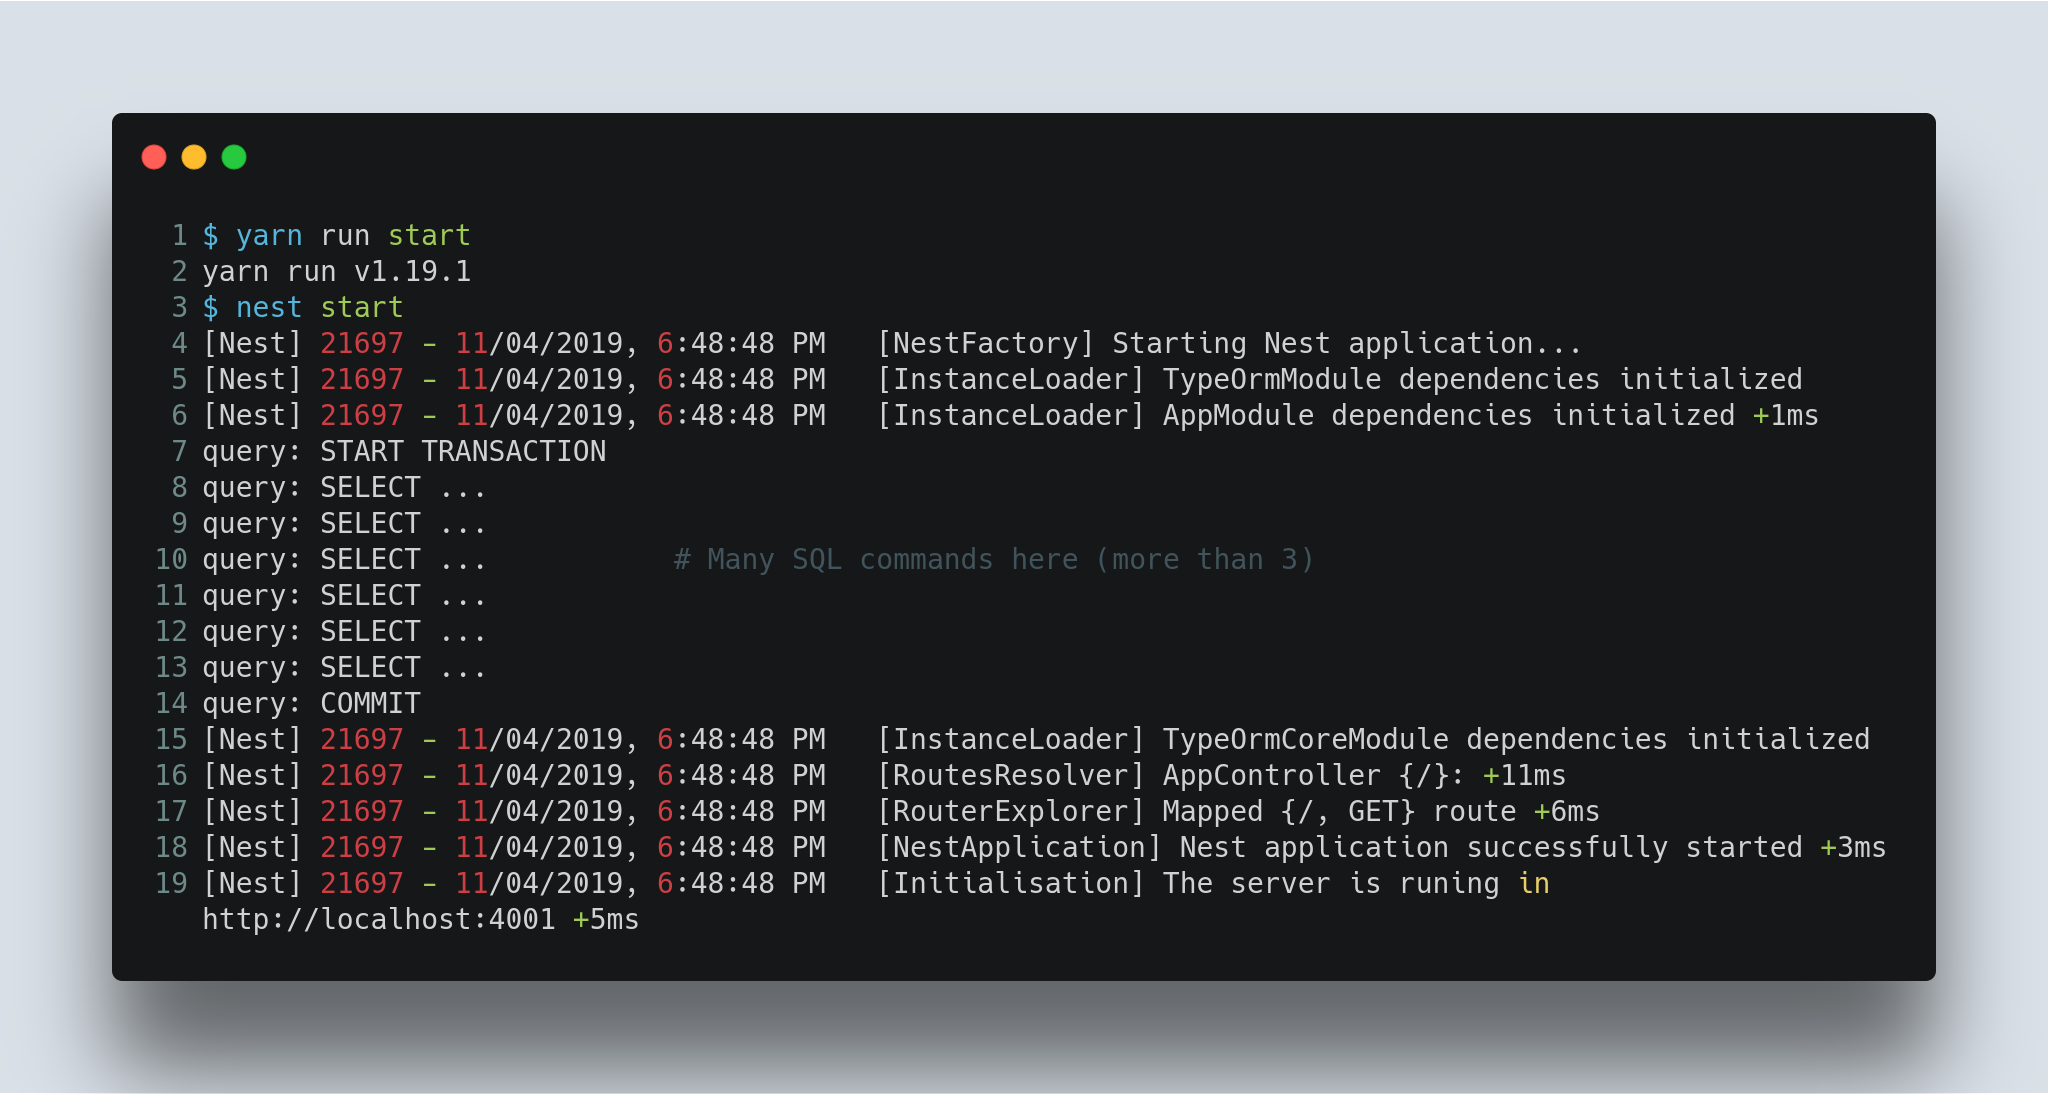
Star your server via yarn run start . Then you must see output like that:
Now browse the DB:
psql -U postgres - connect to db server\c quiz - open db called quiz\dt - describe tables within
If everything is ok, you should see:
