Deploying Laravel in Kubernetes
Deploying Laravel in Kubernetes simplifies running, scaling and monitoring Kubernetes in an easily reproducible way.
There are plenty of aspects to take into account when running Laravel.
FPM, Nginx, Certificates, Static Assets, Queue Workers, Caches, The Scheduler, Monitoring, Distributed Logging and a bunch more stuff.
Tools like Laravel Forge, and Laravel Vapor manage many of these things for you, but what would the tech world look like without choices ?
Laravel already ships with a Docker setup with Laravel Sail, but in this series we will build our own images in a production like fashion, specialising the containers and images to each of the different parts of our application.
We will also create a reproducible setup for our application,
which can easily be used to deploy other Laravel applications as well.
This series will cover everything from local development, CI/CD, Codified Infrastructure including databases, Declarative configurations for deployment in Kubernetes for each independent component of the application, Monitoring the deployed application and infrastructure, Distributed Logging infrastructure, and Alerting for application and infrastructure metrics.
There is a lot covered in this series, and the best way to approach this would be to read 2-3 posts, and implement them as you go through, and then do a bit of digging to better understand why and how they work.
Below all the series episodes are listed in their particular section of deployment
! PART ONE: Installing Laravel
This series will show you how to go from laravel new to Laravel running in Kubernetes, including monitoring, logging, exposing and bunch more.
Part 1 of this series covers creating a new laravel installation which we can deploy in Kubernetes.
Prerequisites
We will be using Laravel sail to run our application locally as a start, but will build our own Docker images as we go through.
- Productionising our Docker images for a smaller size
- We need multiple images for things like fpm and nginx when we move toward running in Kubernetes
- For existing applications which do not have sail as part of their version < 8.0
- Learning
Install a new Laravel application
Change directory to where you want the new application installed.
Install a new Laravel application. For full documentation see here https://laravel.com/docs/8.x/installation#your-first-laravel-project
We will be installing only our app, Redis, and Mysql as part of this post, as we will not be using the rest just yet, and can add them later if necessary.
# Mac OS
curl -s "https://laravel.build/laravel-in-kubernetes?with=mysql,redis" | bash
cd laravel-in-kubernetes
./vendor/bin/sail up

# Linux
curl -s https://laravel.build/laravel-in-kubernetes?with=mysql,redis | bash
cd laravel-in-kubernetes
./vendor/bin/sail up
It might take a while for your application to come up the first time. This is due to new Docker images being downloaded, built, and started up for most services.
You should be able to reach you application http://localhost
Port mappings
Your service might error when starting due to port mounting with an error similar to
ERROR: for laravel.test Cannot start service laravel.test: Ports are not available: listen tcp 0.0.0.0:80: bind: address already in use
To solve this you can set the APP_PORT environment variable when running sail up
APP_PORT=8080 ./vendor/bin/sail up
You should now be able to reach the application at http://localhost:8080 or whichever port you chose in APP_PORT
Understanding the docker-compose file
With sail, your application has a docker-compose.yml file in the root directory.
This docker-compose file controls what runs when you run sail up
Sail is essentially an abstraction on top of Docker to more easily manage running Laravel
You can see the underlying details by looking at the docker-compose.yml file, used for running your Laravel application locally, and the ./vendor/laravel/sail/runtimes/8.0/Dockerfile file, building the container which runs Laravel.
Commit changes
Let's commit our changes at this point, so we can revert anything in future.
git init
git add .
git commit -m "Initial Laravel Install"
Adding authentication
For our application, we want at least a little bit of functionality, so we'll use Laravel Breeze to add a login and register pages.
./vendor/bin/sail composer require laravel/breeze --dev
./vendor/bin/sail php artisan breeze:install
./vendor/bin/sail npm install
./vendor/bin/sail npm run dev
./vendor/bin/sail php artisan migrate
Now you can head over to http://localhost:8080/register to see your new register page.
Fill out the form, submit, and if everything works correctly, you should see a logged in dashboard
Commit again
git add .
git commit -m "Add breeze authentication"
Running tests
You can also run the test suite using
./vendor/bin/sail artisan test
Next, we want to start moving our Laravel application closer to Kubernetes. We will build a bunch of Docker images and update our docker-compose to reflect a more production ready installation.
Onto the next
Next we'll look at Dockerizing our Laravel application for production use
! PART TWO: Dockerizing Laravel
In this part of the series, we are going to Dockerise our Laravel application with different layers, for all the different technical pieces of our application (FPM, Web Server, Queues, Cron etc.)
We will do this by building layers for each process, copy in the codebase, and build separate containers for them.
Prerequisites
- A Laravel application. You can see Part 1 if you haven't got an application yet
- Docker running locally
Getting started
Laravel 8.0 ships with Sail, which already runs Laravel applications in Docker, but it is not entirely production ready, and might need to be updated according to your use case and needs for sizing, custom configs etc. It only has a normal PHP container, but we might need a few more containers for production.
We need a FPM container to process requests, a PHP CLI container to handle artisan commands, and for example running queues, and an Nginx container to serve static content etc.
As you can already see, simply running one container would not serve our needs, and doesn't allow us to scale or manage different pieces of our application differently from the others.
In this post we'll cover all of the required containers, and what each of them are specialised for.
Why wouldn't we use the default sail container
The default sail container contains everything we need to run the application, to the point where it has too much for a production deployment.
For local development it works well out of the box, but for production deployment using Kubernetes, it's a bit big, and has too many components installed in a single container.
The more "stuff" installed in a container, the more places there are to attack and for us to manage. For our our Kubernetes deployment we are going to split out the different parts (FPM, Nginx, Queue Workers, Crons etc.).
Kubernetes filesystem
One thing we need to look into first, is the Kubernetes filesystem.
By default, you can write thing to files on a local drive to run things like logs and sessions.
When moving toward Kubernetes, we start playing in the field of distributed applications, and a local filesystem no longer suffices.
If you think about sessions for example. If we have 2 Kubernetes pods, we need to reach for the same one for recurring requests from the same user, otherwise the session might not exist.
With that in mind we need to make a couple updates to our application in preparation of Dockerizing the system.
We will also eventually secure our application with a readonly filesystem, to prevent localised logic.
Logging Update
One thing we need to do before we start setting up our Docker containers, is to update the logging driver to output to stdout, instead of to a file.
Being able to run kubectl logs and getting application logs is the primary reason for updating to use stdout. If we log to a file, we would need to cat the log files and that makes it a bunch more difficult.
So let's update the logging to point at stdout.
In the application configuration config/logging.php , add a new log channel for stdout
return [
    'channels' => [
        'stdout' => [
            'driver' => 'monolog',
            'level' => env('LOG_LEVEL', 'debug'),
            'handler' => StreamHandler::class,
            'formatter' => env('LOG_STDOUT_FORMATTER'),
            'with' => [
                'stream' => 'php://stdout',
            ],
        ],
    ],
],
Next, update your .env file to use this Logger
LOG_CHANNEL=stdout
The application will now output any logs to stdout so we can read it directly.
Session update
Sessions also use the local filesystem by default, and we want to update this to use Redis instead, so all pods can reach for the same session database, along with our Cache.
In order to do this for sessions, we need to install the predis/predis package.
We can install it from local composer, or simply add it to the composer.json file, and then Docker will take care of installing it.
$ composer require predis/predis
Or if you prefer, simply add it to the require list in composer.json
{
    "require": {
        [...]
        "predis/predis": "^1.1"
Also, update the .env to use Redis for sessions
SESSION_DRIVER=redis
HTTPS for production
Because we are going to expose our application and add Let's Encrypt certificates, we also need to force HTTPS for production.
When the request actually reaches our applications, it will be an http request, as TLS terminates at the Ingress.
We need to therefor force HTTPS urls for our application.
When our application serves html pages for example, it will add the URLS to css files using http if the request is http. We need to force https, so all the urls in our html are https.
In the app/Providers/AppServiceProvider.php file, in the boot method, force https for production.
<?php

namespace App\Providers;

# Add the Facade
use Illuminate\Support\Facades\URL;
use Illuminate\Support\ServiceProvider;

class AppServiceProvider extends ServiceProvider
{
    /** All the rest */

    public function boot()
    {
        if($this->app->environment('production')) {
            URL::forceScheme('https');
        }
    }
}
This will force any assets served in production to be requested from an https domain, which our application will have.
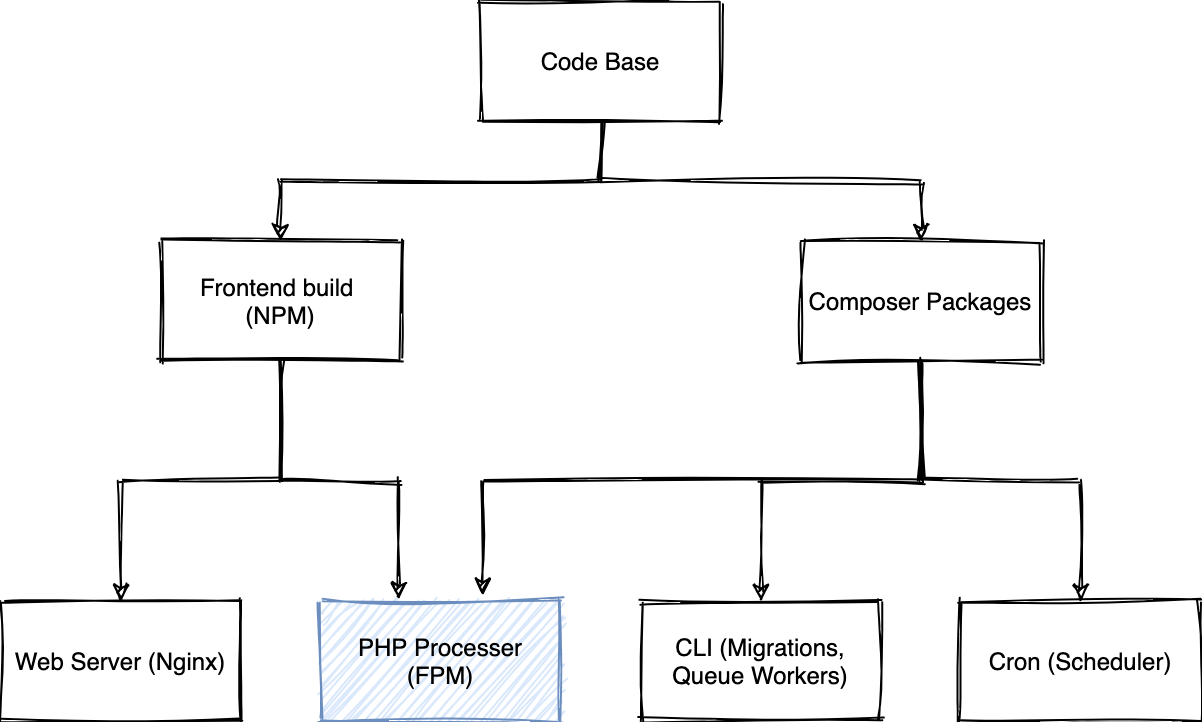
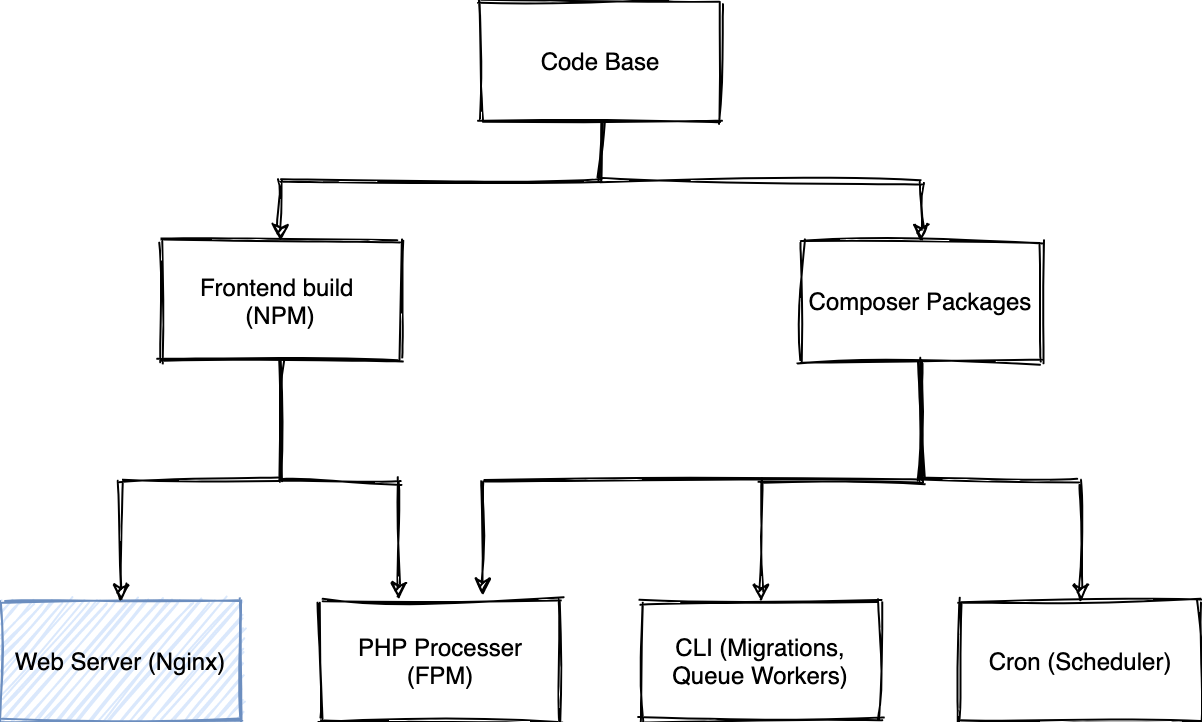
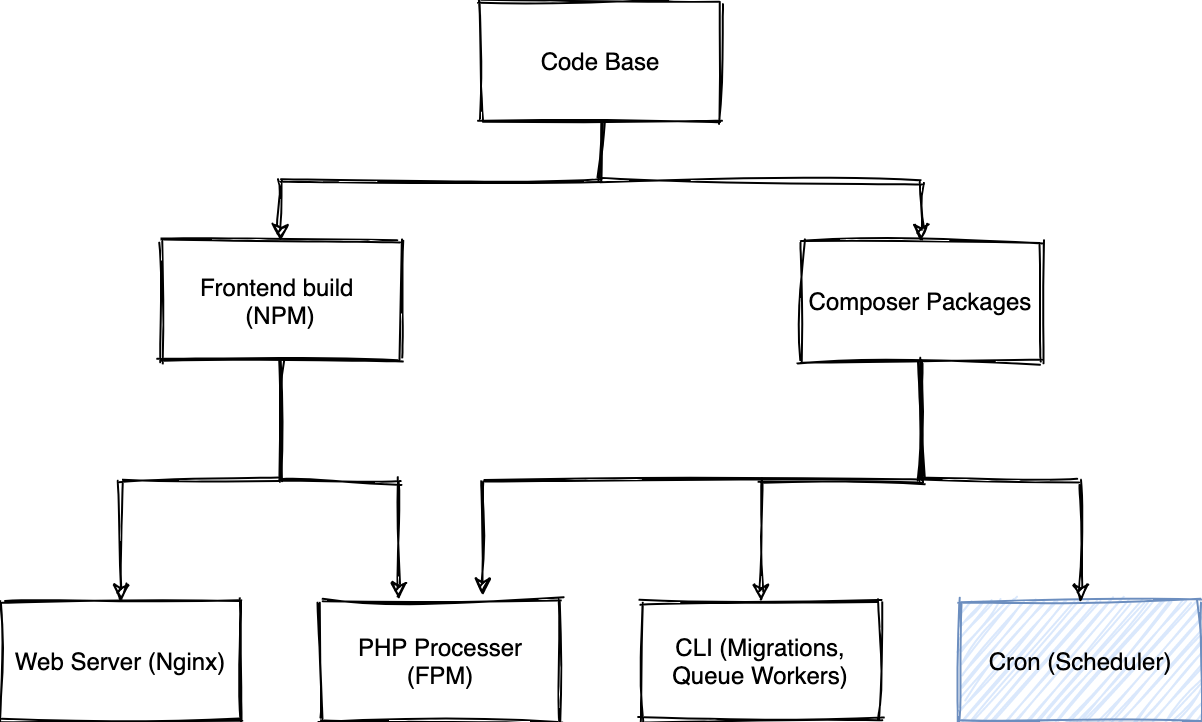
Docker Containers
We want to create multiple containers for our application, but we want to use the same base pieces for different pieces, which specialise in specific pieces.
Our container structure looks a bit like the below diagram.
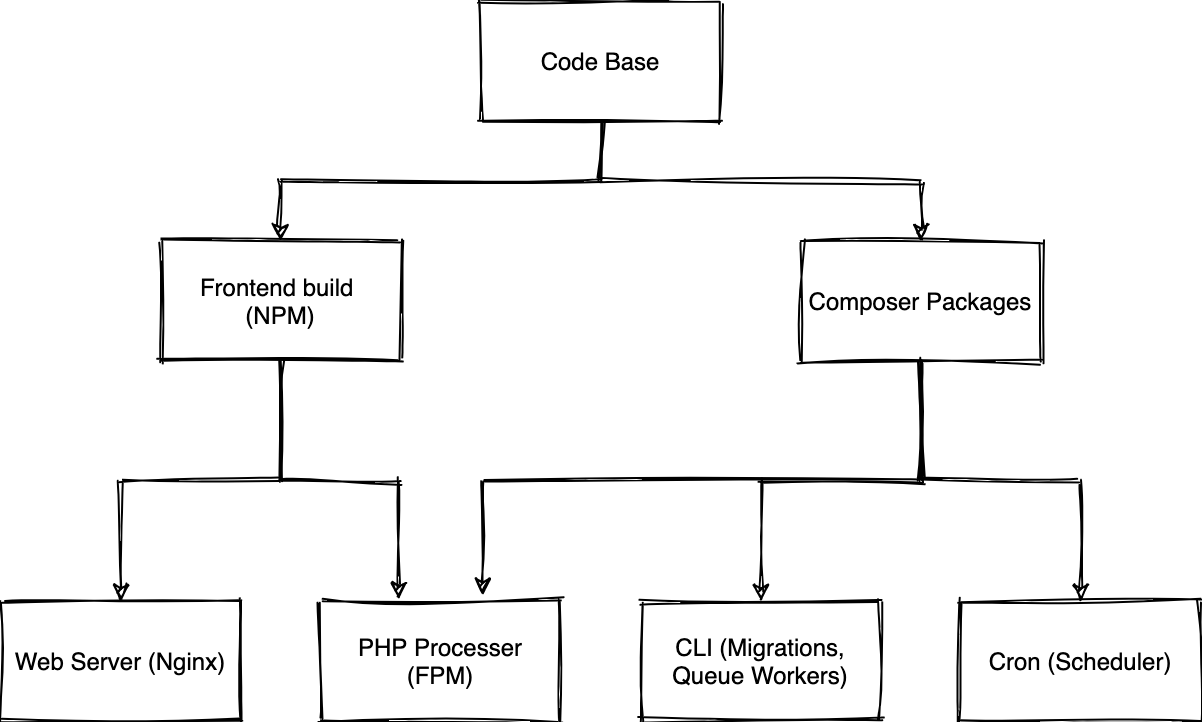
We will use Docker Multi Stage Builds to achieve each of the different pieces of the diagram
We will start with the 2 base images (NPM, Composer), and then build out each of the custom pieces.
The .dockerignore file
We will start by adding a .dockerignore file so we can prevent Docker from copying in the node_modules and the vendor directory, as we want to build any binaries for the specific architecture in the image.
In the root of your project, create a file called .dockerignore with the following contents
/vendor
/node_modules
The Dockerfile
We need to create a Dockerfile in the root of our project, and setup some reusable pieces.
In the root of your project, create a file called Dockerfile.
$ touch Dockerfile
Next, create 2 variables inside the Dockerfile to contain the PHP packages we require.
We'll use two variables. One for built-in extensions, and one for extensions we need to instal using pecl.
# Create args for PHP extensions and PECL packages we need to install.
# This makes it easier if we want to install packages,
# as we have to install them in multiple places.
# This helps keep ou Dockerfiles DRY -> https://bit.ly/dry-code
# You can see a list of required extensions for Laravel here: https://laravel.com/docs/8.x/deployment#server-requirements
ARG PHP_EXTS="bcmath ctype fileinfo mbstring pdo pdo_mysql tokenizer dom pcntl"
ARG PHP_PECL_EXTS="redis"
If your application needs additional extensions installed, feel free to add them to the list before building.
Composer Stage
We need to build a Composer base, which contains all our code, and installed Composer dependencies.
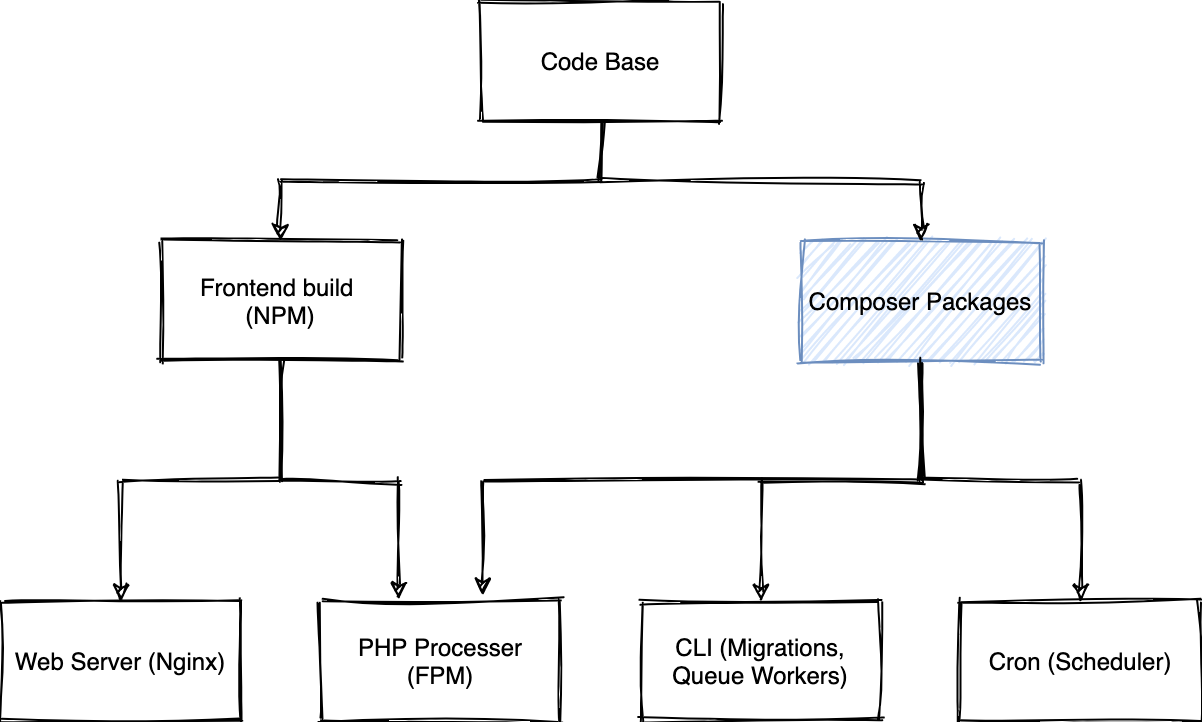
This will set us up for all the following stages to reuse the Composer packages.
Once we have build the Composer base, we can build the other layers from that, only using the specific parts we need.
We start with a Composer image which is based of php-8 in an alpine distro image.
This will help us install dependencies of our application.
In our Dockerfile, we can add the Composer stage (This goes directly after the previous piece)
# We need to build the Composer base to reuse packages we've installed
FROM composer:2.1 as composer_base

# We need to declare that we want to use the args in this build step
ARG PHP_EXTS
ARG PHP_PECL_EXTS

# First, create the application directory, and some auxilary directories for scripts and such
RUN mkdir -p /opt/apps/laravel-in-kubernetes /opt/apps/laravel-in-kubernetes/bin

# Next, set our working directory
WORKDIR /opt/apps/laravel-in-kubernetes

# We need to create a composer group and user, and create a home directory for it, so we keep the rest of our image safe,
# And not accidentally run malicious scripts
RUN addgroup -S composer \
    && adduser -S composer -G composer \
    && chown -R composer /opt/apps/laravel-in-kubernetes \
    && apk add --virtual build-dependencies --no-cache ${PHPIZE_DEPS} openssl ca-certificates libxml2-dev oniguruma-dev \
    && docker-php-ext-install -j$(nproc) ${PHP_EXTS} \
    && pecl install ${PHP_PECL_EXTS} \
    && docker-php-ext-enable ${PHP_PECL_EXTS} \
    && apk del build-dependencies

# Next we want to switch over to the composer user before running installs.
# This is very important, so any extra scripts that composer wants to run,
# don't have access to the root filesystem.
# This especially important when installing packages from unverified sources.
USER composer

# Copy in our dependency files.
# We want to leave the rest of the code base out for now,
# so Docker can build a cache of this layer,
# and only rebuild when the dependencies of our application changes.
COPY --chown=composer composer.json composer.lock ./

# Install all the dependencies without running any installation scripts.
# We skip scripts as the code base hasn't been copied in yet and script will likely fail,
# as `php artisan` available yet.
# This also helps us to cache previous runs and layers.
# As long as comoser.json and composer.lock doesn't change the install will be cached.
RUN composer install --no-dev --no-scripts --no-autoloader --prefer-dist

# Copy in our actual source code so we can run the installation scripts we need
# At this point all the PHP packages have been installed,
# and all that is left to do, is to run any installation scripts which depends on the code base
COPY --chown=composer . .

# Now that the code base and packages are all available,
# we can run the install again, and let it run any install scripts.
RUN composer install --no-dev --prefer-dist
Testing the Composer Stage
We can now build the Docker image and make sure it builds correctly, and installs all our dependencies
docker build . --target composer_base
Frontend Stage
We need to install the NPM packages as well, so we can run any compilations for Laravel Mix as well.
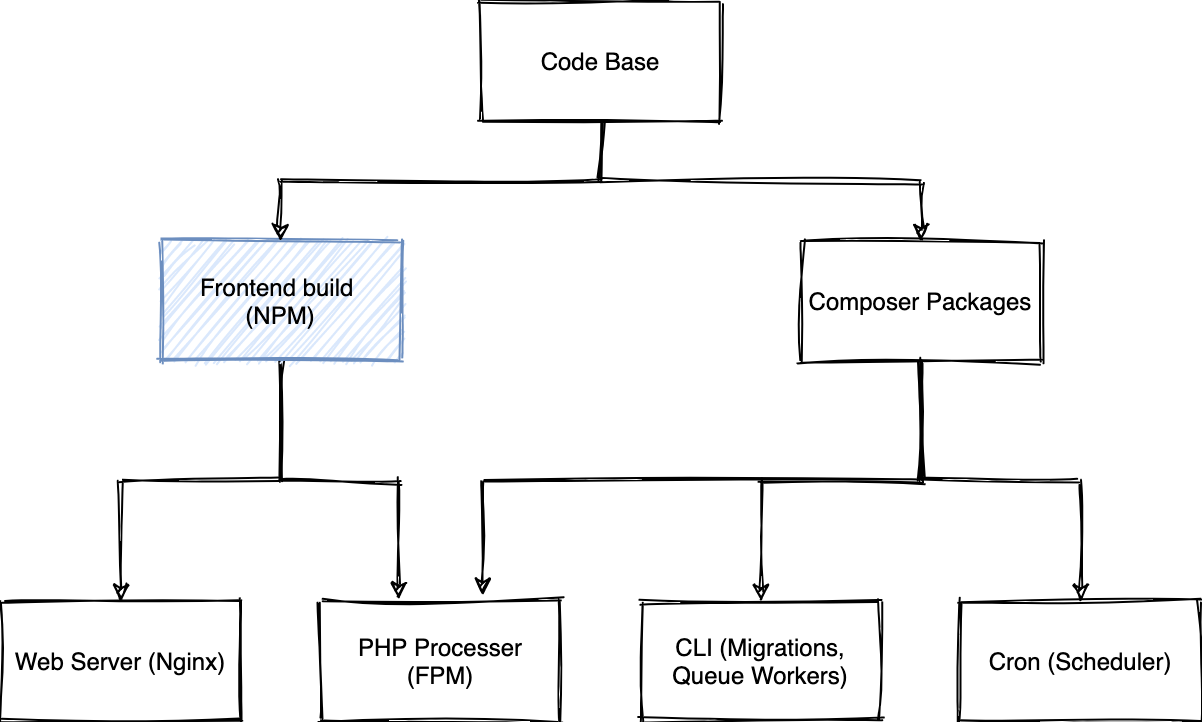
Laravel Mix is an NPM package, so we also need a container which we can use to compile the dependencies to the public directory.
Usually you run this just using npm run prod, and we need to convert this to a Docker Stage.
In the Dockerfile, we can add the next stage for NPM
# For the frontend, we want to get all the Laravel files,
# and run a production compile
FROM node:14 as frontend

# We need to copy in the Laravel files to make everything is available to our frontend compilation
COPY --from=composer_base /opt/apps/laravel-in-kubernetes /opt/apps/laravel-in-kubernetes

WORKDIR /opt/apps/laravel-in-kubernetes

# We want to install all the NPM packages,
# and compile the MIX bundle for production
RUN npm install && \
    npm run prod
Testing the frontend stage
Let's build the frontend image to make sure it builds correctly, and doesn't fail along the way
$ docker build . --target frontend
CLI Container
We are going to need a CLI container to run Queue jobs, Crons (The Scheduler), Migrations, and Artisan commands when in Docker / Kubernetes
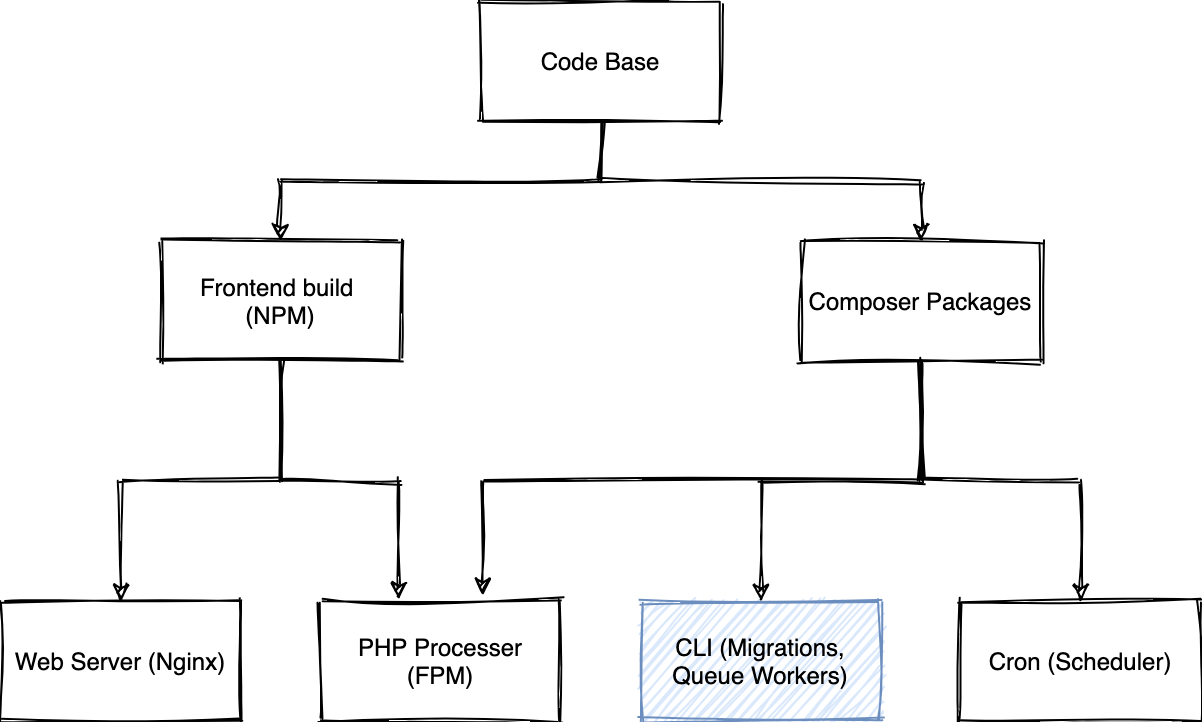
In the Dockerfile add a new piece for CLI usage.
# For running things like migrations, and queue jobs,
# we need a CLI container.
# It contains all the Composer packages,
# and just the basic CLI "stuff" in order for us to run commands,
# be that queues, migrations, tinker etc.
FROM php:8.0-alpine as cli

# We need to declare that we want to use the args in this build step
ARG PHP_EXTS
ARG PHP_PECL_EXTS

WORKDIR /opt/apps/laravel-in-kubernetes

# We need to install some requirements into our image,
# used to compile our PHP extensions, as well as install all the extensions themselves.
# You can see a list of required extensions for Laravel here: https://laravel.com/docs/8.x/deployment#server-requirements
RUN apk add --virtual build-dependencies --no-cache ${PHPIZE_DEPS} openssl ca-certificates libxml2-dev oniguruma-dev && \
    docker-php-ext-install -j$(nproc) ${PHP_EXTS} && \
    pecl install ${PHP_PECL_EXTS} && \
    docker-php-ext-enable ${PHP_PECL_EXTS} && \
    apk del build-dependencies

# Next we have to copy in our code base from our initial build which we installed in the previous stage
COPY --from=composer_base /opt/apps/laravel-in-kubernetes /opt/apps/laravel-in-kubernetes
COPY --from=frontend /opt/apps/laravel-in-kubernetes/public /opt/apps/laravel-in-kubernetes/public
Testing the CLI image build
We can build this layer to make sure everything works correctly
$ docker build . --target cli
[...]
 => => writing image sha256:b6a7b602a4fed2d2b51316c1ad90fd12bb212e9a9c963382d776f7eaf2eebbd5
The CLI layer has successfully built, and we can move onto the next layer
FPM Container
We can now also build out the specific parts of the application, the first of which is the container which runs fpm for us.
In the same Dockerfile, we will create another stage to our docker build called fpm_server with the following contents
# We need a stage which contains FPM to actually run and process requests to our PHP application.
FROM php:8.0-fpm-alpine as fpm_server

# We need to declare that we want to use the args in this build step
ARG PHP_EXTS
ARG PHP_PECL_EXTS

WORKDIR /opt/apps/laravel-in-kubernetes

RUN apk add --virtual build-dependencies --no-cache ${PHPIZE_DEPS} openssl ca-certificates libxml2-dev oniguruma-dev && \
    docker-php-ext-install -j$(nproc) ${PHP_EXTS} && \
    pecl install ${PHP_PECL_EXTS} && \
    docker-php-ext-enable ${PHP_PECL_EXTS} && \
    apk del build-dependencies

# As FPM uses the www-data user when running our application,
# we need to make sure that we also use that user when starting up,
# so our user "owns" the application when running
USER  www-data

# We have to copy in our code base from our initial build which we installed in the previous stage
COPY --from=composer_base --chown=www-data /opt/apps/laravel-in-kubernetes /opt/apps/laravel-in-kubernetes
COPY --from=frontend --chown=www-data /opt/apps/laravel-in-kubernetes/public /opt/apps/laravel-in-kubernetes/public

# We want to cache the event, routes, and views so we don't try to write them when we are in Kubernetes.
# Docker builds should be as immutable as possible, and this removes a lot of the writing of the live application.
RUN php artisan event:cache && \
    php artisan route:cache && \
    php artisan view:cache
Testing the FPM build
We want to build this stage to make sure everything works correctly.
$ docker build . --target fpm_server
[...]
=> => writing image sha256:ead93b67e57f0cdf4ec9c1ca197cf8ca1dacb0bb030f9f57dc0fccf5b3eb9904
Web Server container
We need to build a web server image which is used to serve static content, and send any PHP requests to our PFM container.
This is quite important, as we can serve static content through our PHP app, but Nginx is a lot better at it than PHP, and can serve static content a lot more efficiently.
The first thing we need is a nginx configuration for our web server.
We'll also use a Nginx Template, so we can inject the FPM URL into the configuration when the container starts up.
Create a directory called docker in the root of your project
mkdir -p docker
Inside of that folder, you can create a file called nginx.conf.template with the following content
server {
    listen 80 default_server;
    listen [::]:80 default_server;

    # We need to set the root for our sevrer,
    # so any static file requests gets loaded from the correct path
    root /opt/apps/laravel-in-kubernetes/public;

    index index.php index.html index.htm index.nginx-debian.html;

    # _ makes sure that nginx does not try to map requests to a specific hostname
    # This allows us to specify the urls to our application as infrastructure changes,
    # without needing to change the application
    server_name _;

    # At the root location,
    # we first check if there are any static files at the location, and serve those,
    # If not, we check whether there is an indexable folder which can be served,
    # Otherwise we forward the request to the PHP server
    location / {
        # Using try_files here is quite important as a security concideration
        # to prevent injecting PHP code as static assets,
        # and then executing them via a URL.
        # See https://www.nginx.com/resources/wiki/start/topics/tutorials/config_pitfalls/#passing-uncontrolled-requests-to-php
        try_files $uri $uri/ /index.php?$query_string;
    }

    # Some static assets are loaded on every page load,
    # and logging these turns into a lot of useless logs.
    # If you would prefer to see these requests for catching 404's etc.
    # Feel free to remove them
    location = /favicon.ico { access_log off; log_not_found off; }
    location = /robots.txt  { access_log off; log_not_found off; }

    # When a 404 is returned, we want to display our applications 404 page,
    # so we redirect it to index.php to load the correct page
    error_page 404 /index.php;

    # Whenever we receive a PHP url, or our root location block gets to serving through fpm,
    # we want to pass the request to FPM for processing
    location ~ \.php$ {
        #NOTE: You should have "cgi.fix_pathinfo = 0;" in php.ini
        include fastcgi_params;
        fastcgi_intercept_errors on;
        fastcgi_pass ${FPM_HOST};
        fastcgi_param SCRIPT_FILENAME $document_root/$fastcgi_script_name;
    }

    location ~ /\.ht {
        deny all;
    }

    location ~ /\.(?!well-known).* {
        deny all;
    }
}
Once we have that completed, we can create the new Docker image stage which contains the Nginx layer
# We need an nginx container which can pass requests to our FPM container,
# as well as serve any static content.
FROM nginx:1.20-alpine as web_server

WORKDIR /opt/apps/laravel-in-kubernetes

# We need to add our NGINX template to the container for startup,
# and configuration.
COPY docker/nginx.conf.template /etc/nginx/templates/default.conf.template

# Copy in ONLY the public directory of our project.
# This is where all the static assets will live, which nginx will serve for us.
COPY --from=frontend /opt/apps/laravel-in-kubernetes/public /opt/apps/laravel-in-kubernetes/public
Testing the Web Server build
We can now build up to this stage to make sure it builds successfully.
$ docker build . --target web_server
[...]
=> => writing image sha256:1ea6b28fcd99d173e1de6a5c0211c0ba770f6acef5a3231460739200a93feef2
Cron container
We also want to create a Cron layer, which we can use to run the Laravel scheduler.
We want to specify crond to run in the foreground as well, and make it the primary command when the container starts up.
# We need a CRON container to the Laravel Scheduler.
# We'll start with the CLI container as our base,
# as we only need to override the CMD which the container starts with to point at cron
FROM cli as cron

WORKDIR /opt/apps/laravel-in-kubernetes

# We want to create a laravel.cron file with Laravel cron settings, which we can import into crontab,
# and run crond as the primary command in the forground
RUN touch laravel.cron && \
    echo "* * * * * cd /opt/apps/laravel-in-kubernetes && php artisan schedule:run" >> laravel.cron && \
    crontab laravel.cron

CMD ["crond", "-l", "2", "-f"]
Testing the Cron build
We can build the container to make sure everything works correctly.
$ docker build . --target cron
 => => writing image sha256:b6fb826820e0669563a8746f83fb168fe39393ef6162d65c64439aa26b4d713b
The Complete Build
In our Dockerfile, we now have 4 stages, composer_base, frontend, fpm_server, cli, and cron but we need a sensible default to build from.
Whenever we run the container then, it will start up with our default stage, and we have sensible and predictable results.
We can specify this right at the end of our Dockerfile, by specifying a last FROM statement with the default stage.
# [...]

FROM cli
Hardcoded values
You'll notice we've used a variable interpolation in the nginx.conf.template file for the fpm host.
# [...]
fastcgi_pass ${FPM_HOST};
# [...]
The reason we've done this, is to replace the FPM host at runtime, as it will change depending on where we are running.
For Docker Compose, it will be the name of the fellow fpm container, but for Kubernetes it will be the name of the service created when running the FPM container.
Nginx 1.19 Docker images support using templates for nginx configurations where we can use environment variables.
It uses envsubst under the hood to replace any variables with ENV variables we pass in.
It does this when the container is started up.
Docker Compose
Next, we can test our Docker images locally by building a docker-compose file which runs each stage of our image together so we can use it in that way locally, and reproduce it when we get to Kubernetes
First step is to create a docker-compose.yml file.
Laravel Sail already comes with one prefilled, but we are going to change it up a bit to have all our separate containers running, so we can validate what will run in Kubernetes early in our cycle.
If you are not using Laravel Sail, and don't have a docker-compose.yml file in the root of your project, you can skip the part where we move it to a backup file.First thing we want to do is move the sail docker-compose file to a backup file called docker-compose.yml.backup.
Next, we want to create a base docker-compose.yml for our new image stages
version: '3'
services:
    # We need to run the FPM container for our application
    laravel.fpm:
        build:
            context: .
            target: fpm_server
        image: laravel-in-kubernetes/fpm_server
        # We can override any env values here.
        # By default the .env in the project root will be loaded as the environment for all containers
        environment:
            APP_DEBUG: "true"
        # Mount the codebase, so any code changes we make will be propagated to the running application
        volumes:
            # Here we mount in our codebase so any changes are immediately reflected into the container
            - '.:/opt/apps/laravel-in-kubernetes'
        networks:
            - laravel-in-kubernetes

    # Run the web server container for static content, and proxying to our FPM container
    laravel.web:
        build:
            context: .
            target: web_server
        image: laravel-in-kubernetes/web_server
        # Expose our application port (80) through a port on our local machine (8080)
        ports:
            - '8080:80'
        environment:
            # We need to pass in the new FPM hst as the name of the fpm container on port 9000
            FPM_HOST: "laravel.fpm:9000"
        # Mount the public directory into the container so we can serve any static files directly when they change
        volumes:
            # Here we mount in our codebase so any changes are immediately reflected into the container
            - './public:/opt/apps/laravel-in-kubernetes/public'
        networks:
            - laravel-in-kubernetes
    # Run the Laravel Scheduler
    laravel.cron:
        build:
            context: .
            target: cron
        image: laravel-in-kubernetes/cron
        # Here we mount in our codebase so any changes are immediately reflected into the container
        volumes:
            # Here we mount in our codebase so any changes are immediately reflected into the container
            - '.:/opt/apps/laravel-in-kubernetes'
        networks:
            - laravel-in-kubernetes
    # Run the frontend, and file watcher in a container, so any changes are immediately compiled and servable
    laravel.frontend:
        build:
            context: .
            target: frontend
        # Override the default CMD, so we can watch changes to frontend files, and re-transpile them.
        command: ["npm", "run", "watch"]
        image: laravel-in-kubernetes/frontend
        volumes:
            # Here we mount in our codebase so any changes are immediately reflected into the container
            - '.:/opt/apps/laravel-in-kubernetes'
            # Add node_modeules as singular volume.
            # This prevents our local node_modules from being propagated into the container,
            # So the node_modules can be compiled for each of the different architectures (Local, Image)
            - '/opt/app/node_modules/'
        networks:
            - laravel-in-kubernetes

networks:
    laravel-in-kubernetes:
If we run these containers, we should be able to access the home page from localhost:8080
$ docker-compose up -d
If you now open http://localhost:8080, you should see your application running.
Our containers are now running properly. Nginx is passing our request onto FPM, and FPM is creating a response from our code base, and sending that back to our browser.
Our crons are also running correctly in the cron container. You can see this, by checking the logs for the cron container.
$ docker-compose logs laravel.cron
Attaching to laravel-in-kubernetes_laravel.cron_1
laravel.cron_1      | No scheduled commands are ready to run.
Running Mysql in docker-compose.yml
We need to run Mysql in docker as well for local development.
Sail does ship with this by default, and if you check the docker-compose.yml.backup file, you will notice a mysql service, which we can copy over as exists, and add to our docker-compose.yml.
Docker Compose will automatically load the .env file from our project, and these are the values referenced in the docker-compose.yml.backup which Sail ships with
services:
    [...]
    mysql:
        image: 'mysql:8.0'
        ports:
            - '${FORWARD_DB_PORT:-3306}:3306'
        environment:
            MYSQL_ROOT_PASSWORD: '${DB_PASSWORD}'
            MYSQL_DATABASE: '${DB_DATABASE}'
            MYSQL_USER: '${DB_USERNAME}'
            MYSQL_PASSWORD: '${DB_PASSWORD}'
            MYSQL_ALLOW_EMPTY_PASSWORD: 'yes'
        volumes:
            - 'laravel-in-kubernetes-mysql:/var/lib/mysql'
        networks:
            - laravel-in-kubernetes
        healthcheck:
          test: ["CMD", "mysqladmin", "ping", "-p${DB_PASSWORD}"]
          retries: 3
          timeout: 5s

# At the end of the file
volumes:
    laravel-in-kubernetes-mysql:
We can now run docker-compose up again, and Mysql should be running alongside our other services.
$ docker-compose up -d
Running migrations in docker-compose
To test out our Mysql service and that our application can actually connect to Mysql, we can run migrations in the FPM container, as it has all of the right dependencies.
$ docker-compose exec laravel.fpm php artisan migrate
Migration table created successfully.
Migrating: 2014_10_12_000000_create_users_table
Migrated:  2014_10_12_000000_create_users_table (35.78ms)
Migrating: 2014_10_12_100000_create_password_resets_table
Migrated:  2014_10_12_100000_create_password_resets_table (25.64ms)
Migrating: 2019_08_19_000000_create_failed_jobs_table
Migrated:  2019_08_19_000000_create_failed_jobs_table (30.73ms)
This means our application can connect to the database, and our migrations have been run.
With the volume we attached, we should be able to restart all of the containers, and our data will stay persisted.
Onto Kubernetes
Now that we have docker-compose running locally, we can move forward onto building our images and pushing them to a registry.
! PART THREE: Container registries
In this post, we will take our new Dockerfile and layers, and build the images, and push them up to a registry, so we can easily use them in Kubernetes.
Building our images, and pushing them into a registry
First thing that needs to happen before we can move into Kubernetes, is to build our Docker images containing everything, and ship those to a Container Registry where Kubernetes can reach them.
Docker hub offers free registries, but only 1 private repo.
For our use case we are going to use Gitlab.
It makes it easy to build CI/CD pipelines, as well as has a really nice registry for our images to be stored securely.
Creating the Registry
We need to create a new registry in Gitlab.
If you already have another registry, or prefer using Docker Hub, you may skip this piece.
You'll need a new repository first.
Once you have created one, go to Packages & Registries > Container Registry, and you'll see instructions on how to login, and get the url for your container registry
In my case this is registry.gitlab.com/laravel-in-kubernetes/laravel-app
Login to the registry
Depending on whether you have 2 factor auth enabled, you might need to generate credentials for your local machine.
You can create a pair in Settings > Repository > Deploy Tokens, and use these as a username and password to login to the registry. The Deploy Token needs write access to the registry.
$ docker login registry.gitlab.com -u [username] -p [token]
Login Succeeded
Building our images
We now need to build our application images, and tag them to our registry.
In order to do this we need to point at the specific stage we need to build, and tag it with a name.
$ docker build . -t [your_registry_url]/cli:v0.0.1 --target cli

$ docker build . -t [your_registry_url]/fpm_server:v0.0.1 --target fpm_server

$ docker build . -t [your_registry_url]/web_server:v0.0.1 --target web_server

$ docker build . -t [your_registry_url]/cron:v0.0.1 --target cron
Pushing our images
Next we need to push our images to our new registry to be used with Kubernetes
$ docker push [your_registry_url]/cli:v0.0.1
$ docker push [your_registry_url]/fpm_server:v0.0.1
$ docker push [your_registry_url]/web_server:v0.0.1
$ docker push [your_registry_url]/cron:v0.0.1
Our images are now available inside the registry, and ready to be used in Kubernetes.
Repeatable build steps with Makefile
In order for us to easily repeat the build steps, we can use a Makefile to specify our build commands, and variableise the specific pieces like our registry url, and the version of our containers.
In the root of the project, create a Makefile
$ touch Makefile
This file will allow us to express our build commands reproducibly.
In the new Makefile add the following contents, which variableise the version and registry, and then specify the commands.
# VERSION defines the version for the docker containers.
# To build a specific set of containers with a version,
# you can use the VERSION as an arg of the docker build command (e.g make docker VERSION=0.0.2)
VERSION ?= v0.0.1

# REGISTRY defines the registry where we store our images.
# To push to a specific registry,
# you can use the REGISTRY as an arg of the docker build command (e.g make docker REGISTRY=my_registry.com/username)
# You may also change the default value if you are using a different registry as a default
REGISTRY ?= registry.gitlab.com/laravel-in-kubernetes/laravel-app


# Commands
docker: docker-build docker-push

docker-build:
	docker build . --target cli -t ${REGISTRY}/cli:${VERSION}
	docker build . --target cron -t ${REGISTRY}/cron:${VERSION}
	docker build . --target fpm_server -t ${REGISTRY}/fpm_server:${VERSION}
	docker build . --target web_server -t ${REGISTRY}/web_server:${VERSION}

docker-push:
	docker push ${REGISTRY}/cli:${VERSION}
	docker push ${REGISTRY}/cron:${VERSION}
	docker push ${REGISTRY}/fpm_server:${VERSION}
	docker push ${REGISTRY}/web_server:${VERSION}
You can then use a make command to easily build, and push the containers all together.
$ make docker VERSION=v0.0.2

# If you only want to run the builds
$ make docker-build VERSION=v0.0.2

# If you only want to push the images
$ make docker-push VERSION=v0.0.2
Onto the next
Next we will setup our Kubernetes Cluster where we will run our images.
! PART FOUR: Kubernetes Cluster Setup
In this post, we will spin up our Kubernetes cluster using Terraform, in DigitalOcean.
We will create this using Terraform, so we can easily spin up and spin down our cluster, as well as keep all of our information declarative.
If you'd like to spin up a cluster without Terraform, you can easily do this in the DigitalOcean UI, and download the kubeconfig
Creating our initial Terraform structure
For this blog series, we will create a separate repository for our Terraform setup, but you can feel free to create a subdirectory in the root of your project and run terraform commands from there.
Create a new directory to act as the base of our new repository
mkdir -p laravel-in-kubernetes-infra
cd laravel-in-kubernetes-infra/
Terraform initialisation
In the new directory we need a few files.
We will start with a file called versions.tf to contain the required versions of our providers.
terraform {
  required_providers {
    digitalocean = {
      source = "digitalocean/digitalocean"
      version = "~> 2.11"
    }
  }
}
Once that file is created, we can initialise the Terraform base and download the DigitalOcean providers
$ terraform init
[...]
Terraform has been successfully initialized!
From here, we can start creating the provider details, and spin up our clusters.
Terraform Provider Setup
Next, we need to get a access token from DigitalOcean which Terraform can use when creating infrastructure.
You can do this by login into your DigitalOcean account, going to API > Generate New Token and giving it an appropriate name, and make sure it has write access.
Create a new file called local.tfvars and save the token in that file.
do_token="XXX"
Now we need to ignore the local.tfvars file in our repository along with some other files.
We also need to register the variable with Terraform, so it knows to look for it, and validate it.
Create a variables.tf file to declare the variable
variable "do_token" {
  type = string
}
At this point we can run terraform validate to make sure all our files are in order.
$ terraform validate
Success! The configuration is valid.
Ignore Terraform state files
Create a .gitignore file containing matching https://github.com/github/gitignore/blob/master/Terraform.gitignore
# Local .terraform directories
**/.terraform/*

# .tfstate files
*.tfstate
*.tfstate.*

# Crash log files
crash.log

# Exclude all .tfvars files, which are likely to contain sentitive data, such as
# password, private keys, and other secrets. These should not be part of version
# control as they are data points which are potentially sensitive and subject
# to change depending on the environment.
#
*.tfvars

# Ignore override files as they are usually used to override resources locally and so
# are not checked in
override.tf
override.tf.json
*_override.tf
*_override.tf.json

# Include override files you do wish to add to version control using negated pattern
#
# !example_override.tf

# Include tfplan files to ignore the plan output of command: terraform plan -out=tfplan
# example: *tfplan*

# Ignore CLI configuration files
.terraformrc
terraform.rc
Once we ignore sensitive files, we can initialise the directory as a git repo, and commit our current changes
Initialise Git Repo
$ git init
Initialized empty Git repository in [your_directory]
$ git add .
$ git commit -m "Init"
Configure DigitalOcean Provider
Create a new file called providers.tf where we can register the DigitalOcean provider with DigitalOceans' token
provider "digitalocean" {
  token = var.do_token
}
Remember to add and commit this new file.
Getting ready to run Kubernetes
Kubernetes Version
In order to run Kubernetes, we need to define which version of Kubernetes we'd like to run.
We'll do this using a Terraform Data Source from DigitalOcean to get us the latest patch version of our chosen version, which for this guide, will be the latest DigitalOcean ships, which is 1.21.X
Create a file in the root of your repository called kubernetes.tf containing the data source for versions
data "digitalocean_kubernetes_versions" "kubernetes-version" {
  version_prefix = "1.21."
}
This should be enough to define the required version.
DigitalOcean and Terraform will now keep your cluster up to date with the latest patches. These are important for security and stability fixes.
Machine Sizes
We also need to define which machine sizes we'd like to run as part of our cluster.
Kubernetes in DigitalOcean runs using Node Pools.
We can use these to have different machines of different capabilities, depending on our needs.
For now, we will create a single Node Pool with some basic machines to run our Laravel application.
In our kubernetes.tf file, add the data source for the machine sizes we will start off with.
[...]
data "digitalocean_sizes" "small" {
  filter {
    key    = "slug"
    values = ["s-2vcpu-2gb"]
  }
}
Region
We also need to define a region for where our Kubernetes cluster is going to run.
We can define this as a variable, to make it easy to change for different folks in different places.
in variables.tf, add a new variable for the region you would like to use.
[...]
variable "do_region" {
  type = string
  default = "fra1"
}
I have defaulted it to Frankfurt 1 for ease of use, but you can now override it in local.tfvars like so
do_region="fra1"
Create our Kubernetes cluster
Next step we need to look at is actually spinning up our cluster.
This is a pretty simple step. Create a Kubernetes Cluster resource in our kubernetes.tf file, with some extra properties for Cluster management with DigitalOcean.
resource "digitalocean_kubernetes_cluster" "laravel-in-kubernetes" {
  name = "laravel-in-kubernetes"
  region = var.do_region

  # Latest patched version of DigitalOcean Kubernetes.
  # We do not want to update minor or major versions automatically.
  version = data.digitalocean_kubernetes_versions.kubernetes-version.latest_version

  # We want any Kubernetes Patches to be added to our cluster automatically.
  # With the version also set to the latest version, this will be covered from two perspectives
  auto_upgrade = true
  maintenance_policy {
    # Run patch upgrades at 4AM on a Sunday morning.
    start_time = "04:00"
    day = "sunday"
  }

  node_pool {
    name = "default-pool"
    size = "${element(data.digitalocean_sizes.small.sizes, 0).slug}"
    # We can autoscale our cluster according to use, and if it gets high,
    # We can auto scale to maximum 5 nodes.
    auto_scale = true
    min_nodes = 1
    max_nodes = 5

    # These labels will be available in the node objects inside of Kubernetes,
    # which we can use as taints and tolerations for workloads.
    labels = {
      pool = "default"
      size = "small"
    }
  }
}
Now that we have added the cluster details, we can validate our Terraform once more
$ terraform validate
Success! The configuration is valid.
We can now create our Kubernetes cluster
$ terraform apply
var.do_token
  Enter a value:
Terraform is asking us to pass in a do_token, but we have specified this in our local.tfvars file.
Terraform will not automatically pull values from these files, but will from files with auto.tfvars suffix.
Let's rename our local.tfvars to local.auto.tfvars
mv local.tfvars local.auto.tfvars
We should now be able to run terraform apply correctly
$ terraform apply
[...]
Plan: 1 to add, 0 to change, 0 to destroy.
[...]
digitalocean_kubernetes_cluster.laravel-in-kubernetes: Creating...
digitalocean_kubernetes_cluster.laravel-in-kubernetes: Still creating... [10s elapsed]
[...]
Apply complete! Resources: 1 added, 0 changed, 0 destroyed.
Our cluster is now created successfully, and we need to fetch the kubeconfig file.
Fetching Cluster access details
We need to get a kubeconfig file from DigitalOcean to access our cluster.
We can do this through Terraform with resource attributes, but this does not scale too well with a team, as not everyone should have access to run Terraform locally.
The other mechanism we can use for this is by utilising doctl https://github.com/digitalocean/doctl
You can follow the installation guide to get it up and running locally https://github.com/digitalocean/doctl#installing-doctl
Get the kubeconfig
Next we need to fetch the kubeconfig using doctl
Get the ID of our cluster first
$ doctl kubernetes clusters list
ID                Name                     Region    Version        Auto Upgrade    Status          Node Pools
[your-id-here]    laravel-in-kubernetes    fra1      1.21.2-do.2    true            running         default-pool
Copy the id from there, and then download the kubeconfig file into your local config file.
$ doctl k8s cluster kubeconfig save [your-id-here]
Notice: Adding cluster credentials to kubeconfig file found in "/Users/chris/.kube/config"
Notice: Setting current-context to do-fra1-laravel-in-kubernetes
You should now be able to get pods in your new cluster
$ kubectl get pods -A
NAMESPACE     NAME                               READY   STATUS    RESTARTS   AGE
kube-system   cilium-8r6qz                       1/1     Running   0          6m33s
kube-system   cilium-operator-6cc67c77f9-4c5vd   1/1     Running   0          9m27s
kube-system   cilium-operator-6cc67c77f9-qhwbb   1/1     Running   0          9m27s
kube-system   coredns-85d9ccbb46-6nkqb           1/1     Running   0          9m27s
kube-system   coredns-85d9ccbb46-hmjbw           1/1     Running   0          9m27s
kube-system   csi-do-node-jppxt                  2/2     Running   0          6m33s
kube-system   do-node-agent-647dj                1/1     Running   0          6m33s
kube-system   kube-proxy-xlldk                   1/1     Running   0          6m33s
This shows that our Kubernetes cluster is running, and we are ready to move on to the next piece.
Onto the next
Next we are going to spin up a database for our application.
You can do this using either a Managed Database from DigitalOcean, or run it in your new Kubernetes cluster. The next post has instructions on running your database in both of these ways
! PART FIVE: Deploying a database for our application
Deploying a database for our application can be quite a challenge.
On one hand, using a managed database makes sense from a management perspective, but might be a bit more expensive than running it ourselves.
On the other hand, running it ourselves comes with a whole array of possible maintenance issues like Storage, Backups and Restoration.
Also introducing Storage into our Kubernetes cluster makes it quite a bit more management, especially for production critical loads.
In this post we will cover both options
Managed Database
The easiest to manage, if you are willing to fork out a couple more bucks, is a managed database.
Most Cloud providers offer managed databases, including DigitalOcean on which this series is built.
We are going to use Mysql in this post, as it is the most used option IMO for Laravel.
You are welcome to switch this out for Postgres if you are so inclined.
In the Infrastructure repository we created, we can add a new file called database.tf where we can define the configuration for our DigitalOcean Managed database.
# Define some constant values for the different versions of DigitalOcean databases
locals {
  mysql = {
    engine = "mysql"
    version = "8"
  }
  postgres = {
    engine = "pg"
    version = "13" # Available options: 10 | 11 | 12 | 13
  }
}

# We need to create a database cluster in DigitalOcean,
# based on Mysql 8, which is the version DigitalOcean provides.
# You can switch this out for Postgres by changing the `locals.` pointer to point at postgres.
resource "digitalocean_database_cluster" "laravel-in-kubernetes" {
  name = "laravel-in-kubernetes"
  engine = local.mysql.engine # Replace with `locals.postgres.engine` if using postgres
  version = local.mysql.version # Replace with `locals.postgres.version` if using postgres
  size = "db-s-1vcpu-1gb"
  region = var.do_region
  node_count = 1
}

# We want to create a separate database for our application inside the database cluster.
# This way we can share the cluster resources, but have multiple separate databases.
resource "digitalocean_database_db" "laravel-in-kubernetes" {
  cluster_id = digitalocean_database_cluster.laravel-in-kubernetes.id
  name = "laravel-in-kubernetes"
}

# We want to create a separate user for our application,
# So we can limit access if necessary
# We also use Native Password auth, as it works better with current Laravel versions
resource "digitalocean_database_user" "laravel-in-kubernetes" {
  cluster_id = digitalocean_database_cluster.laravel-in-kubernetes.id
  name = "laravel-in-kubernetes"
  mysql_auth_plugin = "mysql_native_password"
}

# We want to allow access to the database from our Kubernetes cluster
# We can also add custom IP addresses
# If you would like to connect from your local machine,
# simply add your public IP
resource "digitalocean_database_firewall" "laravel-in-kubernetes" {
  cluster_id = digitalocean_database_cluster.laravel-in-kubernetes.id

  rule {
    type  = "k8s"
    value = digitalocean_kubernetes_cluster.laravel-in-kubernetes.id
  }

#   rule {
#     type  = "ip_addr"
#     value = "ADD_YOUR_PUBLIC_IP_HERE_IF_NECESSARY"
#   }
}

# We also need to add outputs for the database, to easily be able to reach it.

# Expose the host of the database so we can easily use that when connecting to it.
output "laravel-in-kubernetes-database-host" {
  value = digitalocean_database_cluster.laravel-in-kubernetes.host
}

# Expose the port of the database, as it is usually different from the default ports of Mysql / Postgres
output "laravel-in-kubernetes-database-port" {
  value = digitalocean_database_cluster.laravel-in-kubernetes.port
}
Once we apply that, it might take some time to create the database, but Terraform will pump out a database host and port for us.
$ terraform apply
[...]
Apply complete! Resources: 3 added, 0 changed, 0 destroyed.

Outputs:

laravel-in-kubernetes-database-host = "XXX"
laravel-in-kubernetes-database-port = 25060
You will now see your database host and port.
Security
But what about the username and password ?
We could fetch these from Terraform directly using the digitalocean_database_user.laravel-in-kubernetes.password attribute like here. The problem with this is that the password will be stored in Terraform state, and anyone who has the state will be able to access this value, which compromises your database.
What we want to be doing is to create the initial user, with a initial password, and then change that outside of Terraform.
There are other solutions to this such as Key Stores provided by Cloud providers, which can be used with the External Secrets Operator to provide these seamlessly in Kubernetes.
For the moment though, we will use the DigitalOcean UI, to regenerate the password, and use that outside of Terraform for the future.
In the DigitalOcean UI, you can regenerate the password, and store it to use in the next steps.
Laravel Changes
When using a default DigitalOcean Managed Database install for our application, we need to make one change to our actual code base.
Laravel migrations will fail with an error for not allowing tables without Primary Keys such as
Migrating: 2014_10_12_100000_create_password_resets_table

In Connection.php line 692:

  SQLSTATE[HY000]: General error: 3750 Unable to create or change a table wit
  hout a primary key, when the system variable 'sql_require_primary_key' is s
  et. Add a primary key to the table or unset this variable to avoid this mes
  sage. Note that tables without a primary key can cause performance problems
   in row-based replication, so please consult your DBA before changing this
  setting. (SQL: create table `password_resets` (`email` varchar(255) not nul
  l, `token` varchar(255) not null, `created_at` timestamp null) default char
  acter set utf8mb4 collate 'utf8mb4_unicode_ci')


In Connection.php line 485:

  SQLSTATE[HY000]: General error: 3750 Unable to create or change a table wit
  hout a primary key, when the system variable 'sql_require_primary_key' is s
  et. Add a primary key to the table or unset this variable to avoid this mes
  sage. Note that tables without a primary key can cause performance problems
   in row-based replication, so please consult your DBA before changing this
  setting.
To get around this error, we can switch off the primary key constraint.
It's advisable to add primary keys for your tables, but if you have an existing application, it might be a better idea to switch off first, then add primary keys later, depending on your specific case.
The way I like to do this is by adding a specific statement which catches migration events, and then switches off the primary key constraints.
In app/Providers/AppServiceProvider.php, add a the following to the register method
use Illuminate\Database\Events\MigrationsEnded;
use Illuminate\Database\Events\MigrationsStarted;
use Illuminate\Support\Facades\DB;
use Illuminate\Support\Facades\Event;


/**
 * Register any application services.
 *
 * @return void
 */
public function register()
{
    // https://github.com/laravel/framework/issues/33238#issuecomment-897063577
    Event::listen(MigrationsStarted::class, function () {
        DB::statement('SET SESSION sql_require_primary_key=0');
    });
    Event::listen(MigrationsEnded::class, function () {
        DB::statement('SET SESSION sql_require_primary_key=1');
    });
}
Once we've have done this, we can commit the new fix, and rebuild both our application containers so they contain the new code updates
// Commit the fix
$ git add app/Providers/AppServiceProvider.php
$ git commit -m "Disable Primary Key check for migrations"

// Rebuild our container images
$ make docker-build

// Lastly push up the new container images to our registry
$ make docker-push
When we now run migrations against the managed database, everything should work.
In the next step, we will start deploying our application and run migrations on startup.
Self-managed database
If you would like to use your own database running in Kubernetes, you can of course do this.
For running a database in Kubernetes there are a few things to keep in mind
- Database maintenance such as backups, upgrades, security etc.
- Persistence. You're probably going to need some persistence so your data remains stable throughout upgrades and updates.
- Scalability. Running a distributed database with separated write & read replicas could become quite difficult to manage. As a starting point you will not need to scale your database this way, but in future you might
All of this taken into account, we will deploy a MySQL 8 database inside of Kubernetes with persistence to DigitalOcean, and a manual backup and restore strategy. We won't cover monitoring for it just yet, as this will be covered in depth by a future post.
Creating a PersistentVolumeClaim in Kubernetes
We need to create a PersistentVolumeClaim.
This will trigger the CSI to create us a volume in the Cloud provider, in this case DigitalOcean, register that in Kubernetes, and then create a PersistentVolumeClaim, which we can use to persist our database data across deployments and upgrades.
In the next Step of the series, we will create a deployment repo to store all our Kubernetes configurations in.
Because we are jumping ahead we will go ahead and do that now.
Create a new directory for your deployment manifests, with a subdirectory for your database.
# First make the deployment directory
mkdir -p deployment
cd deployment

# Then next create a database directory to store database specific manifests
mkdir -p database
Next, create a file called database/persistent-volume-claim.yml where we will store the configuration.
apiVersion: v1
kind: PersistentVolumeClaim
metadata:
  name: laravel-in-kubernetes-mysql
spec:
  storageClassName: do-block-storage
  accessModes:
    - ReadWriteOnce
  resources:
    requests:
      storage: 1Gi
We specify that we only want 1 GB of data for the moment. You can always resize this at a later point if necessary.
You can apply that to your Kubernetes cluster, and after a few minutes you should see the DigitalOcean volume mounted.
$ kubectl apply -f database
persistentvolumeclaim/laravel-in-kubernetes-mysql created
$ kubectl get persistentvolume
NAME                                       CAPACITY   ACCESS MODES   RECLAIM POLICY   STATUS   CLAIM                             STORAGECLASS       REASON   AGE
pvc-47da21f2-113c-4415-b7c0-08e3782ac1c3   1Gi        RWO            Delete           Bound    app/laravel-in-kubernetes-mysql   do-block-storage            16s
You can also see the volume created in the DigitalOcean UI under Volumes.

You'll notice that it is not mounted to a particular droplet just yet.
The Volume will only be mounted once an application actually tries to use the PVC.
This is intentional, as the volume will be mounted to the specific Droplet where the pod is running.
Creating Secrets for our Mysql database
We need to create a username and password which we can use with Mysql.
Mysql allows us to inject these as environment variables, but first we need to save them to a Kubernetes Secret.
Create a new random password for use in our application.
$ LC_ALL=C tr -dc 'A-Za-z0-9' </dev/urandom | head -c 20 ; echo
eyeckfIIXw3KX0Rd0GHo
We also need a username which in this case we'll call laravel-in-kubernetes
Create a new file called secret.yml in the database folder which contains our Username and Password.
apiVersion: v1
kind: Secret
metadata:
  name: laravel-in-kubernetes-mysql
type: Opaque
stringData:
  DB_USERNAME: "laravel-in-kubernetes"
  DB_PASSWORD: "eyeckfIIXw3KX0Rd0GHo"
A note on security
A good approach would be to not store this secret in version control as that would expose our passwords to whoever has access to the manifests.
An alternative solution might be to use Sealed Secrets or External Secrets Operator from Container Solutions
For the moment, we will use this to keep the learning simple.
So from here we can apply that secret, and make it available to our database in coming steps.
$ kubectl  apply -f database/
secret/laravel-in-kubernetes-mysql created
Creating a StatefulSet for the database
In our database folder we can create another file called statefulset.yml where we will declare our database setup, with some liveness and readiness probes, as well as resource requests for most stable running.
We use a StatefulSet so it only reschedules it when it really needs to.
apiVersion: apps/v1
kind: StatefulSet
metadata:
  name: laravel-in-kubernetes-mysql
  labels:
    tier: backend
    layer: database
spec:
  selector:
    matchLabels:
      tier: backend
      layer: database
  serviceName: laravel-in-kubernetes-mysql
  replicas: 1
  template:
    metadata:
      labels:
        tier: backend
        layer: database
    spec:
      containers:
      - name: mysql
        image: mysql:5.7
        ports:
        - name: mysql
          containerPort: 3306
        env:
        - name: MYSQL_RANDOM_ROOT_PASSWORD
          value: '1'
        - name: MYSQL_DATABASE
          value: laravel-in-kubernetes
        - name: MYSQL_USER
          valueFrom:
            secretKeyRef:
              name: laravel-in-kubernetes-mysql
              key: DB_USERNAME
        - name: MYSQL_PASSWORD
          valueFrom:
            secretKeyRef:
              name: laravel-in-kubernetes-mysql
              key: DB_PASSWORD
        volumeMounts:
        - name: data
          mountPath: /var/lib/mysql
          subPath: mysql
        resources:
          requests:
            cpu: 300m
            memory: 256Mi
        livenessProbe:
          exec:
            command:
            - bash
            - -c
            - mysqladmin -u ${MYSQL_USER} -p${MYSQL_PASSWORD} ping
          initialDelaySeconds: 10
          periodSeconds: 5
          timeoutSeconds: 5
        readinessProbe:
          exec:
            command:
            - bash
            - -c
            - mysql -h 127.0.0.1 -u ${MYSQL_USER} -p${MYSQL_PASSWORD} -e "SELECT 1"
          initialDelaySeconds: 5
          periodSeconds: 2
          timeoutSeconds: 1
      volumes:
      - name: data
        persistentVolumeClaim:
          claimName: laravel-in-kubernetes-mysql
The StatefulSet will start up a single pod containing our database, mount our PersistentVolumeClaim into the container to store the data in a DigitalOcean Volume, and automatically check for Mysql Availability before allowing other pods to connect.
When we redeploy the StatefulSet for upgrades of Mysql or changing settings, our data will stay persisted, and the CSI will remount the volumes to the new nodes where our StatefulSet is running.
Database Service
The next piece we need is a Kubernetes Service so we can easily connect to our database instance.
In the database folder, create a new file called service.yml where we can specify the Service details
apiVersion: v1
kind: Service
metadata:
  name: laravel-in-kubernetes-mysql
spec:
  selector:
    tier: backend
    layer: database
  ports:
    - protocol: TCP
      port: 3306
      targetPort: 3306
We can apply that, and in future if we'd like to connect to that database we can use mysql as the url and 3306 as the port.
$ kubectl apply -f database/
service/mysql created
Database backups
As we are mounting to a DigitalOcean volume, our data should be fairly safe.
But, there are a few things we need to take care of.
For example, if we recreate our cluster for a major version upgrade, we need to manually remount our volume into the Kubernetes cluster.
We also need to make sure if we accidentally delete the PersistentVolumeClaim, we can restore it from a data source.
For this and more on Backups, you can have a look at Kubernetes Volume Snapshots and Kubernetes Volume Data Sources. This will allow you to restore data on failure.
There are also a few tools to help alleviate a lot of this manual work called Velero you can have a look at.
Onto the next
Next, we will start deploying our application in Kubernetes.
! PART SIX: Deploying Laravel Web App in Kubernetes
In this post we will cover deploying our Laravel Web App inside of Kubernetes.
This covers our main app and our migrations in Kubernetes.
This post also assumes you have Dockerised your application, using Part 2 & Part 3 from this series. If not, and you have containerised your application, you should be able to follow along if you have the same style of Docker files, or if you have a monolithic Docker image, such as the one from Laravel Sail, you can simply replace the images in the manifests with your image.
Deployment Repo
First thing we'll start with is a fresh repository. This is where we will store all of our deployment manifests, and also where we will deploy from.
If you followed the self-managed database tutorial in the previous post, you'll already have created a deployment repo, and can skip the creation of this directory.
Start with a fresh directory in your projects folder, or wherever you keep your source code folders.
mkdir -p laravel-in-kubernetes-deployment
cd laravel-in-kubernetes-deployment
Common Configuration
We want to create a ConfigMap and Secret which we can use for all the different pieces of our application and easily configure them commonly.
Common folder
We'll start with a common folder for the common manifests.
$ mkdir -p common
ConfigMap
Create a ConfigMap, matching all of the details in the .env file, except the Secret values.
Create a new file called common/app-config.yml with the following content
apiVersion: v1
kind: ConfigMap
metadata:
  name: laravel-in-kubernetes
data:
  APP_NAME: "Laravel"
  APP_ENV: "local"
  APP_DEBUG: "true"
  # Once you have an external URL for your application, you can add it here.
  APP_URL: "http://laravel-in-kubernetes.test"

  # Update the LOG_CHANNEL to stdout for Kubernetes
  LOG_CHANNEL: "stdout"
  LOG_LEVEL: "debug"
  DB_CONNECTION: "mysql"
  DB_HOST: "mysql"
  DB_PORT: "3306"
  DB_DATABASE: "laravel_in_kubernetes"
  BROADCAST_DRIVER: "log"
  CACHE_DRIVER: "file"
  FILESYSTEM_DRIVER: "local"
  QUEUE_CONNECTION: "sync"

  # Update the Session driver to Redis, based off part-2 of series
  SESSION_DRIVER: "redis"
  SESSION_LIFETIME: "120"
  MEMCACHED_HOST: "memcached"
  REDIS_HOST: "redis"
  REDIS_PORT: "6379"
  MAIL_MAILER: "smtp"
  MAIL_HOST: "mailhog"
  MAIL_PORT: "1025"
  MAIL_ENCRYPTION: "null"
  MAIL_FROM_ADDRESS: "null"
  MAIL_FROM_NAME: "${APP_NAME}"
  AWS_DEFAULT_REGION: "us-east-1"
  AWS_BUCKET: ""
  AWS_USE_PATH_STYLE_ENDPOINT: "false"
  PUSHER_APP_ID: ""
  PUSHER_APP_CLUSTER: "mt1"
  MIX_PUSHER_APP_KEY: "${PUSHER_APP_KEY}"
Secret
Create a Secret, matching all the secret details in .env. This is where we will pull in any secret values for our application.
Create a new file called common/app-secret.yml with the following content
apiVersion: v1
kind: Secret
metadata:
  name: laravel-in-kubernetes
type: Opaque
stringData:
  APP_KEY: "base64:eQrCXchv9wpGiOqRFaeIGPnqklzvU+A6CZYSMosh1to="
  DB_USERNAME: "sail"
  DB_PASSWORD: "password"
  REDIS_PASSWORD: "null"
  MAIL_USERNAME: "null"
  MAIL_PASSWORD: "null"
  AWS_ACCESS_KEY_ID: ""
  AWS_SECRET_ACCESS_KEY: ""
  PUSHER_APP_KEY: ""
  PUSHER_APP_SECRET: ""
  MIX_PUSHER_APP_KEY: "${PUSHER_APP_KEY}"
We can apply both of these files for usage in our Deployments.
$ kubectl apply -f common/
Update ConfigMap with database details
We can fill in our database details as well in the ConfigMap and the Secret so our database can connect easily.
In the common/app-config.yml replace the values for the DB_* connection details,
apiVersion: v1
kind: ConfigMap
metadata:
  name: laravel-in-kubernetes
data:
  DB_CONNECTION: "mysql"
  DB_HOST: "mysql" # Use host from terraform if using managed Mysql
  DB_PORT: "3306" # Use port from terraform if using managed Mysql
  DB_DATABASE: "laravel-in-kubernetes"
Updating configuration with production details
We also need to update our application configuration with production details, so our app runs in a production like fashion in Kubernetes.
In the common/app-config.yml, replace the details with production settings.
apiVersion: v1
kind: ConfigMap
metadata:
  name: laravel-in-kubernetes
data:
  APP_NAME: "Laravel"
  APP_ENV: "production"
  APP_DEBUG: "false"
Apply the configurations
We can now apply those into our cluster.
$ kubectl apply -f common/
configmap/laravel-in-kubernetes configured
Update Secret with database details
We also need to fill our Secret with the correct database details
apiVersion: v1
kind: Secret
metadata:
  name: laravel-in-kubernetes
type: Opaque
stringData:
  DB_USERNAME: "XXX" # Replace with your DB username
  DB_PASSWORD: "XXX" # Replace with your DB password
We can apply that, and then move onto the deployments
$ kubectl apply -f common/
secret/laravel-in-kubernetes configured
FPM Deployment
We need a Deployment to run our application.
The Deployment instructs Kubernetes which image to deploy and how many replicas of it to run.
FPM Directory
First we need to create an fpm directory where we can store all of our FPM Deployment configurations
$ mkdir -p fpm
FPM Deployment
We'll start with a very basic Kubernetes Deployment for our FPM app inside the fpm directory called deployment.yml
apiVersion: apps/v1
kind: Deployment
metadata:
  name: laravel-in-kubernetes-fpm
  labels:
    tier: backend
    layer: fpm
spec:
  replicas: 1
  selector:
    matchLabels:
      tier: backend
      layer: fpm
  template:
    metadata:
      labels:
        tier: backend
        layer: fpm
    spec:
      containers:
        - name: fpm
          image: [your_registry_url]/fpm_server:v0.0.1
          ports:
            - containerPort: 9000
We can now apply that, and we should see the application running correctly.
$ kubectl apply -f fpm/deployment.yml
deployment.apps/laravel-in-kubernetes-fpm created

$ kubectl get deploy,pods
NAME                                        READY   UP-TO-DATE   AVAILABLE   AGE
deployment.apps/laravel-in-kubernetes-fpm   1/1     1            1           58s

NAME                                             READY   STATUS    RESTARTS   AGE
pod/laravel-in-kubernetes-fpm-79fb79c548-2lp7m   1/1     Running   0          59s
You should also be able to see the logs from the FPM pod.
$ kubectl logs laravel-in-kubernetes-fpm-79fb79c548-2lp7m
[30-Aug-2021 19:33:49] NOTICE: fpm is running, pid 1
[30-Aug-2021 19:33:49] NOTICE: ready to handle connections
Everything is now running well for our FPM Deployment.
Private Registry
If you are using a private registry for your images, you can have a look here for how to authenticate a private registry for your cluster.
- https://chris-vermeulen.com/using-gitlab-registry-with-kubernetes/
- https://kubernetes.io/docs/tasks/configure-pod-container/pull-image-private-registry/
FPM Service
We also need a Kubernetes Service. This will expose our FPM container port in Kubernetes for us to use from our future NGINX deployment
Create a new file service.yml in the fpm directory.
apiVersion: v1
kind: Service
metadata:
  name: laravel-in-kubernetes-fpm
spec:
  selector:
    tier: backend
    layer: fpm
  ports:
    - protocol: TCP
      port: 9000
      targetPort: 9000
This will allow us to connect to the FPM container from our Web Server deployment, which we will deploy next.
First, we need to apply the new Service though
$ kubectl apply -f fpm/service.yml
service/laravel-in-kubernetes-fpm created
Web Server Deployment
The next piece we need to deploy, is our Web Server container as well as it's service.
This will help expose our FPM application to the outside world.
Web Server Directory
Create a new folder called webserver
mkdir -p webserver
Web Server Deployment
Within the webserver folder, create the Web Server deployment.yml file.
We will also inject the FPM_HOST environment variable to point Nginx at our FPM deployment.
apiVersion: apps/v1
kind: Deployment
metadata:
  name: laravel-in-kubernetes-webserver
  labels:
    tier: backend
    layer: webserver
spec:
  replicas: 1
  selector:
    matchLabels:
      tier: backend
      layer: webserver
  template:
    metadata:
      labels:
        tier: backend
        layer: webserver
    spec:
      containers:
        - name: webserver
          image: [your_registry_url]/web_server:v0.0.1
          ports:
            - containerPort: 80
          env:
            # Inject the FPM Host as we did with Docker Compose
            - name: FPM_HOST
              value: laravel-in-kubernetes-fpm:9000
We can apply that, and see that our service is running correctly.
$ kubectl apply -f webserver/deployment.yml
deployment.apps/laravel-in-kubernetes-webserver created

$ kubectl get pods
NAME                                               READY   STATUS    RESTARTS   AGE
laravel-in-kubernetes-fpm-79fb79c548-2lp7m         1/1     Running   0          9m9s
laravel-in-kubernetes-webserver-5877867747-zm7zm   1/1     Running   0          6s

$ kubectl logs laravel-in-kubernetes-webserver-5877867747-zm7zm
[...]
2021/08/30 19:42:51 [notice] 1#1: start worker processes
2021/08/30 19:42:51 [notice] 1#1: start worker process 38
2021/08/30 19:42:51 [notice] 1#1: start worker process 39
Our Web Server deployment is now running successfully.
We are now be able to move onto the service.
Web Server Service
We also need a webserver service to expose the nginx deployment to the rest of the cluster.
Create a new file in the webserver directory called service.yml
apiVersion: v1
kind: Service
metadata:
  name: laravel-in-kubernetes-webserver
spec:
  selector:
    tier: backend
    layer: webserver
  ports:
    - protocol: TCP
      port: 80
      targetPort: 80
We can apply that, and test our application, by port-forwarding it to our local machine.
$ kubectl apply -f webserver/service.yml
service/laravel-in-kubernetes-webserver created

$ kubectl port-forward service/laravel-in-kubernetes-webserver 8080:80
Forwarding from 127.0.0.1:8080 -> 80
Forwarding from [::1]:8080 -> 80
If you now open up http://localhost:8080 on your local machine and you should see you application running in Kubernetes

This means your application is running correctly, and it can serve requests.
Using the Database
Next, we need to inject our common config and secret into the FPM deployment, to provide it with all the database details
You can see here for a better understanding of how to use secrets and configmaps as environment variables.
We are going to use envFrom to directly inject our ConfigMap and Secret into the container.
apiVersion: apps/v1
kind: Deployment
metadata:
  [...]
spec:
  [...]
  template:
    [...]
    spec:
      containers:
        - name: fpm
          [...]
          envFrom:
            - configMapRef:
                name: laravel-in-kubernetes
            - secretRef:
                name: laravel-in-kubernetes
Kubernetes will now inject these values as environment variables when our application starts to run.
Apply the new configuration to make sure everything works correctly
$ kubectl apply -f fpm/
deployment.apps/laravel-in-kubernetes-fpm configured
service/laravel-in-kubernetes-fpm unchanged

$ kubectl get pods
NAME                                               READY   STATUS    RESTARTS   AGE
laravel-in-kubernetes-fpm-84cf5b9bd7-z2jfd         1/1     Running   0          32s
laravel-in-kubernetes-webserver-5877867747-zm7zm   1/1     Running   0          15m

$ kubectl logs laravel-in-kubernetes-fpm-84cf5b9bd7-z2jfd
[30-Aug-2021 19:57:31] NOTICE: fpm is running, pid 1
[30-Aug-2021 19:57:31] NOTICE: ready to handle connections
Everything seems to be working swimmingly.
Migrations
The next piece we want to take care of, is running migrations for the application
I've heard multiple opinions on when to run migrations, and there are multiple ways.
Some options around migrations
Running migrations as initContainers
We'll be using a Kubernetes initContainer to run our migrations. This makes it quite simple, and stops any deployment if the migrations don't pass first, giving us a clean window to fix any issues and deploy again.
In our application, we need to add a new initContainer.
We can go ahead and do this in the fpm/deployment.yml file.
apiVersion: apps/v1
kind: Deployment
metadata:
  name: fpm
  namespace: app
  labels:
    tier: backend
    layer: fpm
spec:
  [...]
  template:
    metadata: [...]
    spec:
      initContainers:
        - name: migrations
          image: [your_registry_url]/cli:v0.0.1
          command:
            - php
          args:
            - artisan
            - migrate
            - --force
          envFrom:
            - configMapRef:
                name: laravel-in-kubernetes
            - secretRef:
                name: laravel-in-kubernetes
      containers:
        - name: fpm
          [...]
This will run a container before starting up our primary container to run migrations, and only if successful, will it run our primary app, and replace the running instances.
Let's apply that and see the results.
$ kubectl apply -f fpm/
deployment.apps/fpm configured

$ kubectl get pods
NAME                                               READY   STATUS    RESTARTS   AGE
laravel-in-kubernetes-fpm-856dcb9754-trf65         1/1     Running   0          16s
laravel-in-kubernetes-webserver-5877867747-zm7zm   1/1     Running   0          36m
Next, we want to check the logs from the migrations initContainer to see if it was successful.
$ kubectl logs laravel-in-kubernetes-fpm-856dcb9754-trf65 -c migrations
Migrating: 2014_10_12_100000_create_password_resets_table
Migrated:  2014_10_12_100000_create_password_resets_table (70.34ms)
Migrating: 2019_08_19_000000_create_failed_jobs_table
Migrated:  2019_08_19_000000_create_failed_jobs_table (24.21ms)
Our migrations are now successfully run.
Errors
If you receive errors at this point, you can check the logs to see what went wrong.
Most likely you cannot connect to your database or have provided incorrect credentials.
Feel free to comment on this blog, and I'd be happy to help you figure it out.
Onto the next.
In the next episode of this series, we will go over deploying queue workers
! PART SEVEN: Deploying Redis to run Queue workers and cache
In this post, we'll go over deploying a Redis instance, where we can run our Queue workers from in Laravel.
The Redis instance can also be used for Caching inside Laravel, or a second Redis cluster can be installed for Cache separately
We will cover two methods of running a Redis Instance.
On one hand we'll use a managed Redis Cluster from DigitalOcean, which alleviates the maintenance burden for us, and gives us a Redis cluster which is immediately ready for use.
On the other hand, we'll deploy a Redis Instance into the Kubernetes cluster. This saves us some money, but does add a whole bunch of management problems into the mix.
Managed Redis
In the same fashion as we did our database, we will deploy a managed Redis instance in DigitalOcean.
In the infrastructure repository we created earlier, we can add a new file called redis.tf, where we can store our Terraform configuration for the Redis Instance in DigitalOcean.
resource "digitalocean_database_cluster" "laravel-in-kubernetes-redis" {
  name = "laravel-in-kubernetes-redis"
  engine = "redis"
  version = "6"
  size = "db-s-1vcpu-1gb"
  region = var.do_region
  node_count = 1
}

# We want to allow access to the database from our Kubernetes cluster
# We can also add custom IP addresses
# If you would like to connect from your local machine,
# simply add your public IP
resource "digitalocean_database_firewall" "laravel-in-kubernetes-redis" {
  cluster_id = digitalocean_database_cluster.laravel-in-kubernetes-redis.id

  rule {
    type  = "k8s"
    value = digitalocean_kubernetes_cluster.laravel-in-kubernetes.id
  }

#   rule {
#     type  = "ip_addr"
#     value = "ADD_YOUR_PUBLIC_IP_HERE_IF_NECESSARY"
#   }
}

output "laravel-in-kubernetes-redis-host" {
  value = digitalocean_database_cluster.laravel-in-kubernetes-redis.host
}

output "laravel-in-kubernetes-redis-port" {
  value = digitalocean_database_cluster.laravel-in-kubernetes-redis.port
}
Let's apply that, and we should see a host and port pop up after a little while.
$ terraform apply
[...]
Plan: 3 to add, 0 to change, 0 to destroy.
Enter a value: yes

digitalocean_database_cluster.laravel-in-kubernetes-redis: Creating...
[...]
Outputs:

laravel-in-kubernetes-database-host = "XXX"
laravel-in-kubernetes-database-port = 25060
laravel-in-kubernetes-redis-host = "XXX"
laravel-in-kubernetes-redis-port = 25061
We now have details for our Redis Instance, but not a username and password.
Terraform does output these for us, but these would then be stored in the state file, which is not ideal.
For the moment, you cannot change the password of the deployed Redis Instance in DigitalOcean, so we'll use the username and password from Terraform.
We won't output these from Terraform, as they will then show up in logs when we build CI/CD.
You can cat the state file, search for the Redis instance, and find the username and password in there.
$ cat terraform.tfstate | grep '"name": "laravel-in-kubernetes-redis"' -A 20 | grep -e password -e '"user"'
"password": "XXX",
"user": "default",
Store these values somewhere safe, as we'll use them in the next step of our deployment.
Self-managed Redis
Self-managed Redis, means we will be running Redis ourselves inside of Kubernetes, with AOF and persistence.
This has more management than a managed cluster, but does save us some cost.
We'll run our Redis Instance in a statefulset to ensure a stable running set of pods.
In our deployment repo, create a new directory called redis. Here we will store all our details for the Redis Cluster.
Create a new file in the redis directory, called persistent-volume-claim.yml. This is where we will store the configuration for the storage we need provisioned in DigitalOcean.
apiVersion: v1
kind: PersistentVolumeClaim
metadata:
  name: laravel-in-kubernetes-redis
spec:
  storageClassName: do-block-storage
  accessModes:
    - ReadWriteOnce
  resources:
    requests:
      # We are starting with 1GB. We can always increase it later.
      storage: 1Gi
Apply that, and we should see the volume created after a few seconds.
$ kubectl apply -f redis/persistent-volume-claim.yml
persistentvolumeclaim/laravel-in-kubernetes-redis created
$ kubectl get persistentvolumes
NAME                                       CAPACITY   ACCESS MODES   RECLAIM POLICY   STATUS   CLAIM                                 STORAGECLASS       REASON   AGE
pvc-f5aac936-98f5-48f1-a526-a68bc5c17471   1Gi        RWO            Delete           Bound    default/laravel-in-kubernetes-redis   do-block-storage            25s
Our volume has been successfully created, and we can move on to actually deploying Redis.
Create a new file in the redis folder called statefulset.yml where we will configure the Redis Node.
apiVersion: apps/v1
kind: StatefulSet
metadata:
  name: laravel-in-kubernetes-redis
  labels:
    tier: backend
    layer: redis
spec:
  serviceName: laravel-in-kubernetes-redis
  selector:
    matchLabels:
      tier: backend
      layer: redis
  replicas: 1
  template:
    metadata:
      labels:
        tier: backend
        layer: redis
    spec:
      containers:
      - name: redis
        image: redis:5.0.4
        command: ["redis-server", "--appendonly", "yes"]
        ports:
        - containerPort: 6379
          name: web
        volumeMounts:
        - name: redis-aof
          mountPath: /data
      volumes:
        - name: redis-aof
          persistentVolumeClaim:
            claimName: laravel-in-kubernetes-redis
As you can see, we are also mounting our PersistentVolumeClaim into the container, so our AOF file will persist across container restarts.
We can go ahead and apply the statefulset, and we should see our Redis pod pop up.
$ kubectl apply -f redis/statefulset.yml
statefulset.apps/laravel-in-kubernetes-redis created

# after a few seconds
$ kubectl get pods
laravel-in-kubernetes-redis-0   1/1     Running   0          18s

# Inspect the logs
$ kubectl logs laravel-in-kubernetes-redis-0
1:C 30 Aug 2021 17:31:16.678 # oO0OoO0OoO0Oo Redis is starting oO0OoO0OoO0Oo
1:C 30 Aug 2021 17:31:16.678 # Redis version=5.0.4, bits=64, commit=00000000, modified=0, pid=1, just started
1:C 30 Aug 2021 17:31:16.678 # Configuration loaded
1:M 30 Aug 2021 17:31:16.681 * Running mode=standalone, port=6379.
1:M 30 Aug 2021 17:31:16.681 # WARNING: The TCP backlog setting of 511 cannot be enforced because /proc/sys/net/core/somaxconn is set to the lower value of 128.
1:M 30 Aug 2021 17:31:16.681 # Server initialized
1:M 30 Aug 2021 17:31:16.681 # WARNING you have Transparent Huge Pages (THP) support enabled in your kernel. This will create latency and memory usage issues with Redis. To fix this issue run the command 'echo never > /sys/kernel/mm/transparent_hugepage/enabled' as root, and add it to your /etc/rc.local in order to retain the setting after a reboot. Redis must be restarted after THP is disabled.
1:M 30 Aug 2021 17:31:16.681 * Ready to accept connections
We now have Redis successfully running, and we just need to add a service to make it discoverable in Kubernetes.
Create a new Service file in the redis directory called service.yml where we will store the service for Redis.
apiVersion: v1
kind: Service
metadata:
  name: laravel-in-kubernetes-redis
  labels:
    tier: backend
    layer: redis
spec:
  ports:
  - port: 6379
    protocol: TCP
  selector:
    tier: backend
    layer: redis
  type: ClusterIP
Apply that, and we'll have a Redis connection ready to go.
Onto the next
Next, we'll move on to deploying our Queue workers in Kubernetes.
! PART EIGHT: Deploying Laravel Queue workers in Kubernetes
In this post we will cover deploying Laravel Queue workers in Laravel.
Deploying Laravel Queue workers in Kubernetes, makes it fairly easy to scale out workers when jobs start piling up, and releasing resources when there is lower load on the system.
Queue connection update
We need to make sure the Queue Workers can connect to our Redis instance.
Update the ConfigMap and Secret in the common/ directory to have the new Redis Details, and switch the Queue Driver to Redis
Updating the ConfigMap
Update the details in the common/app-config.yml for Redis and the Queue Driver
apiVersion: v1
kind: ConfigMap
metadata:
  name: laravel-in-kubernetes
data:
  QUEUE_CONNECTION: "redis"
  REDIS_HOST: "XXX"
  REDIS_PORT: "XXX"
We can apply the new ConfigMap
$ kubectl apply -f common/app-config.yml
configmap/laravel-in-kubernetes configured
Updating the Secret
Update the details in the common/app-secret.yml to contain the new Redis connection details.
apiVersion: v1
kind: Secret
metadata:
  name: laravel-in-kubernetes
type: Opaque
stringData:
  REDIS_PASSWORD: "XXX" # If you have no password set, you can set this to an empty string
We can apply the new Secret, and then move on to running the actual Queues.
$ kubectl apply -f common/app-secret.yml
secret/laravel-in-kubernetes configured
Queue directory
First thing we'll need is a new directory in our deployment repo called queue-workers.
Here is where we will configure our queue-workers.
$ mkdir -p queue-workers
Creating the deployment
Next, we need to create a Deployment for our queue workers, which will run them and be able to scale them for us.
In the queue-workers directory, create a new file called deployment-default.yml.
apiVersion: apps/v1
kind: Deployment
metadata:
  name: laravel-in-kubernetes-queue-worker-default
  labels:
    tier: backend
    layer: queue-worker
    queue: default
spec:
  replicas: 1
  selector:
    matchLabels:
      tier: backend
      layer: queue-worker
      queue: default
  template:
    metadata:
      labels:
        tier: backend
        layer: queue-worker
        queue: default
    spec:
      containers:
        - name: queue-worker
          image: [your_registry_url]/cli:v0.0.1
          command:
            - php
          args:
            - artisan
            - queue:work
            - --queue=default
            - --max-jobs=200
          ports:
            - containerPort: 9000
          envFrom:
            - configMapRef:
                name: laravel-in-kubernetes
            - secretRef:
                name: laravel-in-kubernetes
This deployment will deploy the queue workers for the default queue only. We will cover adding more queues further down in the post.
Let's apply the new Queue worker, and check that the pod is running correctly.
$ kubectl apply -f queue-workers/deployment-default.yml
deployment.apps/laravel-in-kubernetes-queue-worker-default created

$ kubectl get pods
NAME                                                          READY   STATUS    RESTARTS   AGE
laravel-in-kubernetes-fpm-856dcb9754-trf65                    1/1     Running   0          10h
laravel-in-kubernetes-queue-worker-default-594bc6f4bb-8swdw   1/1     Running   0          9m38s
laravel-in-kubernetes-webserver-5877867747-zm7zm              1/1     Running   0          10h
That's it. The Queue workers are running correctly.
Separate queues
Our current deployment is running the queue for only the default queue.
If we'd like to add additional workers for more queues, we can simply add another deployment file called deployment-{queue-name}.yml, update the queue label with the new name, and update the --queue flag to the new queue name.
Once we apply that, we'll have a second group of queue workers to run our other queue.
We can also run a single queue
If you have not built in multiple queues into your application, you can also remove the --queue flag from the queue-worker deployment to have it run all of the queued jobs.
Onto the next
Next, we'll look at running the cron job for our Laravel scheduler.
! PART NINE: Deploying the Laravel Scheduler
In this post, we'll cover deploying the Laravel Scheduler in Kubernetes.
The Laravel Scheduler takes care of running tasks / jobs on a set schedule or at specific times.
Kubernetes Cronjob or Cron in a Container ?
There are some differences we need to be aware of before willy-nilly jumping into a specific implementation.
Kubernetes Cronjobs
Kubernetes comes with a built-in Cron mechanism which can be used to run tasks or jobs on a schedule.
Whilst it is a great mechanism to run jobs on a schedule, we have built most of our scheduling into our Laravel app, to make it more declarative and testable with our codebase.
We could run our scheduler (Which needs to be run every minute with actual cron), using a Kubernetes CronJob, but there are a few things to be aware of.
Kubernetes CronJobs have some limitations to be aware of. They will also create a new pod every minute to run the Laravel Scheduler, and once completed kill it off.
This means that there will be a new pod scheduled every minute, which might cause some churn and duplicated runs, and also have the issue where if there is not enough resources to schedule the pods, our cron will stop running and not be scheduled until we fix the issue.
Creating new pods every minute also creates a lot of scheduling overhead.
Cron in a container
Cron in a container is a bit more lightweight in terms of scheduling, but does have some invisibility when it comes to how many schedule runs have passed, and when they start failing.
Cron will not fail if one of its jobs fails, and it will just continue trudging silently on.
This might be more performant than the Kubernetes CronJobs, but we might not spot unexpected failures in our Laravel Scheduler.
For this reason, we are going to use the Kubernetes CronJobs, but we will also cover running inside a cron container, for cases where Kubernetes performance is an issue
Laravel Scheduler on one server at a time
Laravel has a built in feature for running a task on only one server at a time.
I strongly recommend using this feature if your jobs are not idempotent, meaning re-runnable with the same end result. If you are sending mails or notifications, you want to make sure you don't run them twice if a Cron accidentally runs multiple times.
Kubernetes CronJob
We want to create a new Kubernetes CronJob object, in which we can specify how to run the scheduler.
Cronjob folder
We'll start by creating a new folder in our deployment repo called cron
$ mkdir -p cron
CronJob resource
Within the new cron folder, we can create our new CronJob object, passing in the environment variables in the same way we did before.
This will instruct Kubernetes to run a pod every minute with our command.
Create a new file called cronjob.yml in the cron directory.
apiVersion: batch/v1
kind: CronJob
metadata:
  name: laravel-in-kubernetes-scheduler
spec:
  schedule: "* * * * *"
  jobTemplate:
    spec:
      template:
        spec:
          containers:
          - name: scheduler
            image: [your_registry_url]/cli:v0.0.1
            command:
              - php
            args:
              - artisan
              - schedule:run
            envFrom:
              - configMapRef:
                  name: laravel-in-kubernetes
              - secretRef:
                  name: laravel-in-kubernetes
          restartPolicy: OnFailure
We can apply that, and watch the pods in Kubernetes. After about a minute a pod should start running.
$ kubectl apply -f cron/cronjob.yml
cronjob.batch/laravel-in-kubernetes-scheduler created

$ kubectl get pods
NAME                                                          READY   STATUS      RESTARTS   AGE
[...]
laravel-in-kubernetes-scheduler-27173731-z2cmg                0/1     Completed   0          38s

$ kubectl logs laravel-in-kubernetes-scheduler-27173731-z2cmg
No scheduled commands are ready to run.
Our scheduler is now running correctly.
Kubernetes by default will keep the last 3 executions of our CronJob for us to inspect. We can use those to have a look at logs.
After 5 minutes you should see 3 Completed pods for the scheduler, and you can run logs on each of them.
$ kubectl get pods
kubectl get pods
NAME                                                          READY   STATUS      RESTARTS   AGE
[...]
laravel-in-kubernetes-scheduler-27173732-pgr6t                0/1     Completed   0          2m46s
laravel-in-kubernetes-scheduler-27173733-qg7ld                0/1     Completed   0          106s
laravel-in-kubernetes-scheduler-27173734-m8mdp                0/1     Completed   0          46s
Our scheduler is now running successfully.
Cron in a container
The other way to run the cron, is run a dedicated container with cron.
We previously built our cron image together with our other images, and we can use that image in a container.
In the same cron directory we created we can create a deployment.yml file to contain our cron running in a Deployment.
apiVersion: apps/v1
kind: Deployment
metadata:
  name: laravel-in-kubernetes-cron
  labels:
    tier: backend
    layer: cron
spec:
  replicas: 1
  selector:
    matchLabels:
      tier: backend
      layer: cron
  template:
    metadata:
      labels:
        tier: backend
        layer: cron
    spec:
      containers:
        - name: cron
          image: [your_registry_url]/cron:v0.0.1
          envFrom:
            - configMapRef:
                name: laravel-in-kubernetes
            - secretRef:
                name: laravel-in-kubernetes
We can apply that, and we should see a cron container pop up, and if we check the logs, we should start seeing some scheduler messages pop up after a while.
$ kubectl apply -f cron/deployment.yml
deployment.apps/laravel-in-kubernetes-cron created

$ kubectl get pods
NAME                                                          READY   STATUS    RESTARTS   AGE
[...]
laravel-in-kubernetes-cron-844c45f6c9-4tdkv                   1/1     Running   0          80s

$ kubectl logs laravel-in-kubernetes-cron-844c45f6c9-4tdkv
No scheduled commands are ready to run.
No scheduled commands are ready to run.
No scheduled commands are ready to run.
No scheduled commands are ready to run.
No scheduled commands are ready to run.
The scheduler is now running successfully in a container.
We now have the scheduler running successfully in Kubernetes
Onto next
Next, we'll look at exposing our application through a Load Balancer, using the Nginx Ingress
! PART TEN: Exposing the application
Our application is now successfully deployed in Kubernetes, but we need to expose it to the outside world.
We can access it locally by running kubectl port-forward svc/laravel-in-kubernetes-webserver 8080:80 and going to http://localhost:8080.
We need to expose our application to the outside world though so our users can access it.
Kubernetes Load Balancer
The primary backing for exposing our application in Kubernetes, is the Load Balancer service type in Kubernetes.
It adds a DigitalOcean load balancer pointing at all of our Kubernetes nodes, which in turn point at our services.
We could simply change the Service type for our webserver service to a LoadBalancer and get a external IP to call it on.
This is not the recommended method of exposing applications, but we'll cover it briefly, just so you know it exists and how to use it.
In our deployment repo, we can update the webserver/service.yml file to have the type LoadBalancer, update it, and see it's external IP be created after a few minutes.
# webserver/service.yml
apiVersion: v1
kind: Service
metadata:
  name: laravel-in-kubernetes-webserver
spec:
  # We can add type LoadBalancer here
  type: LoadBalancer
  selector:
    tier: backend
    layer: webserver
  ports:
    - protocol: TCP
      port: 80
      targetPort: 80
Now we can apply that, and wait a few minutes for the LoadBalancer to be created.
$ kubectl apply -f webserver/
service/laravel-in-kubernetes-webserver configured

$ kubectl get svc
NAME                              TYPE           CLUSTER-IP      EXTERNAL-IP   PORT(S)        AGE
[...]
laravel-in-kubernetes-webserver   LoadBalancer   10.245.76.55    <pending>     80:30844/TCP   12d

$ # After a few minutes (Took 10 on my end) we should see an external IP.
$ kubectl get svc
NAME                              TYPE           CLUSTER-IP      EXTERNAL-IP     PORT(S)        AGE
[...]
laravel-in-kubernetes-webserver   LoadBalancer   10.245.76.55    157.245.20.41   80:30844/TCP   12d
In this case my IP is 157.245.20.41. If I open in up in my browser it show the application
You can also see the load balancer created in the DigitalOcean UI.
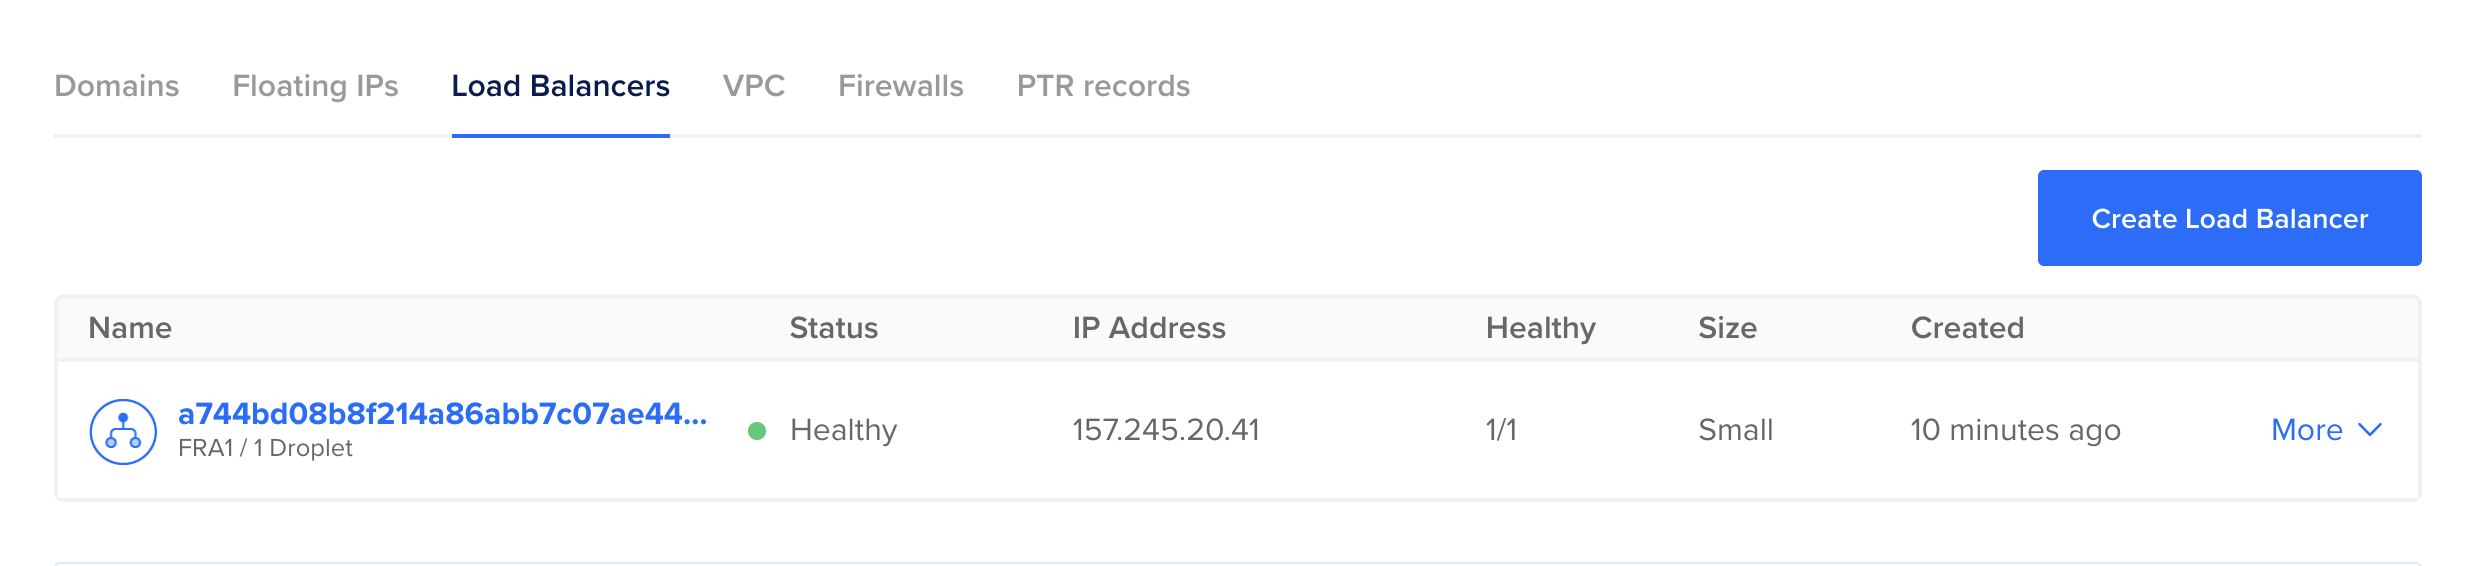
To learn more about configuring Load Balancers in this way, you can have a look at this page for DigitalOcean. It has many configurable settings.
For the moment though, if you followed along and created the LoadBalancer Service, now would be a good time time to delete it, as we are going to create one in the next section.
Update the webserver/service.yml file once more and remove the type: LoadBalancer line
# webserver/service.yml
apiVersion: v1
kind: Service
metadata:
  name: laravel-in-kubernetes-webserver
spec:
  # Commented for clarity, but you can simply remove it entirely
  # type: LoadBalancer
  selector:
    tier: backend
    layer: webserver
  ports:
    - protocol: TCP
      port: 80
      targetPort: 80
Now we can apply that, and the Load Balancer should be deleted automatically in DigitalOcean.
$ kubectl apply -f webserver/
deployment.apps/laravel-in-kubernetes-webserver unchanged
service/laravel-in-kubernetes-webserver configured

$ kubectl get services
NAME                              TYPE        CLUSTER-IP      EXTERNAL-IP   PORT(S)    AGE
[...]
laravel-in-kubernetes-webserver   ClusterIP   10.245.76.55    <none>        80/TCP     12d
You'll notice that the external IP no longer exists. You can also check the DigitalOcean UI, and you'll see the LoadBalancer no longer exists.

Installing the Nginx Ingress Controller
Our preferred method for exposing applications, is by deploying an Ingress controller to the Kubernetes Cluster, and then exposing the Ingress using a LoadBalancer.
This allows us to create a single LoadBalancer for our cluster and all the applications in our cluster, whilst easily creating the correct routing rules, and pointing a DNS entry at our LoadBalancer.
In total, we will easily expose our applications, and configure any custom configurations we need.
Deploying the controller
First we need to deploy the controller. The documentation is available here
We are using the DigitalOcean Kubernetes Service, and therefor will be using the DigitalOcean specific provider.
You can have a look at all the different providers here https://kubernetes.github.io/ingress-nginx/deploy/#provider-specific-steps
We want to version control the Ingress Controller, so we can visibly see any changes if we every update. What we will do for this case, is instead of applying directly from the URL, we will create an ingress directory, and create the manifest in that directory.
$ mkdir ingress-controller
$ wget https://raw.githubusercontent.com/kubernetes/ingress-nginx/controller-v1.0.0/deploy/static/provider/do/deploy.yaml -O ingress-controller/controller.yml
You can inspect this file to see all the parts which get deployed for the Ingress controller.
The defaults should suffice for our application, so we can apply that.
$ kubectl apply -f ingress-controller/
namespace/ingress-nginx unchanged
serviceaccount/ingress-nginx unchanged
configmap/ingress-nginx-controller configured
clusterrole.rbac.authorization.k8s.io/ingress-nginx unchanged
clusterrolebinding.rbac.authorization.k8s.io/ingress-nginx unchanged
role.rbac.authorization.k8s.io/ingress-nginx unchanged
rolebinding.rbac.authorization.k8s.io/ingress-nginx unchanged
service/ingress-nginx-controller-admission unchanged
service/ingress-nginx-controller configured
deployment.apps/ingress-nginx-controller configured
ingressclass.networking.k8s.io/nginx unchanged
validatingwebhookconfiguration.admissionregistration.k8s.io/ingress-nginx-admission configured
serviceaccount/ingress-nginx-admission unchanged
clusterrole.rbac.authorization.k8s.io/ingress-nginx-admission unchanged
clusterrolebinding.rbac.authorization.k8s.io/ingress-nginx-admission unchanged
role.rbac.authorization.k8s.io/ingress-nginx-admission unchanged
rolebinding.rbac.authorization.k8s.io/ingress-nginx-admission unchanged
job.batch/ingress-nginx-admission-create unchanged
job.batch/ingress-nginx-admission-patch unchanged

$ # After a few minutes (usually about 10), the ingress service will be available with an external IP
$ kubectl get service -n ingress-nginx
NAME                                 TYPE           CLUSTER-IP       EXTERNAL-IP       PORT(S)                      AGE
ingress-nginx-controller             LoadBalancer   10.245.228.253   104.248.101.239   80:30173/TCP,443:31300/TCP   6m21s
The Nginx Ingress Controller is now deployed and ready to be used.
Adding an Ingress for the application
The next piece we need to do is add an actual Ingress resource for our application to configure how the Ingress should be routed.
In the Deployment repo once again, we can add this.
In the webserver directory, create a new file called ingress.yml with the following contents.
apiVersion: networking.k8s.io/v1
kind: Ingress
metadata:
  name: laravel-in-kubernetes-webserver
spec:
  ingressClassName: nginx
  rules:
  - http:
      paths:
      - path: /
        pathType: Prefix
        backend:
          service:
            name: laravel-in-kubernetes-webserver
            port:
              number: 80
This tells our Ingress Controller how to route requests to our application. In this case the base path on our Ingress will route to our webserver deployment.
Apply that, and if you open the IP of your service in your browser, you should see your application running successfully through the Ingress.
$ kubectl apply -f webserver
kubectl apply -f webserver/
deployment.apps/laravel-in-kubernetes-webserver unchanged
ingress.networking.k8s.io/laravel-in-kubernetes-webserver created
service/laravel-in-kubernetes-webserver unchanged

$ kubectl get services ingress-nginx-controller -o jsonpath='{.status.loadBalancer.ingress[0].ip}' -n ingress-nginx
104.248.101.239
The application is now exposed on the public domain and going through our Load Balancer.
Load Balancer reports nodes as down
In DigitalOcean, when you have a LoadBalancer in front of your nodes, it will automatically check the health of the NodePorts exposed by the worker nodes.
BUT, if the LoadBalancer service, in this case the ingress-controller, is deployed on only one node, only that node will report as successful.
This is not really a problem, and looks more pressing than it necessarily is.
There are a few ways to fix this though if you think it's necessary.
Update the Ingress Controller to a DaemonSet.
Updating the Ingress Controller Deployment to a DaemonSet will deploy a pod per node, and DigitalOcean will be able to detect each when doing the HealthChecks.
Update the externalTrafficPolicy for the Ingress Deployment to Cluster
You could set the externalTrafficPolicy on the Ingress Controller Service to "cluster", but this will lose the source IP address of the originating client.
You can see here for more details.
Onto the next
Next, we're going to look at adding certificates for our API, so we can server the application using https.
! PART ELEVEN: Adding Let's Encrypt certificates to the application
The next important piece, is for us to add certificates to our application, so our users can securely use our application across the internet.
We are going to use Cert Manager to achieve this, as it will automatically provision new certificates for us, as well as renew them on a regular basis.
We will use the Let's Encrypt tooling to issue certificates.
But first, we need a DNS name for our service.
For this piece you'll need a domain name. I'll be using https://larakube.chris-vermeulen.com for this demo.
Setting up a domain name
Setting up a domain name is fairly simple for our Kubernetes cluster
We need to point either a domain, or a subdomain to our LoadBalancer created by the Nginx Ingress
In my case, I am simply pointing laravel-in-kubernetes.chris-vermeulen.com to my load balancer.
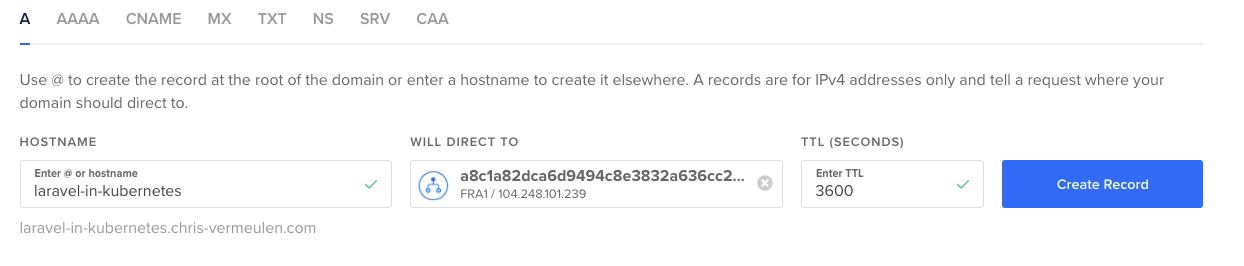
If you are doing this outside of DigitalOcean, you can also create a A NAME record, pointing at the IP of your LoadBalancer.
$ kubectl get svc -n ingress-nginx
NAME                                 TYPE           CLUSTER-IP       EXTERNAL-IP       PORT(S)                      AGE
ingress-nginx-controller             LoadBalancer   10.245.228.253   104.248.101.239   80:30173/TCP,443:31300/TCP   8d
Once you have the IP for the LoadBalancer, you can point the A name directly at it
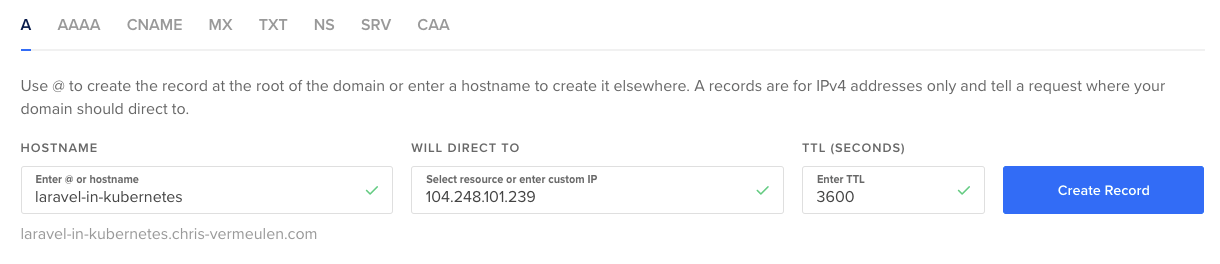
For more stability, you can also assign a Floating IP (a.k.a Static IP) to the LoadBalancer, and use that instead.
That way, if you ever need to recreate the LoadBalancer, you can keep the same IP.
HTTPS error
If you now load the DNS name in your browser, you'll notice it'll throw a insecure warning immediately (I am using Chrome)
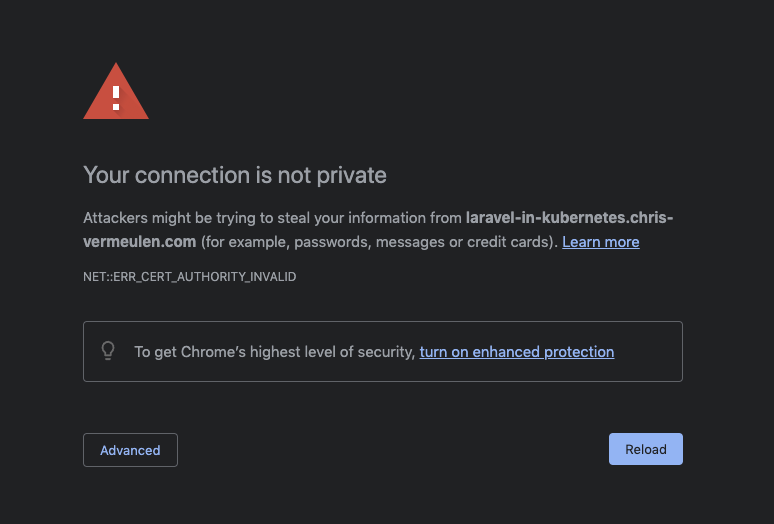
This is due to a redirect from http to https.
But this is exactly what this post is about. We now need to add SSL certificates to our website to serve it securely.
We'll issue the certs from Let's Encrypt as they are secure and free, and easy to manage.
Installing the Cert Manager
First thing we need to do for certs is install Cert manager
We'll do this by using the bundle once again.
At the time of writing the current version was v1.5.3. You can see the latest release here.
We'll download the latest bundle and install it in the same way we did the Ingress Controller
First we need to create a new directory in our deployment repo called cert-manager and download the cert manager bundle there.
$ mkdir -p cert-manager
$ wget https://github.com/jetstack/cert-manager/releases/download/v1.5.3/cert-manager.yaml -O cert-manager/manager.yml
We now have the local files, and we can install the cert manager in our cluster.
$ kubectl apply -f cert-manager/
[...]
You'll now see the cert manager pods running, and we are ready to start issuing certs for our API.
$ kubectl get pods -n cert-manager
NAME                                      READY   STATUS    RESTARTS   AGE
cert-manager-848f547974-v2pf8             1/1     Running   0          30s
cert-manager-cainjector-54f4cc6b5-95k9v   1/1     Running   0          30s
cert-manager-webhook-7c9588c76-6kxs5      1/1     Running   0          30s
You can also use the instructions on the cert manager page to verify the installation
Creating the issuer
Next piece, we need to create an issuer for our certificates.
This is for Let's Encrypt (Are any ACME issuer) to remind you about certificate renews (This will happen automatically with Cert Manager), and some other admin pieces.
I've used Let's Encrypt for years now, and never been spammed, ever.
Now the one thing we also need to do, is create 2 issuers. One for Let's Encrypt staging so we can test whether our configuration is valid, and a production one to issue the actual certificate.
This is important so you don't run into Let's Encrypt rate limits if you accidentally make a configuration mistake.
Again in the cert-manager directory in the deployment repo, create a new file called cluster-issuer.yml in the cert-manager directory, where we can configure our ClusterIssuers.
We are using ClusterIssuers to make it easy for our setup, but you can also use the normal Issuers for namespaced issuers.
apiVersion: cert-manager.io/v1
kind: ClusterIssuer
metadata:
  name: laravel-in-kubernetes-staging
spec:
  acme:
    # You must replace this email address with your own.
    # Let's Encrypt will use this to contact you about expiring
    # certificates, and issues related to your account.
    email: chris@example.com
    server: https://acme-staging-v02.api.letsencrypt.org/directory
    privateKeySecretRef:
      # Secret resource that will be used to store the account's private key.
      name: laravel-in-kubernetes-staging-key
    # Add a single challenge solver, HTTP01 using nginx
    solvers:
    - http01:
        ingress:
          class: nginx
---
apiVersion: cert-manager.io/v1
kind: ClusterIssuer
metadata:
  name: laravel-in-kubernetes-production
spec:
  acme:
    # You must replace this email address with your own.
    # Let's Encrypt will use this to contact you about expiring
    # certificates, and issues related to your account.
    email: chris@example.com
    server: https://acme-v02.api.letsencrypt.org/directory
    privateKeySecretRef:
      # Secret resource that will be used to store the account's private key.
      name: laravel-in-kubernetes-production-key
    # Add a single challenge solver, HTTP01 using nginx
    solvers:
    - http01:
        ingress:
          class: nginx
We can now create our issuers.
$ kubectl apply -f cert-manager/cluster-issuer.yml
clusterissuer.cert-manager.io/laravel-in-kubernetes-staging created
clusterissuer.cert-manager.io/laravel-in-kubernetes-production created
Next, we want to check they were created successfully.
Let's start with the staging one.
$ kubectl describe clusterissuer laravel-in-kubernetes-staging
[...]
Status:
  Acme:
    Last Registered Email:  chris@example.com
    Uri:                    XXX
  Conditions:
    Last Transition Time:  2021-09-22T21:02:27Z
    Message:               The ACME account was registered with the ACME server
    Observed Generation:   2
    Reason:                ACMEAccountRegistered
    Status:                True
    Type:                  Ready
Events:                    <none>
We can see Status: true and Type: Ready, which show us that the ClusterIssuer is correct and working as we need it to.
Next, we can check the production ClusterIssuer.
$ kubectl describe clusterissuer laravel-in-kubernetes-production
[...]
Status:
  Acme:
    Last Registered Email:  chris@example.com
    Uri:                    XXX
  Conditions:
    Last Transition Time:  2021-09-22T21:06:20Z
    Message:               The ACME account was registered with the ACME server
    Observed Generation:   1
    Reason:                ACMEAccountRegistered
    Status:                True
    Type:                  Ready
Events:                    <none>
We can see that it too was created successfully.
Now, we can add a certificate to our ingress.
Fixing a small issue with Kubernetes
There is an Existing bug in Kubernetes propagated through to DigitalOcean, which we need to fix first in our cluster though.
Quick description of the problem.
When we add the certificate, the cert-manager will deploy a endpoint which confirms we own the domain, and then do some validation with Let's Encrypt to issue the certificate.
The current problem is we cannot reach the LoadBalancer hostname from inside the cluster, where cert-manager is trying to confirm the endpoint.
This means it cannot validate that the domain is ours.
The solution to this is to not use the IP as our LoadBalancer endpoint in the Service, but rather the actual hostname
We need to update the Ingress Controller's Service with an extra annotation to update it's external hostname to whatever domain we have assigned to it.
In the ingress-controller/controller.yml file, search for LoadBalancer to find the service, and add an extra annotation for the hostname
[...]
---
apiVersion: v1
kind: Service
metadata:
  annotations:
    service.beta.kubernetes.io/do-loadbalancer-enable-proxy-protocol: 'true'
    # We need to add this annotation for the load balancer hostname to fix the bug
    # Replace it with your domain or subdomain
    service.beta.kubernetes.io/do-loadbalancer-hostname: "laravel-in-kubernetes.chris-vermeulen.com"
  labels: [...]
  name: ingress-nginx-controller
  namespace: ingress-nginx
[...]
Now we can apply that, and check that it's working correctly.
$ kubectl apply -f ingress-controller/controller.yml
[...]

$ kubectl get svc -n ingress-nginx
NAME                                 TYPE           CLUSTER-IP       EXTERNAL-IP                                 PORT(S)                      AGE
ingress-nginx-controller             LoadBalancer   10.245.228.253   laravel-in-kubernetes.chris-vermeulen.com   80:30173/TCP,443:31300/TCP   9d
You'll see that the external ip is now the hostname pointing at our LoadBalancer.
The certificate issuing will now work as we expect it to.
Add certificates to Ingress
Issuing staging certificate
Next, let's update the ingress, using the staging ClusterIssuer to make sure the certificate is going to be issued correctly.
We need to add 3 things to the webserver/ingress.yml.
We need to add an annotation with the cluster-issuer name, a tls section configuration, and a host to the Ingress rules.
Remember to change the URLs to your domain or subdomain.
apiVersion: networking.k8s.io/v1
kind: Ingress
metadata:
  name: laravel-in-kubernetes-webserver
  annotations:
    # We need to add the cluster issuer annotation
    cert-manager.io/cluster-issuer: "laravel-in-kubernetes-staging"
spec:
  # We need to add a tls section
  tls:
  - hosts:
    - laravel-in-kubernetes.chris-vermeulen.com
    secretName: laravel-in-kubernetes-tls
  ingressClassName: nginx
  rules:
  # We also need to add a host for our ingress path
  - host: laravel-in-kubernetes.chris-vermeulen.com
    http: [...]
We can now apply the Ingress, and then have a look at the certificate generated to make sure it's ready.
$ kubectl apply -f webserver/ingress.yml
ingress.networking.k8s.io/laravel-in-kubernetes-webserver configured

# Now we can check the certificate to make sure it's ready
$ kubectl get certificate
NAME                                READY   SECRET                              AGE
laravel-in-kubernetes-ingress-tls   True    laravel-in-kubernetes-ingress-tls   37s
If your certificate is not showing up correctly, or not marked as ready after a minute or so, you can consult the TroubleShooting guide for ACME cert-manager
Issuing the production certificate
If everything is working correctly, you will need to delete the ingress, and recreate it, as we need to recreate the certificate secret, and just an annotation change will not be enough to reissue a production certificate, and recreate the certificate.
So as a first step, let's delete the Ingress.
$ kubectl delete -f webserver/ingress.yml
ingress.networking.k8s.io "laravel-in-kubernetes-webserver" deleted
Next, let's update the Ingress annotation to the production issuer.
In webserver/ingress.yml, update the annotation for issuer
apiVersion: networking.k8s.io/v1
kind: Ingress
metadata:
  name: laravel-in-kubernetes-webserver
  annotations:
    # Update to production
    cert-manager.io/cluster-issuer: "laravel-in-kubernetes-production"
spec:
  [...]
Next we can recreate the Ingress, and a certificate will be issued against the production Let's Encrypt, and we should then have HTTPS in the browser when we open the URL.
$ kubectl  apply -f webserver/ingress.yml
ingress.networking.k8s.io/laravel-in-kubernetes-webserver created

$ kubectl get certificate
NAME                                READY   SECRET                              AGE
laravel-in-kubernetes-ingress-tls   True    laravel-in-kubernetes-ingress-tls   11s
We now have a production certificate issued by cert-manager through Let's Encrypt, and you should see the lock in your browser without any issues.
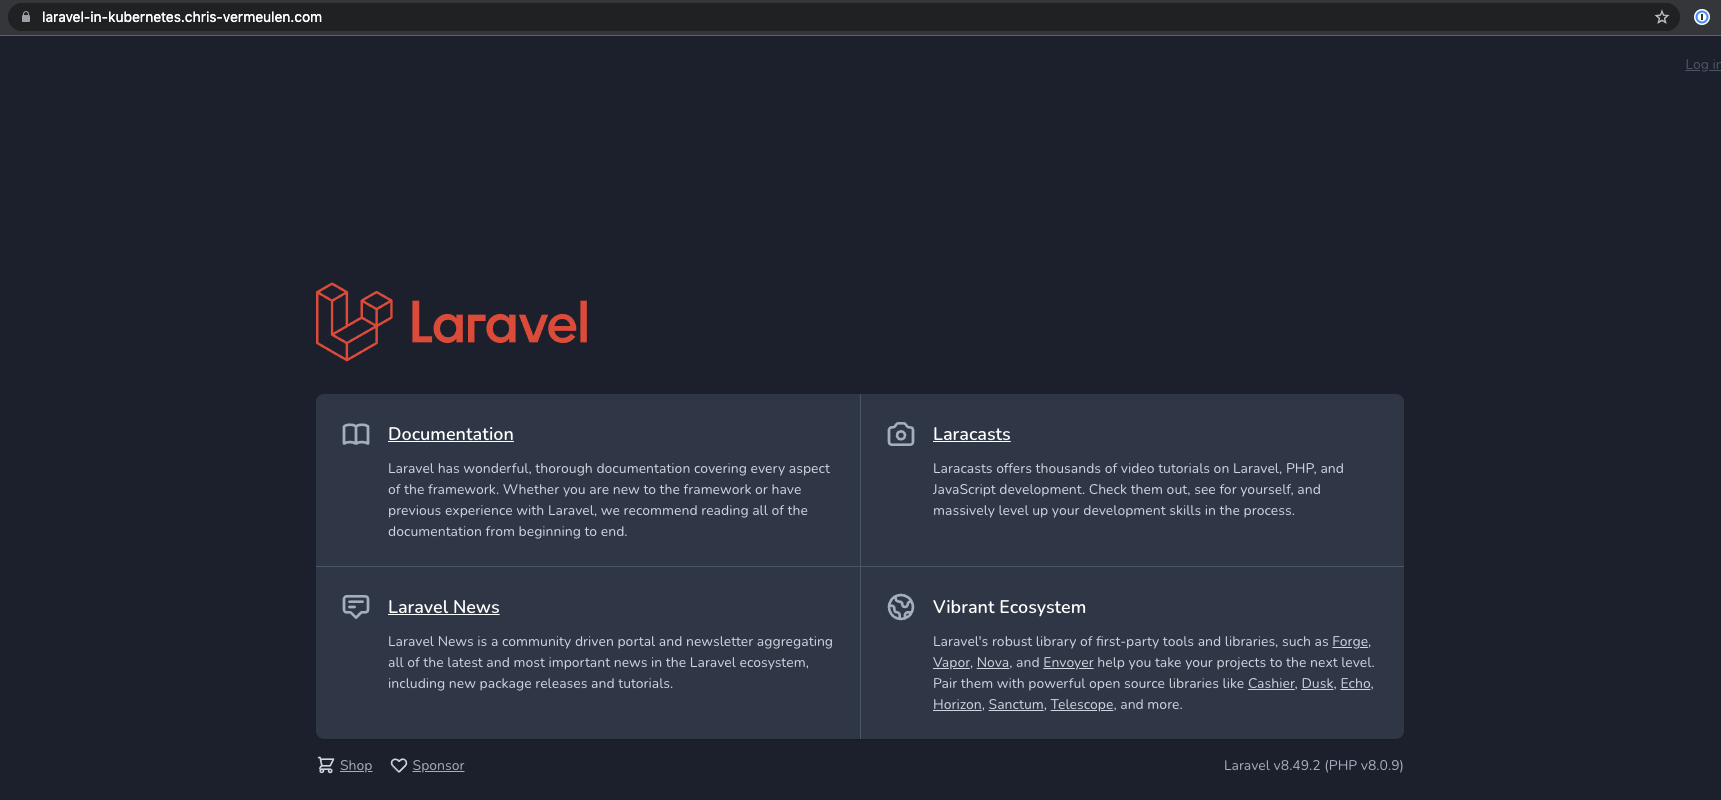
We now have certificates setup and working and our site is secure for people to connect to and do stuff, whatever that may be.
Next, we are going to move onto distributed logging, so we can easily catch all the logs from our applications in an easily searchable place.
Source: https://chris-vermeulen.com/tag/laravel-in-kubernetes/