Adobe Audition Vs Audacity Complete Review 2020

Audacity and Adobe Audition CC are two popular Digital Audio Workstations (DAWs) - software programs that can be used to record, edit, and mix audio.
The two work on the same principles (as do all DAWs), but there are many differences between them.
If you're new to audio production, and you want to learn how to craft a quality episode, it's a good idea to choose a DAW and try to master it, rather than juggling between multiple programs.
Remember, though, that this isn't a pre-requisite to podcasting. There are tools out there that can help you process and edit really simply, like Alitu: the Podcast Maker. But, if you want to take the time to learn how to do it yourself, then Audacity and Audition are both great options.
In this comparison, I want to run through the key differences between Audacity and Adobe Audition. My aim is to help you make a decision on whether either of them are a good fit for you and your podcast.
And remember, if you want to look at the wider choices, pop back out to our main Podcast software article for a full range of recording, editing, scheduling & planning apps.
Price
Okay, let's get the money stuff out the way first.
Audacity is an open source program, so it is completely free to download and use.
Adobe Audition is subscription-based, so you pay a monthly or annual ongoing fee to use it.
The monthly cost of Adobe Audition CC is $ 29.99 or £ 30.34, though an Annual Plan paid on a monthly basis drops to $ 19.99 or £ 19.97
The prepaid annual cost of Adobe Audition CC is $ 239.88 or £ 238.42
Adobe also offers an 'All Apps' package, which gives you access to over 20 apps (including Audition, Photoshop, and Illustrator)
The monthly cost of Adobe's All Apps package is $ 74.99 or £ 75.85, though an Annual Plan paid on a monthly basis drops to $ 49.99 or £ 49.94
The prepaid annual cost of Adobe's All Apps package is $ 599.88 or £ 596.33
Students and teachers qualify for a discount with the All Apps package. Here, the monthly cost is $ 19.99 or £ 16.24 and the annual cost is $ 239.88 or £ 196.30.
Look & Feel
Although the two look similar in terms of their main functions, they're far from identical in appearance.
My personal opinion is that Audition looks a lot more slick, but at the same time, might be slightly more intimidating to a beginner.
Audacity looks a bit more dated and basic, but this will be appealing to many folks who're just starting out.
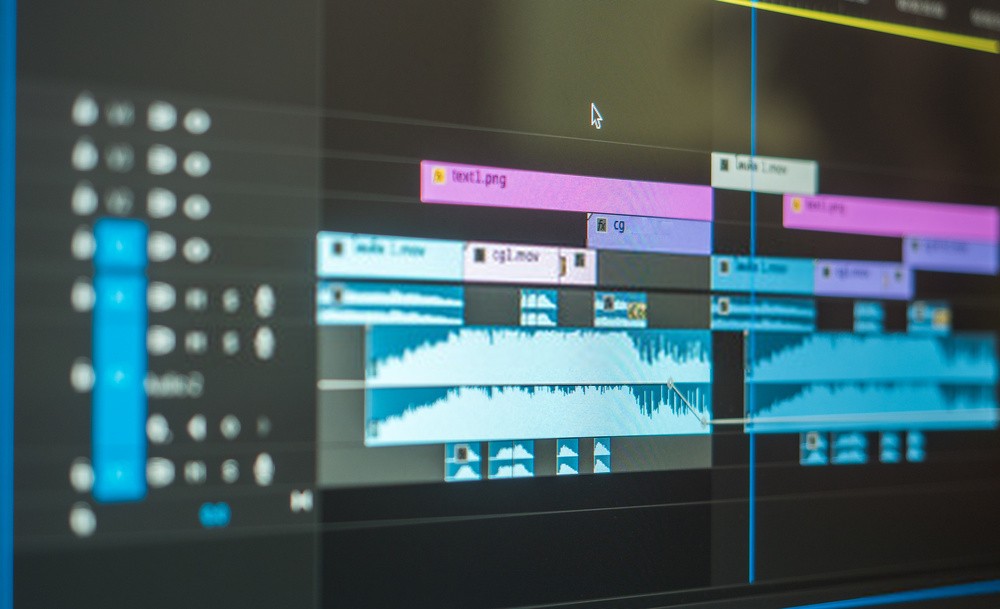
Being the 'premium' option, Audition understandably offers a lot more detail when looking at your waveforms (the visual representation of your audio tracks).
Ease of Use

Audacity is extremely simple to open up and start recording with.
There are drop-down menus on the main window where you can select the mic you want to record with, the headphones or speakers you want to listen with, and whether you'd like to record in mono or stereo.
There are also sliders which let you set your recording and playback volumes, along with level meters to monitor your signals.
With Audition, it isn't as obvious when it comes to selecting a mic and setting your levels before hitting record. To do this, you need to go to your Audio Hardware settings inside the Preferences menu.
On a side note, working inside Audacity is referred to (and saved as) a "project", whilst working inside Audition is referred to (and saved as) a "session".
Multitracking

If you stop recording, and start recording again, Audacity will automatically create a new track underneath your original. Working with multiple tracks is known as a "multitrack" mode.
Audacity will also function in this way if you import a pre-existing audio file into your project.
Audition, on the other hand, will focus on one single audio track at a time, until you specifically select the Multitrack option underneath the main toolbar.
All other audio imported into Audition won't automatically be added into the session - these will be listed in the Files window instead.
Audition's multitrack function is powerful and intuitive. With the correct preamp or mixer, you can record multiple microphones onto individual tracks simultaneously.
Although this isn't impossible to do in Audacity, it isn't half as easy. Compatible devices are few and far between, and you'll usually need additional driver or soundcard support.
The multitrack function is also used to mix together the multiple elements of a podcast, such as music, interviews, and other clips.
Without a doubt, this can been done in a lot more fine detail inside Audition, though Audacity's more basic setup is still more than good enough to piece together your episode.
Editing & Mixing
Audition is a far stronger performer than Audacity when it comes to building an episode. Especially if you're working with more than a handful of files.
The editing tools within Audition's multitrack give you the capability to split, stretch, overlap, and generally shuffle clips around in a much more intuitive way.
The terms "destructive" and "non-destructive" are often used when it comes to editing. These identify whether or not edits are being made directly onto the source material or not.
Destructive changes will be irreversible later on, whereas non-destructive edits won't alter the source material at all. This means it's much less of a disaster when you mess something up.
It can also refer to how easily alter or undo an edit once it has been made inside a project or session.
Though Audacity has an option to create copies of files prior to starting an editing project, it's definitely harder to work in a non-destructive manner when compared to editing in Audition.
Commonly Used Effects
Both DAWs have an Effects menu in their toolbar. In here, you'll find all the features you need to repair, enhance, or manipulate audio.
We'd be here all day if I ran through every single one, so let's take a look at the 3 most commonly used effects.
EQ
Also known as Equalization, this function allows you to boost or lower certain frequencies within your audio.
EQ within Audition and Audacity can be viewed as if it's a mixing desk - the kind you'd expect to see in a radio studio.
To view the EQ function in this way, you'd check the Graphic option in Audacity, or select Graphic Equalizer inside Audition.
Each frequency 'band' has its own individual slider that you can raise or lower.
Most podcasters use EQ to reduce the impact of 'pops' or 'plosives' in their recording. This is generally done by lowering (or 'rolling off') everything under 100Hz.
For making audio sound better, there's no one-size-fits-all answer - as it depends on your source material. However, boosting frequencies between the 1k and 6k range can enhance your audio if done correctly.
EQ can be carried out manually, but Audition has a plethora of presets you can try out.
Audacity has a handful of presets too, but many of these are to apply telephone or radio effects to your audio.
Limiting & Normalization
Limiting and normalization are functions you can use to alter and control your audio's volume level.
Limiting means you're putting an upper limit on how high the peaks (the loudest parts) of your waveform can go.
Normalization, meanwhile, let's you raise or reduce the overall level of your waveform without actually changing its shape.
Audition and Audacity's Normalization functions are virtually identical, and very simple to use.
Audition's Hard Limiter (found inside the Amplitude & Compression menu) will let you clip off or flatten peaks to one tenth of a decibel (dB).
A similar tool can be found in Audacity (Limiter, then Hard Limit) but it's a little clunky and harder to use due to the lack of detail on the audio track's dB scale.
Noise Reduction

Taking out 'hiss' or 'noisefloor' from underneath an audio track is a common practice in podcast editing.
Noise reduction works by taking a sample (ideally, around 10 seconds or so) of 'silence' in the audio.
Here it's able to recognize any background noise that it needs to try and remove, without damaging the parts of the audio that you want to keep (usually, the speech).
The noise reduction processes are similar in Audition and Audacity. In Audition, you right click on your highlighted area and select Capture Noise Print. In Audacity, you need to go through the Noise Reduction effect option and click Get Noise Profile.
Again, there's never any one-size-fits-all answer when it comes to audio production. But, in my opinion, it's much easier to get better results with Audacity's default noise reduction settings. Especially if you're a beginner.
Audition does have another trick up its sleeve, though. When you have files in your multitrack you can apply an effect called Adaptive Noise Reduction which will learn the noise and remove it as it plays, rather than working off of a pre-selected sample.
Saving Your Work
I've already mentioned this, but I'll mention it again for clarity. You refer to your saved work in Audacity as a "project", whilst in Audition, it's a "session".
The universal "Save" and "Save As" rules apply here for both.
Saving an Audacity project for the first time will create an Audacity Project File (.aup), and a separate folder containing the project's data.
Saving an Audition session will create a folder for the session and its materials on a whole. Inside that folder you'll find the actual Adobe Audition Session File (.sesx) where you can open up your save.
Audition sessions tend to take up a lot less room than their Audacity project counterparts, because of where and how either of them store their data.
Exporting an MP3
Once you've finished putting your episode together, you'll want to export it as an MP3 prior to uploading it for the world to hear.
Inside Audition this is quick and easy, just select a bitrate, name your file, and mix it down.
In Audacity there's a couple of one-off hurdles as you need to download and install an additional program called the LAME encoder.
This is due to licensing, and Audacity being open source.
Audacity's lack of MP3 exporting options as default might change in the very near future however, as the MP3 just had its patent dropped.
For now though, once the LAME encoder has been installed, creating an MP3 in Audacity is as simple as it is in Audition.
There's a strong argument that the quality of a LAME-encoded MP3 isn't too great, though.
Audition uses the more powerful Fraunhofer encoder.
You can actually use this encoder freely inside the iTunes desktop app, so if you're using Audacity, export your mixdown as a WAV, then open it up in there before converting it to an MP3.
Summary: Adobe Audition CC Vs Audacity
I hope the above has given you an idea of whether either of these DAWs would suit the needs of you, and your podcast.
Adobe Audition CC is undoubtedly more powerful, flexible, and intuitive.
With that said, the ongoing subscription costs can be a barrier for some.
The fact that Audacity is completely free makes it appealing to many beginners.
If you're a solo podcaster using a USB mic setup, then Audacity will be more than good enough for your needs.
If you're looking to use a mixer and multiple microphones though, then paying for Audition is absolutely going to be worth it in the long run.
Remember, if you're still building out your wider podcasting toolset, pop back out to our main Podcast software article for a full range of recording, editing, scheduling & planning apps.
Learning Audacity or Audition
There's a tons of free resources out there that'll show you various aspects of working with Audacity or Audition.
If you have the time to search through them, and determine which ones are "qualified" and aren't offering bad advice, then you can eventually master either through trial and error.
If you're looking for a more direct path to learning the ropes however, then you can save time by spending some money on a dedicated course.