Use Putty to Convert pem to ppk format

PuTTY
PuTTY is an SSH and telnet client, developed originally by Simon Tatham for the Windows platform. PuTTY is open source software that is available with source code and is developed and supported by a group of volunteers.
Running PuTTY and connecting to a server
If you selected to create a desktop icon during installation, you can start the software simply by (double-)clicking on the icon. Otherwise, open the software from the Windows Start menu.
When the software starts, a window titled PuTTY Configuration should open. This window has a configuration pane on the left, a Host Name (or IP address) field and other options in the middle, and a pane for saving session profiles in the lower right area.
For simple use, all you need to do is to enter the domain name or IP address of the host you want to connect to in the Host Name field and click Open (or press Enter). A domain name looks like students.example.edu. An IP address looks something like 78.99.129.32.
What if you don't have a server
Convert pem to ppk format
Option 1) Connecting from Linux instance to a Linux instance - The pem file can be used as-is.
Option 2) Connecting from a Windows instance to a Windows instance - The pem file can be used as-is.
Option 3) Connecting from a Windows instance to a Linux instance - The pem file has to converted into a ppk file.
Option 1) and 2) don't require any conversion, while the Option 3) requires the same. In this blog we will look into Convert pem to ppk File.
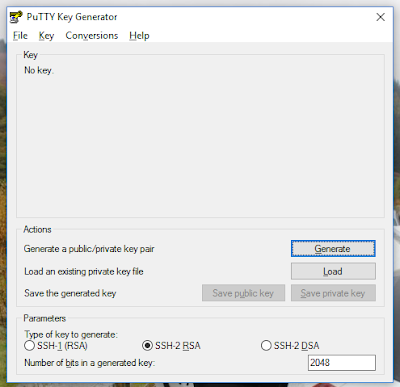
1) The first step is download puttykey.com from here onto a Windows machine. There is no need to install it, simply save it in a location where it can be located easily.
2) Launch the puttykey.com The below screen should appear.
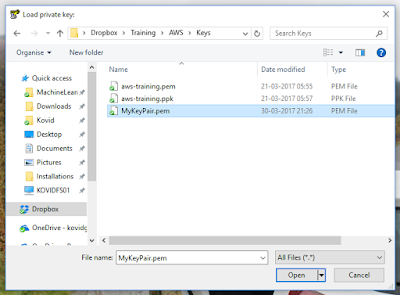
3) Click on Load. Point to the pem file which has been downloaded during the creation of the Key Pair. The file would be hidden. Make sure `AAll files (*.*)s selected. Click on Open.
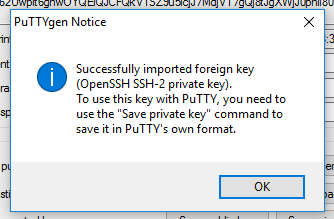
4) There will be a notice, simply accept the same.
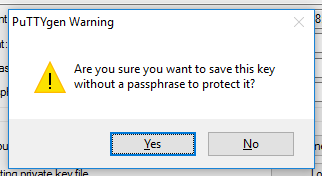
5) Click on Save private key. There will be a warning, accept the same.
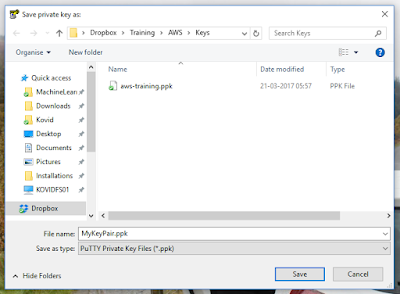
6) Navigate to the location where the file has to be saved. Make sure the complete file name is specified as shown below and click on Save.
The above sequence of steps will convert the pem file into a ppk file which will be used to login to a Linux instance in the cloud from a Windows machine.