Тестовая сеть Onomy — пошаговое руководство
The Onomy Testnet - A Step-by-Step Tutorial
The following tutorial will guide you through Onomy’s testnet Bonding Curve interface, enabling interested parties to interact with the beta versions of the Onomy Network, Arc Bridge Hub, and BCO.
What’s the Onomy BCO?
The Bonding Curve Offering (BCO) helps distribute NOM tokens to users who would like to utilise Onomy’s vertically-integrated ecosystem of DeFi products.
Bonding Curves work by establishing a relationship between supply and price through AMM contracts. They provide an instant market with liquidity before exchange listings, rather than a static-priced sale.
The BCO is deployed on Ethereum, where $bNOM may be purchased and sold. $bNOM may then be bridged 1:1 for $NOM on the Onomy Network, which burns the $bNOM and moves the price floor higher until it reaches parity with $ETH. $NOM would be listed on exchanges and is the utility & governance token for the Onomy ecosystem.
To learn more about the purpose and mechanics of the Bonding Curve, click here or here.
How to Use Onomy’s Testnet Bonding Curve?
1) Install Metamask and the Keplr wallets
As Onomy’s BCO is a non-custodial and decentralized platform, you’ll need to connect your ERC-20 and Cosmos-compatible wallets to the contract.
We recommend using Metamask to access the Ethereum Goerli testnet and Keplr for the Onomy Network, on Google Chrome to access the Onomy Network testnet.
You can download Metamask here:
Here are all the details you need to install Metamask:
https://metamask.zendesk.com/hc/en-us/articles/360015489531-Getting-started-with-MetaMask
You can download Keplr here:
Here are all the details you need to install Keplr:
https://help.keplr.app/getting-started/keplr-quickstart-guide
You’ll now have to enable testnet access on Metamask**:**
- Click on My Accounts (upper-right corner)
- Click on Settings
- Click on Advanced
- Scroll down to “Show Testnet Networks” and toggle on the switch
- To change your network to Goerli testnet, click on the Network switch in the upper-center side of your app, scroll down, and select Goerli test network.
For Keplr, this process is automated through the BCO interface - no additional manual action is needed. Once you’ve successfully set up both wallets, you are ready to move to the next step.
2) Obtain Goerli ETH from our faucet.
- Join the Onomy Protocol Discord here: discord.gg/onomy
- Navigate to the #goerli-faucet channel
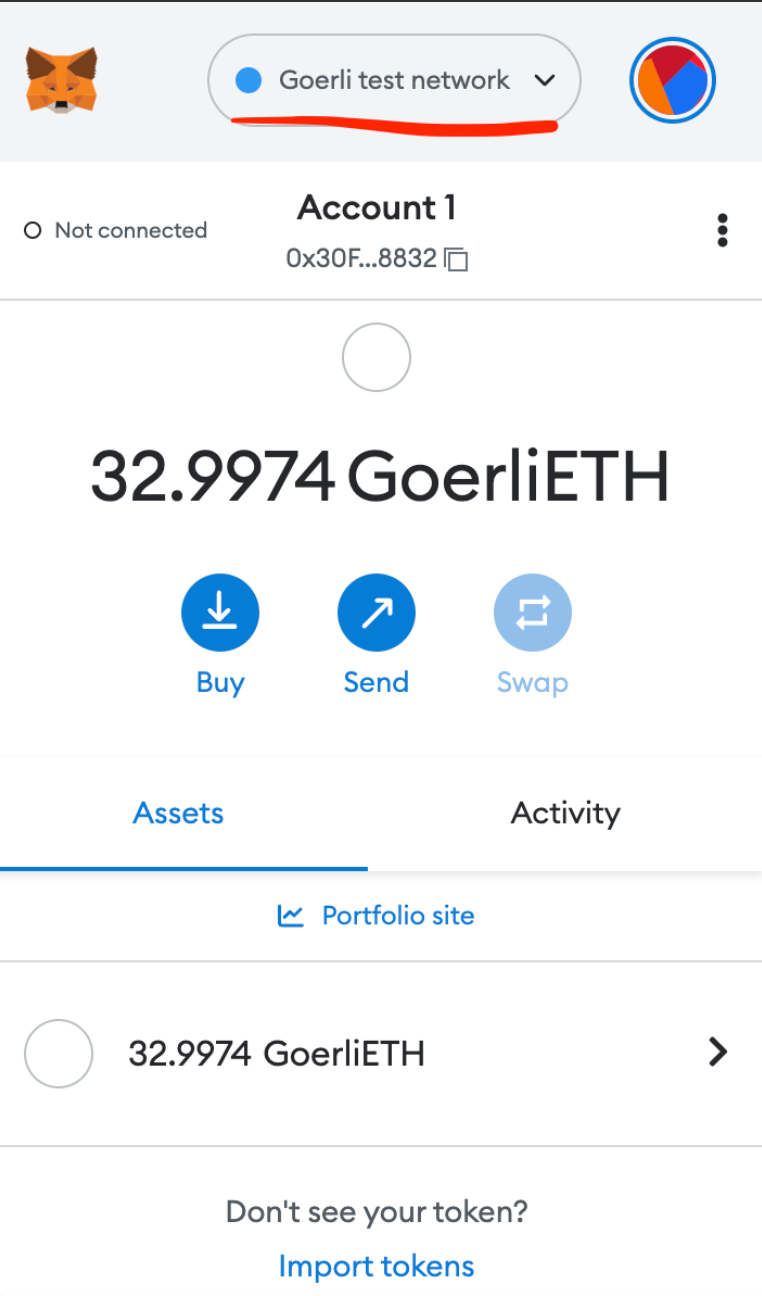
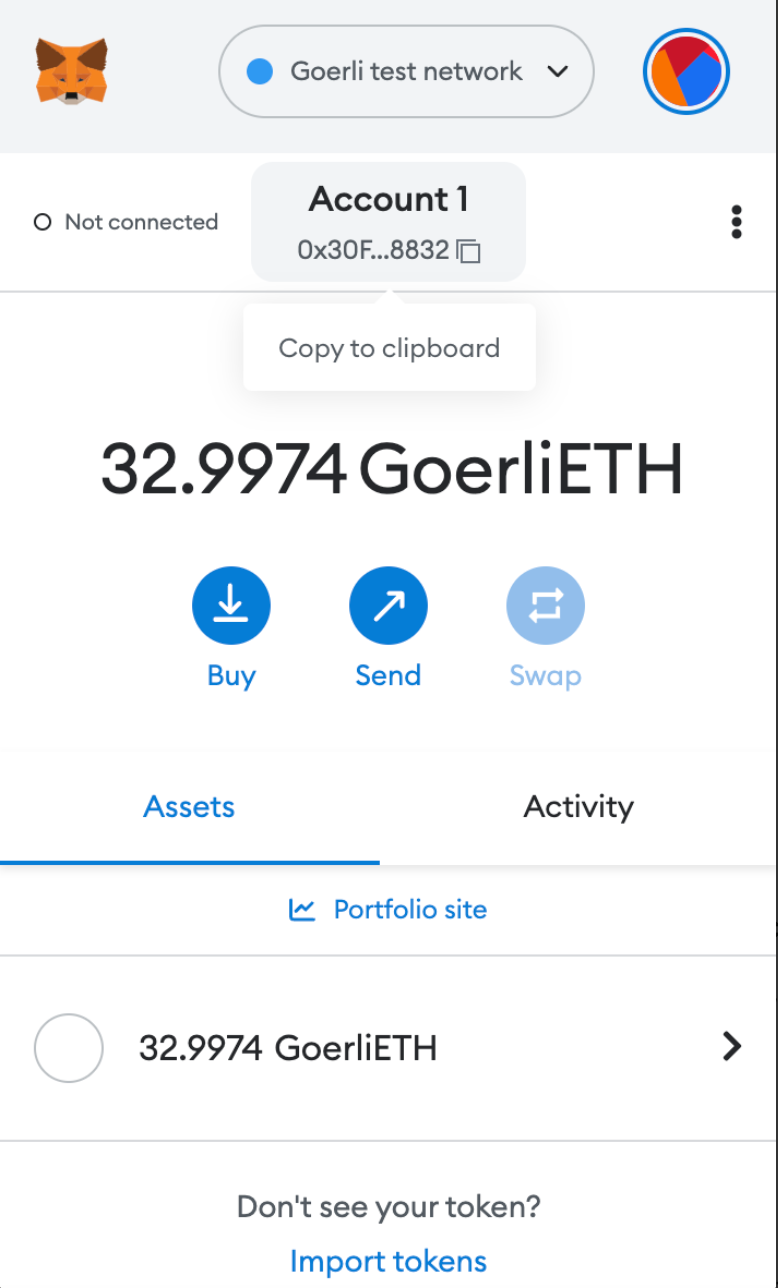
- Copy your Goerli ETH address from Metamask by clicking on it in the main interface
- Paste your Goerli ETH address from Metamask in the #goerli-faucet Discord channel.
В течение следующих 60 минут вы получите немного Goerli ETH. После отправки вы будете уведомлены с помощью смайлика «💧» на вашем адресе.
3) Test out the Bonding Curve
You are now ready to test out the Bonding Curve interface. The following features are available and will be explained in this guide:
- Logging into the Bonding Curve
- Buy bNOM from the Bonding Curve
- Sell bNOM to the Bonding Curve
- Bridge bNOM to the Onomy Network Testnet using the Arc Bridge Hub
- Delegate (stake) your bNOM to validators
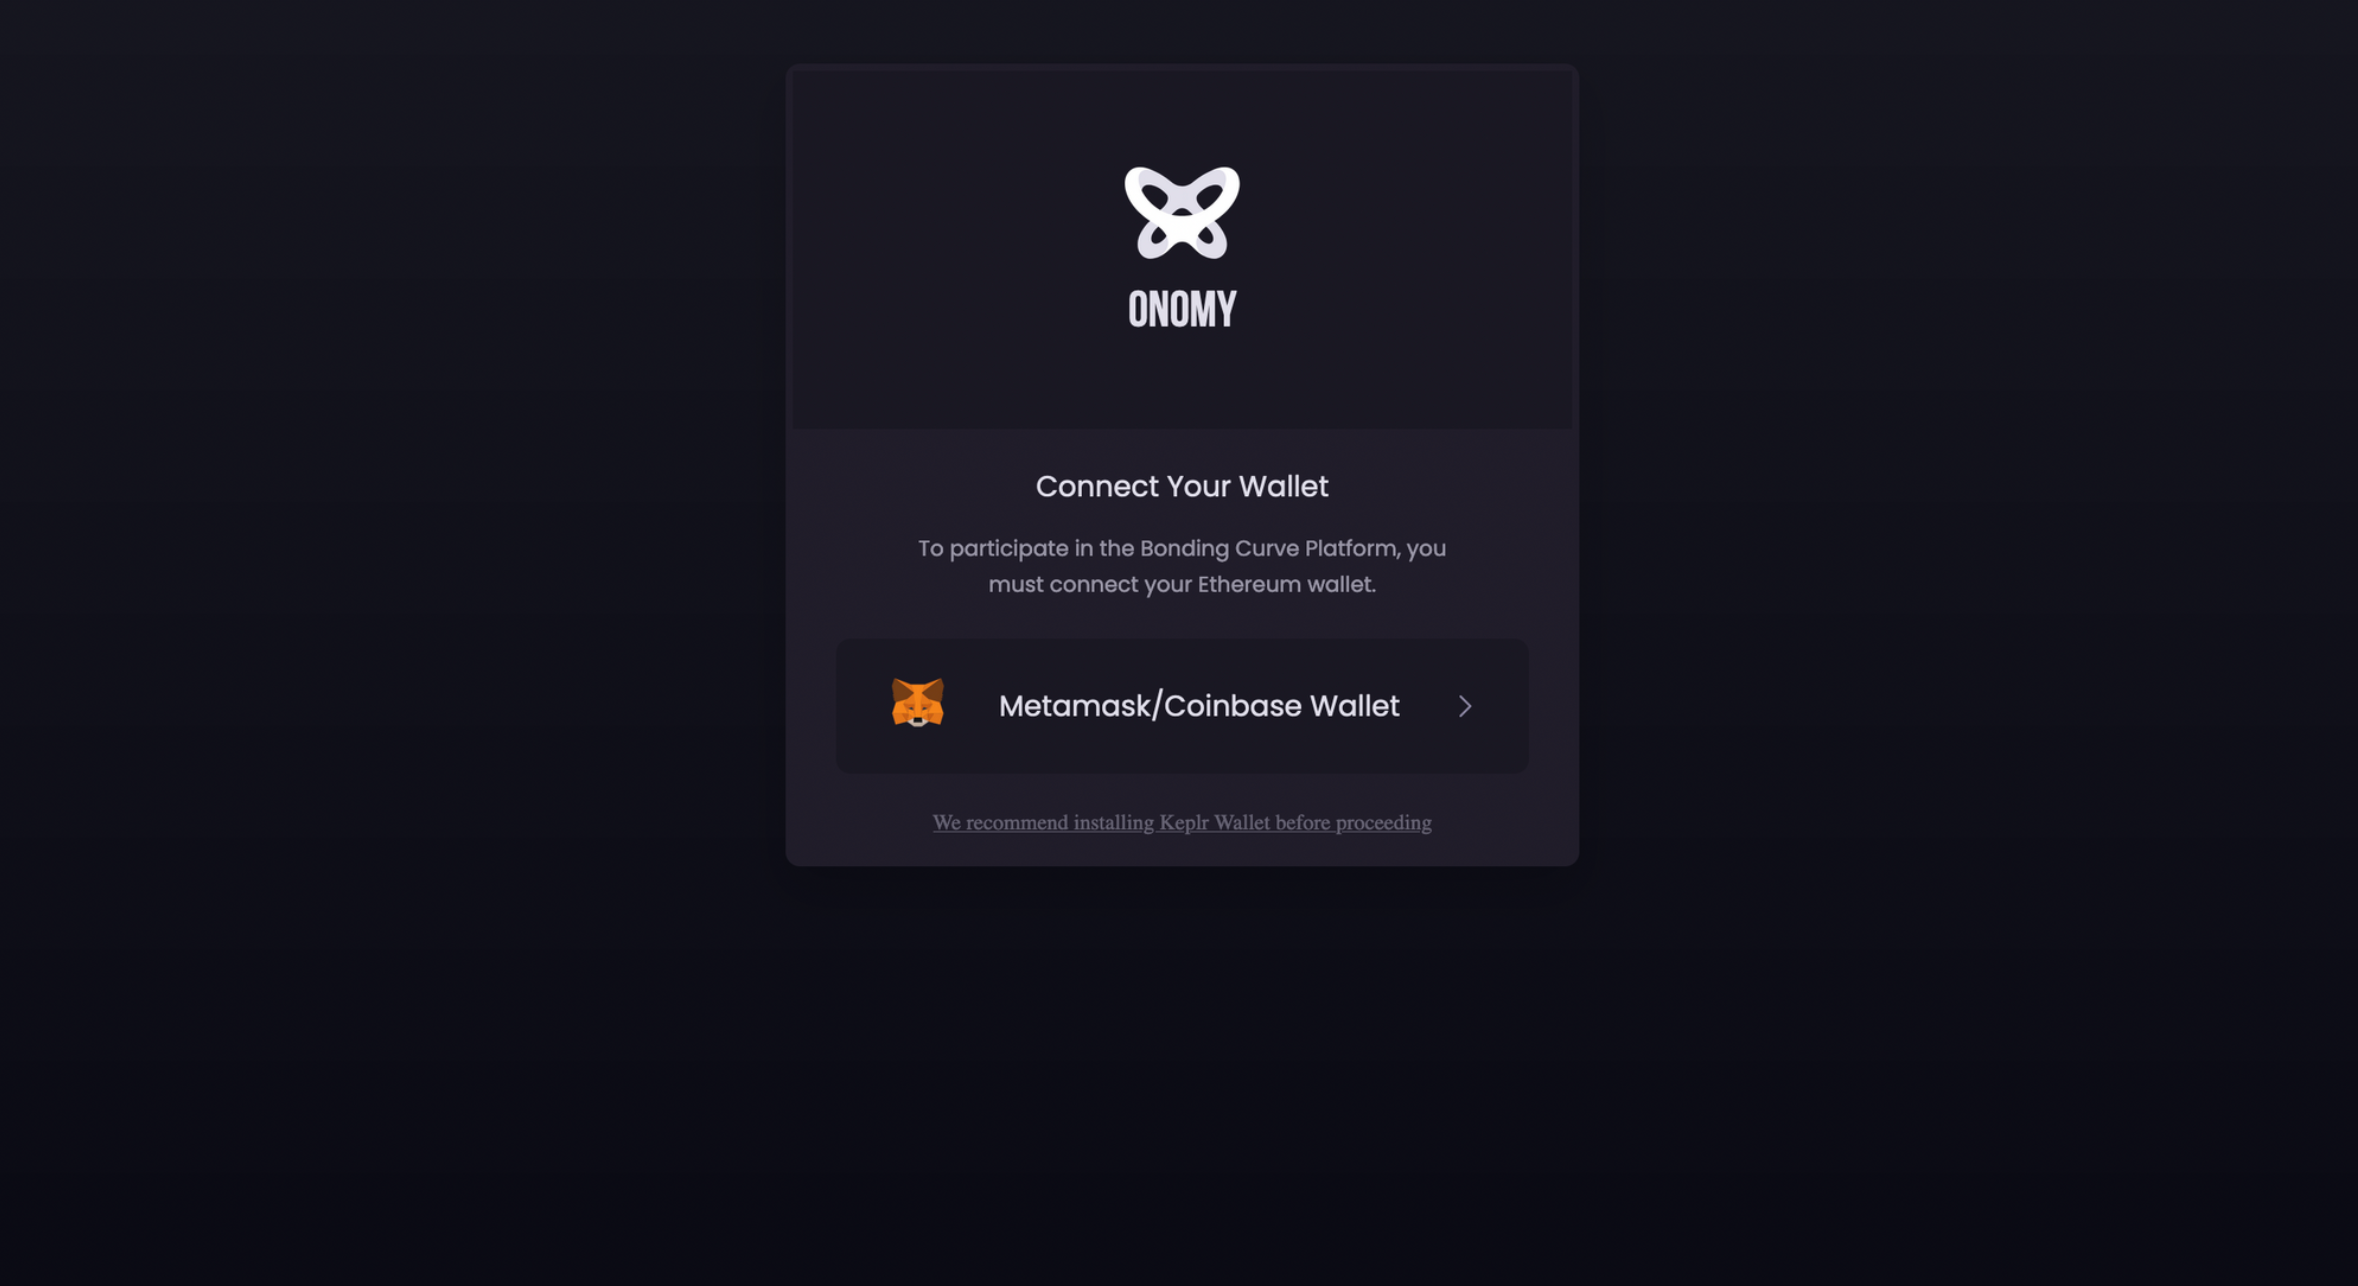
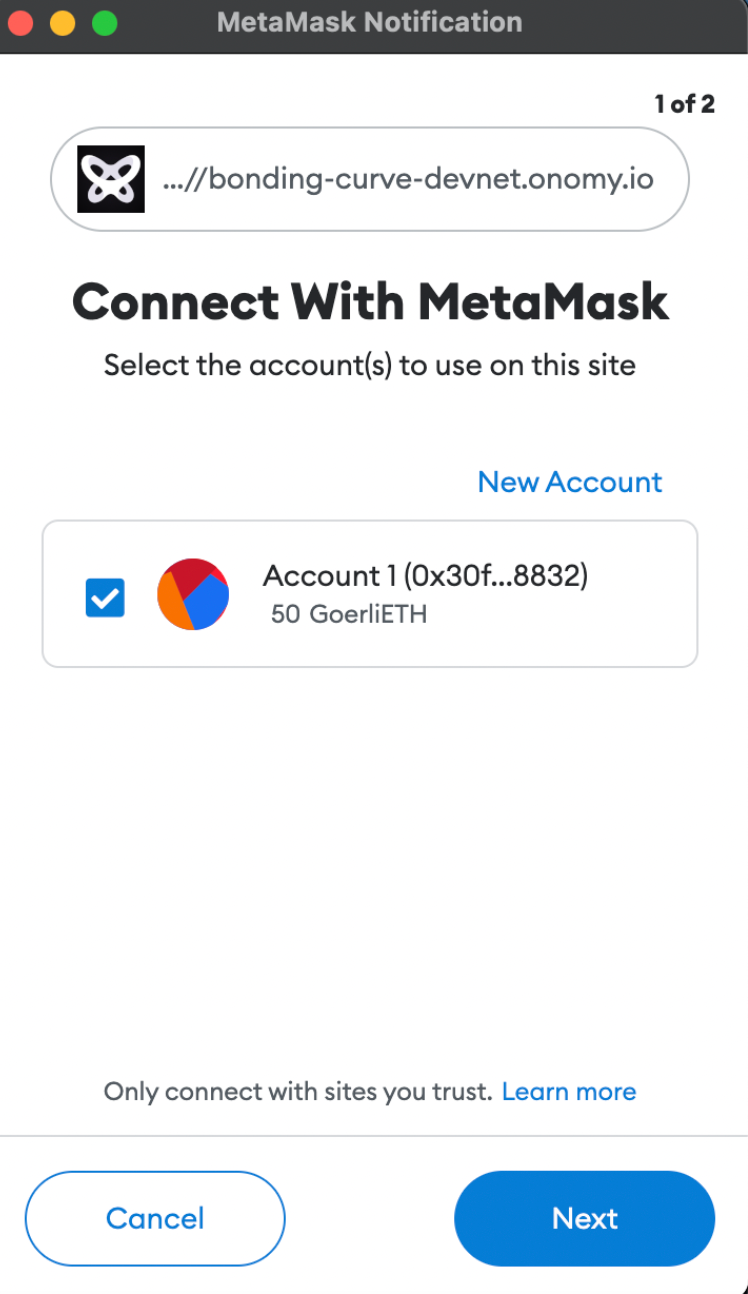
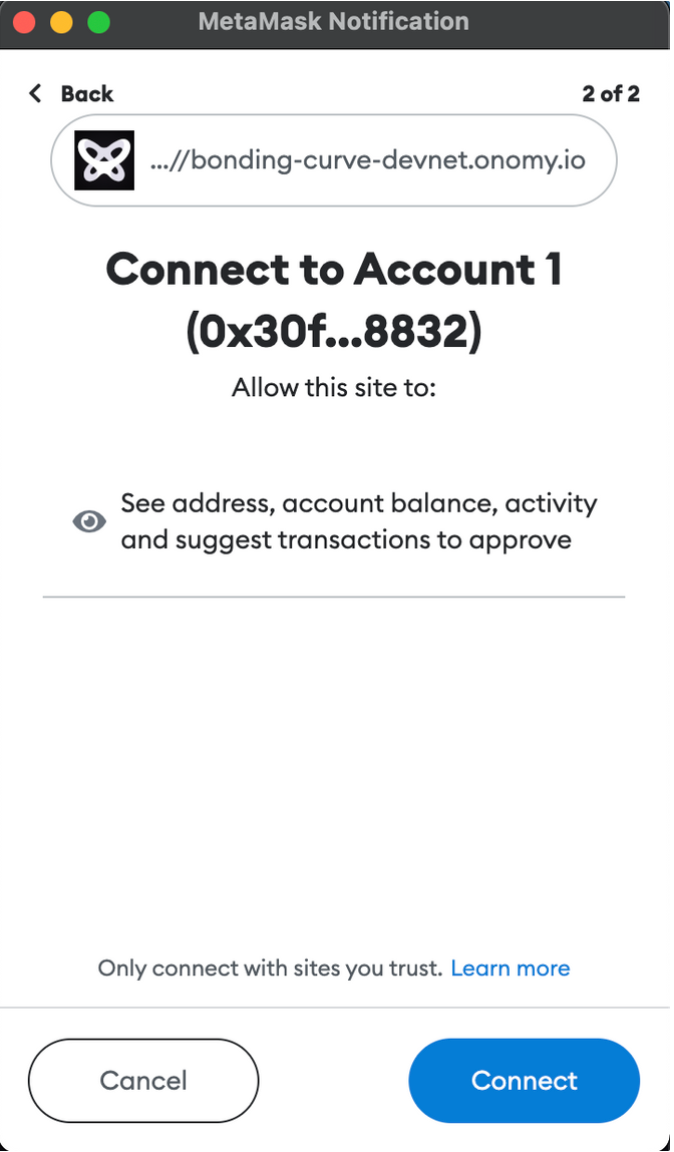
4) Logging into the Bonding Curve
- Access the Bonding Curve interface here.
- To connect your wallet, click on the Metamask prompt.


5) The On-Screen Bonding Curve Tutorial
Congrats! You’ve now logged into the Bonding Curve interface.
To use it, you must accept the disclaimers by ticking the box, and follow the on-screen tutorial that will guide you through the BCO’s features and tools.
Read it carefully and click on Next after understanding each step. Worry not, as the workflow to buy/sell, bridge, and stake are also outlined in this guide.


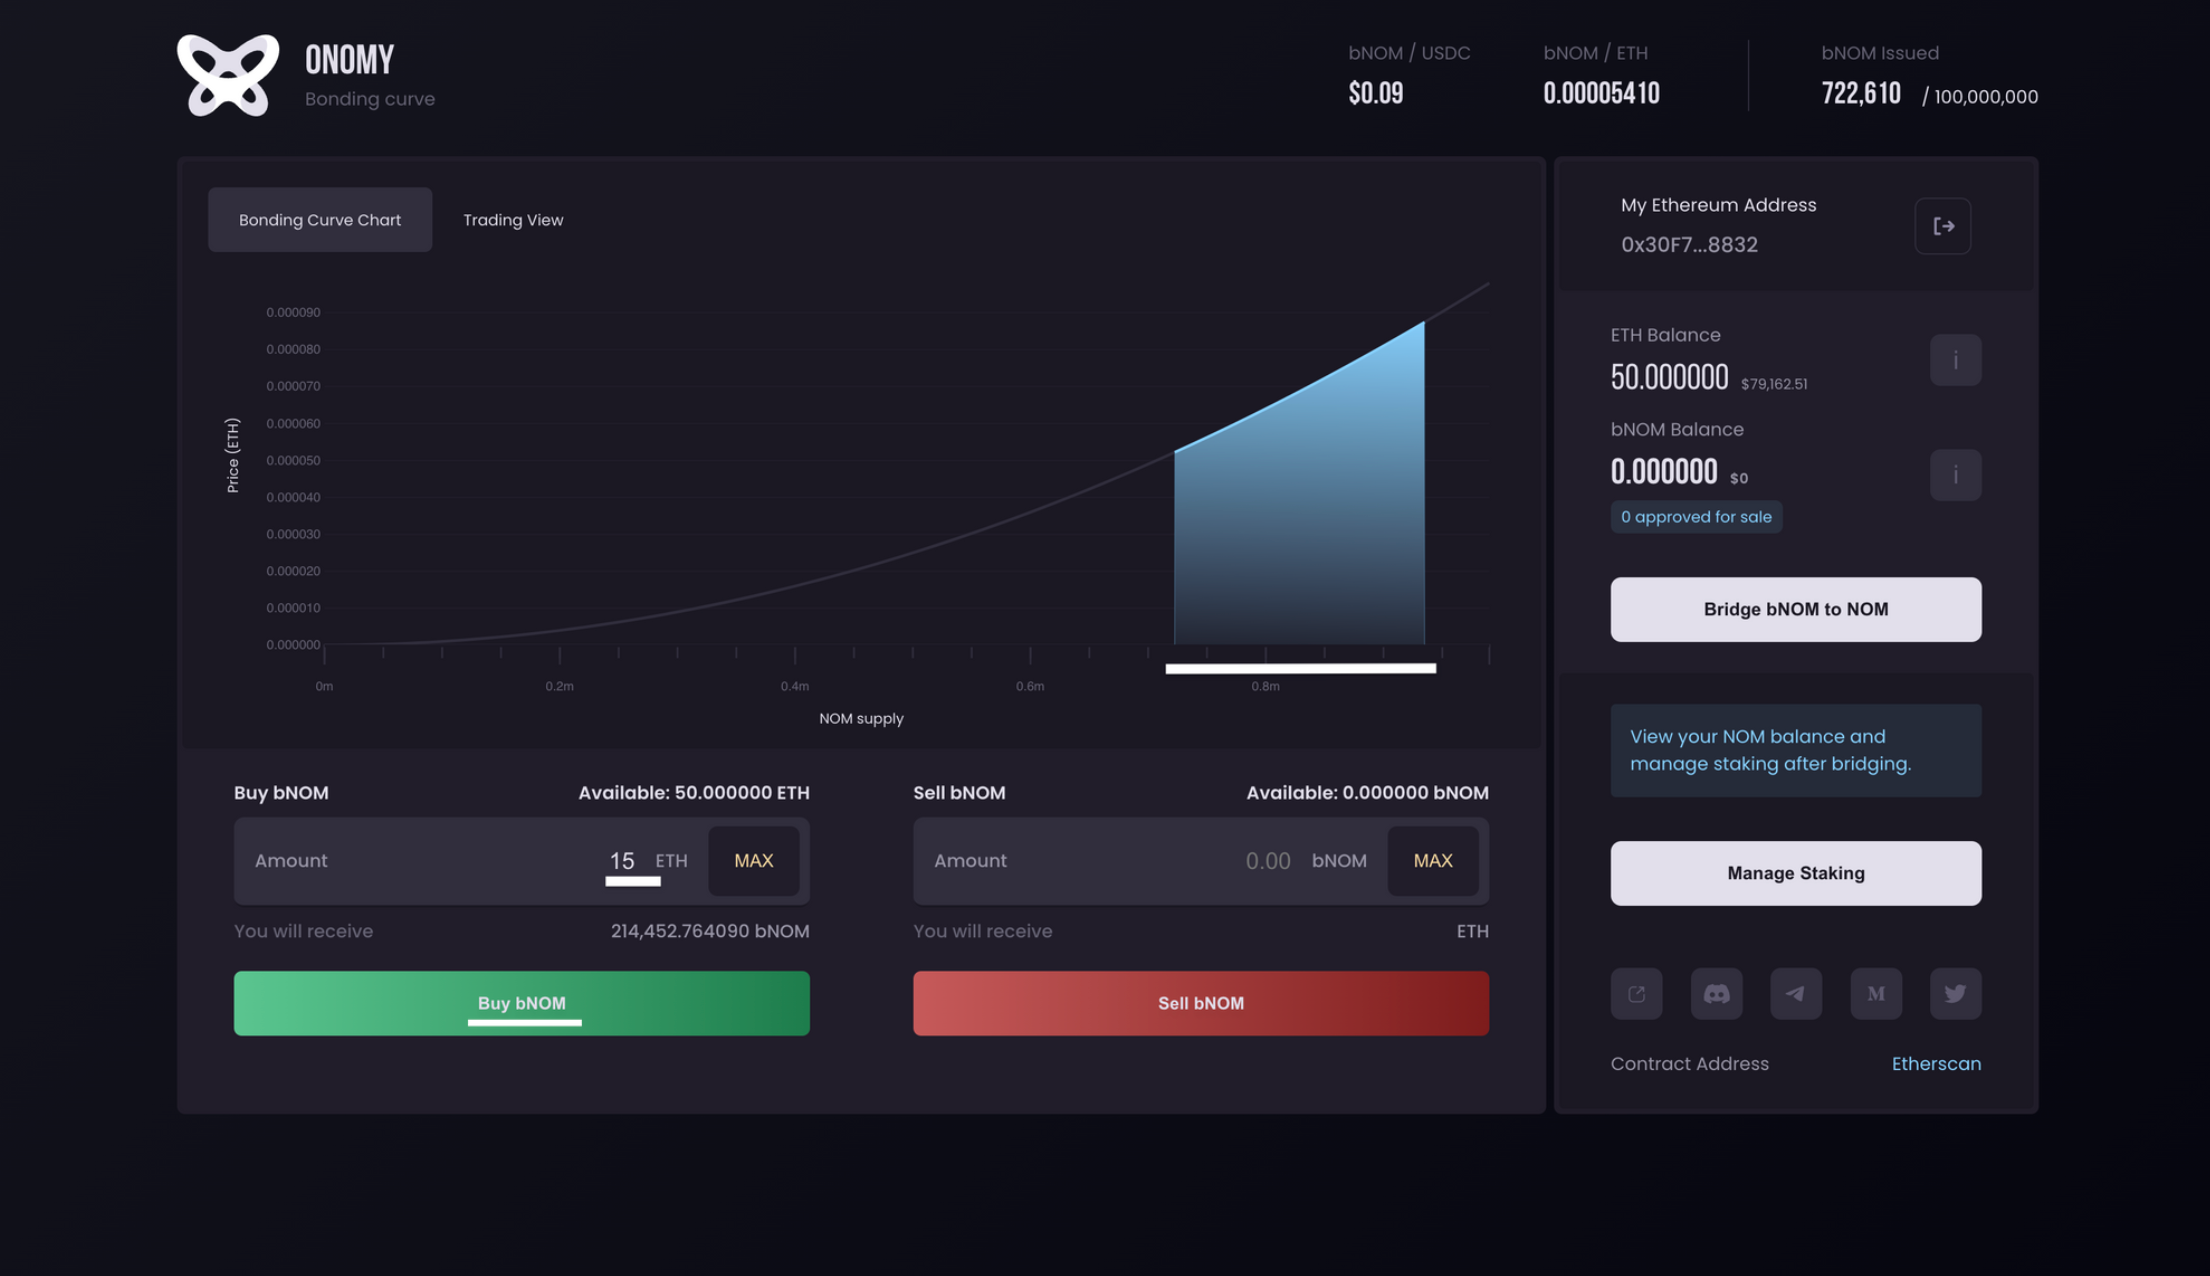
6) How to buy testnet bNOM
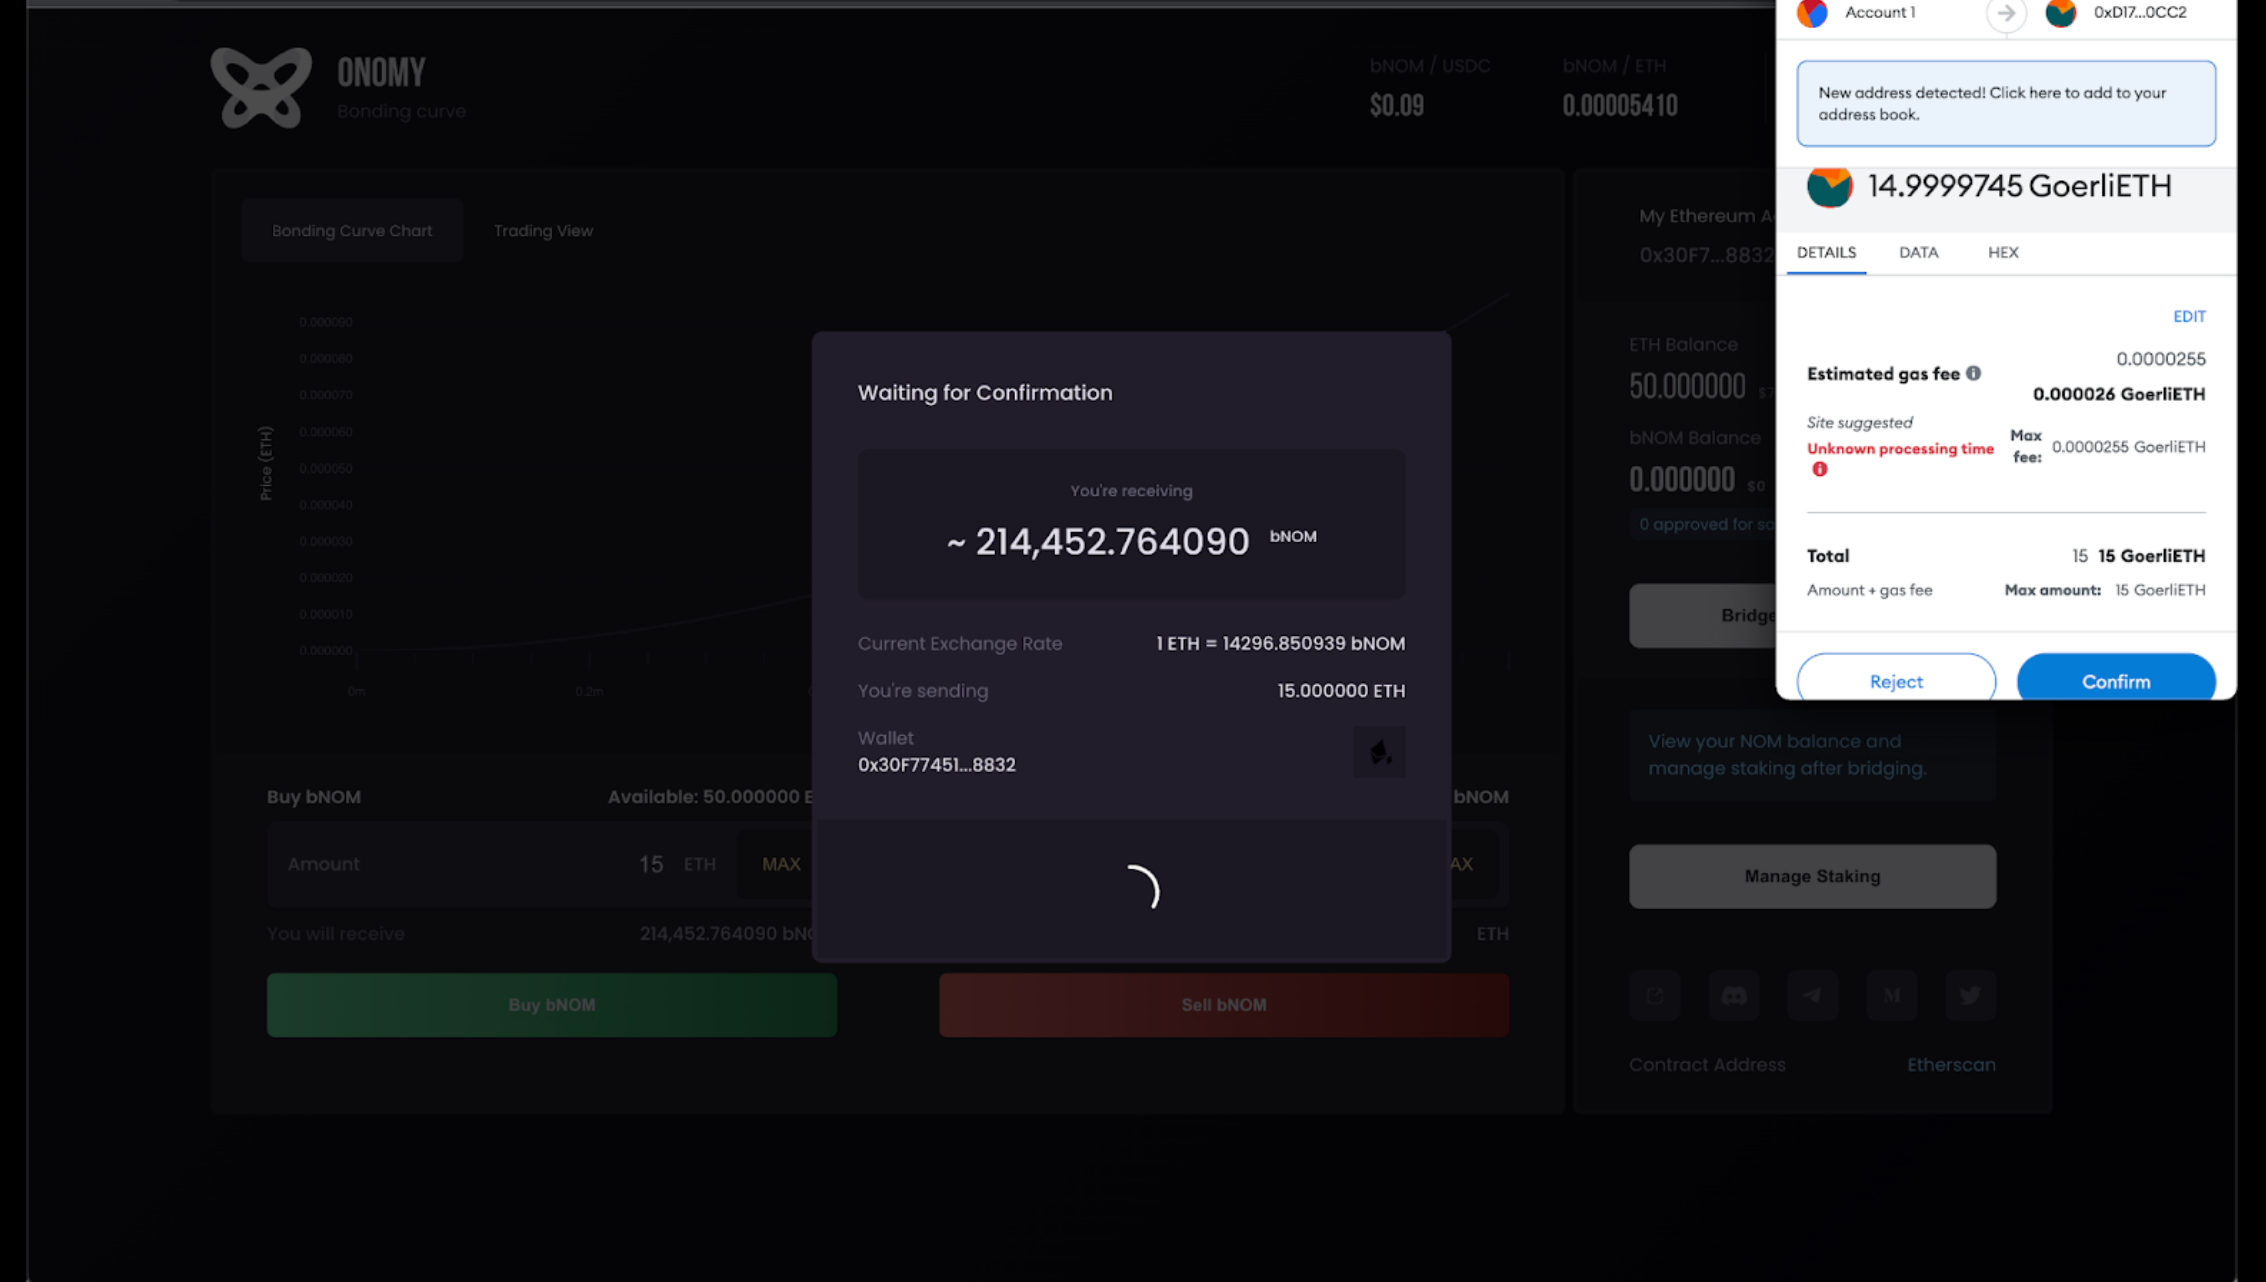
- In the Buy bNOM section, enter the amount of ETH you would like to spend - the interface will then show the amount of bNOM you will receive and highlight the section of the Bonding Curve that you are purchasing from. Read this to understand how the Bonding Curve prices bNOM in relation to ETH.
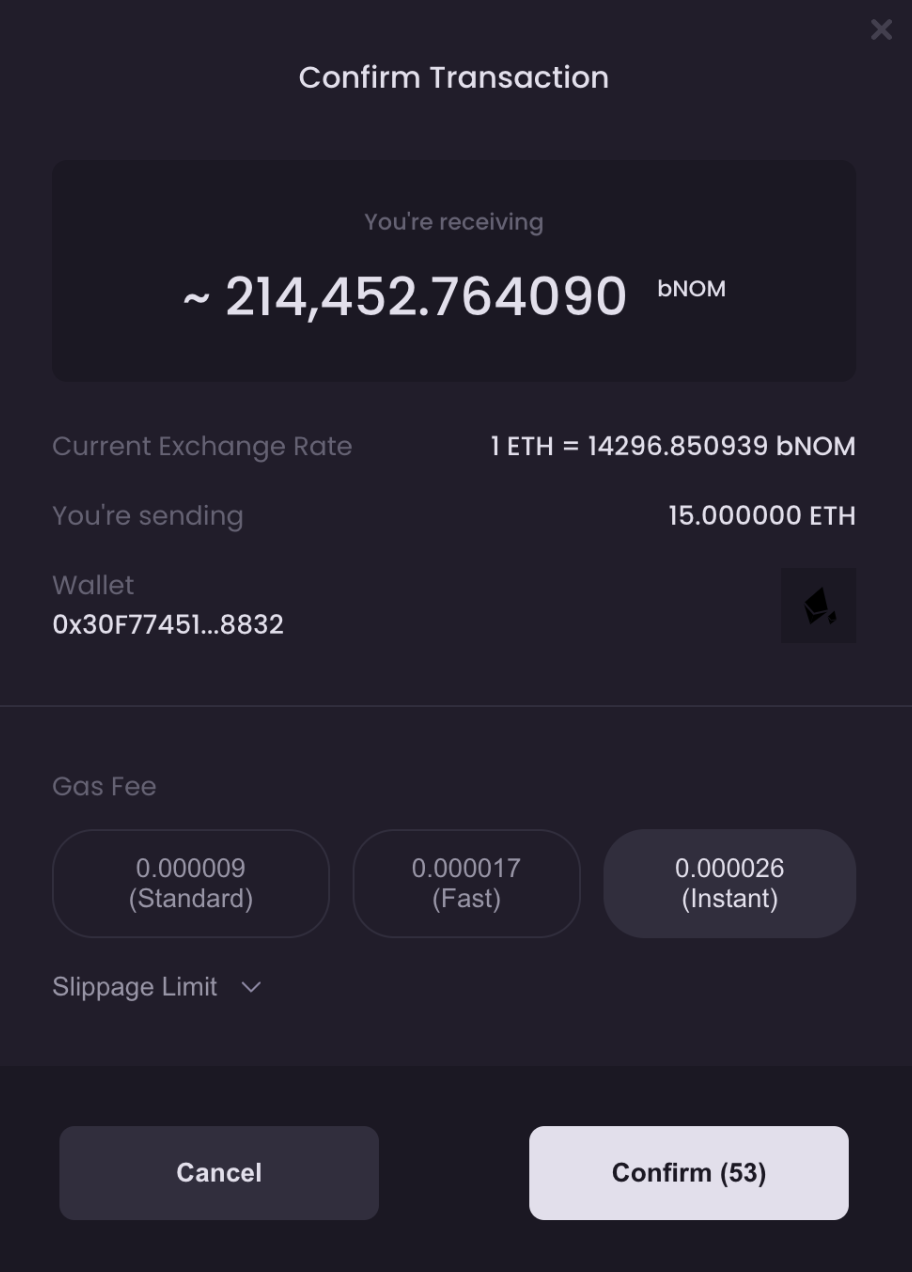
- Confirm your transaction via the interface pop up - here, you’ll once again see the current exchange rate, the amount of ETH you are spending, the approximate amount of bNOM you will receive, and the gas fee. You’re also able to set a slippage rate should you desire - when the BCO is in high demand, the price might ‘slip’, so if you’d like to make sure that your transaction goes through regardless of pending TXs that may slightly influence the price, set a higher slippage limit.
Once you are ready, click on confirm.
- Теперь вам предлагается подтвердить транзакцию через кошелек Metamask. Просто нажмите «Подтвердить » , чтобы продолжить.
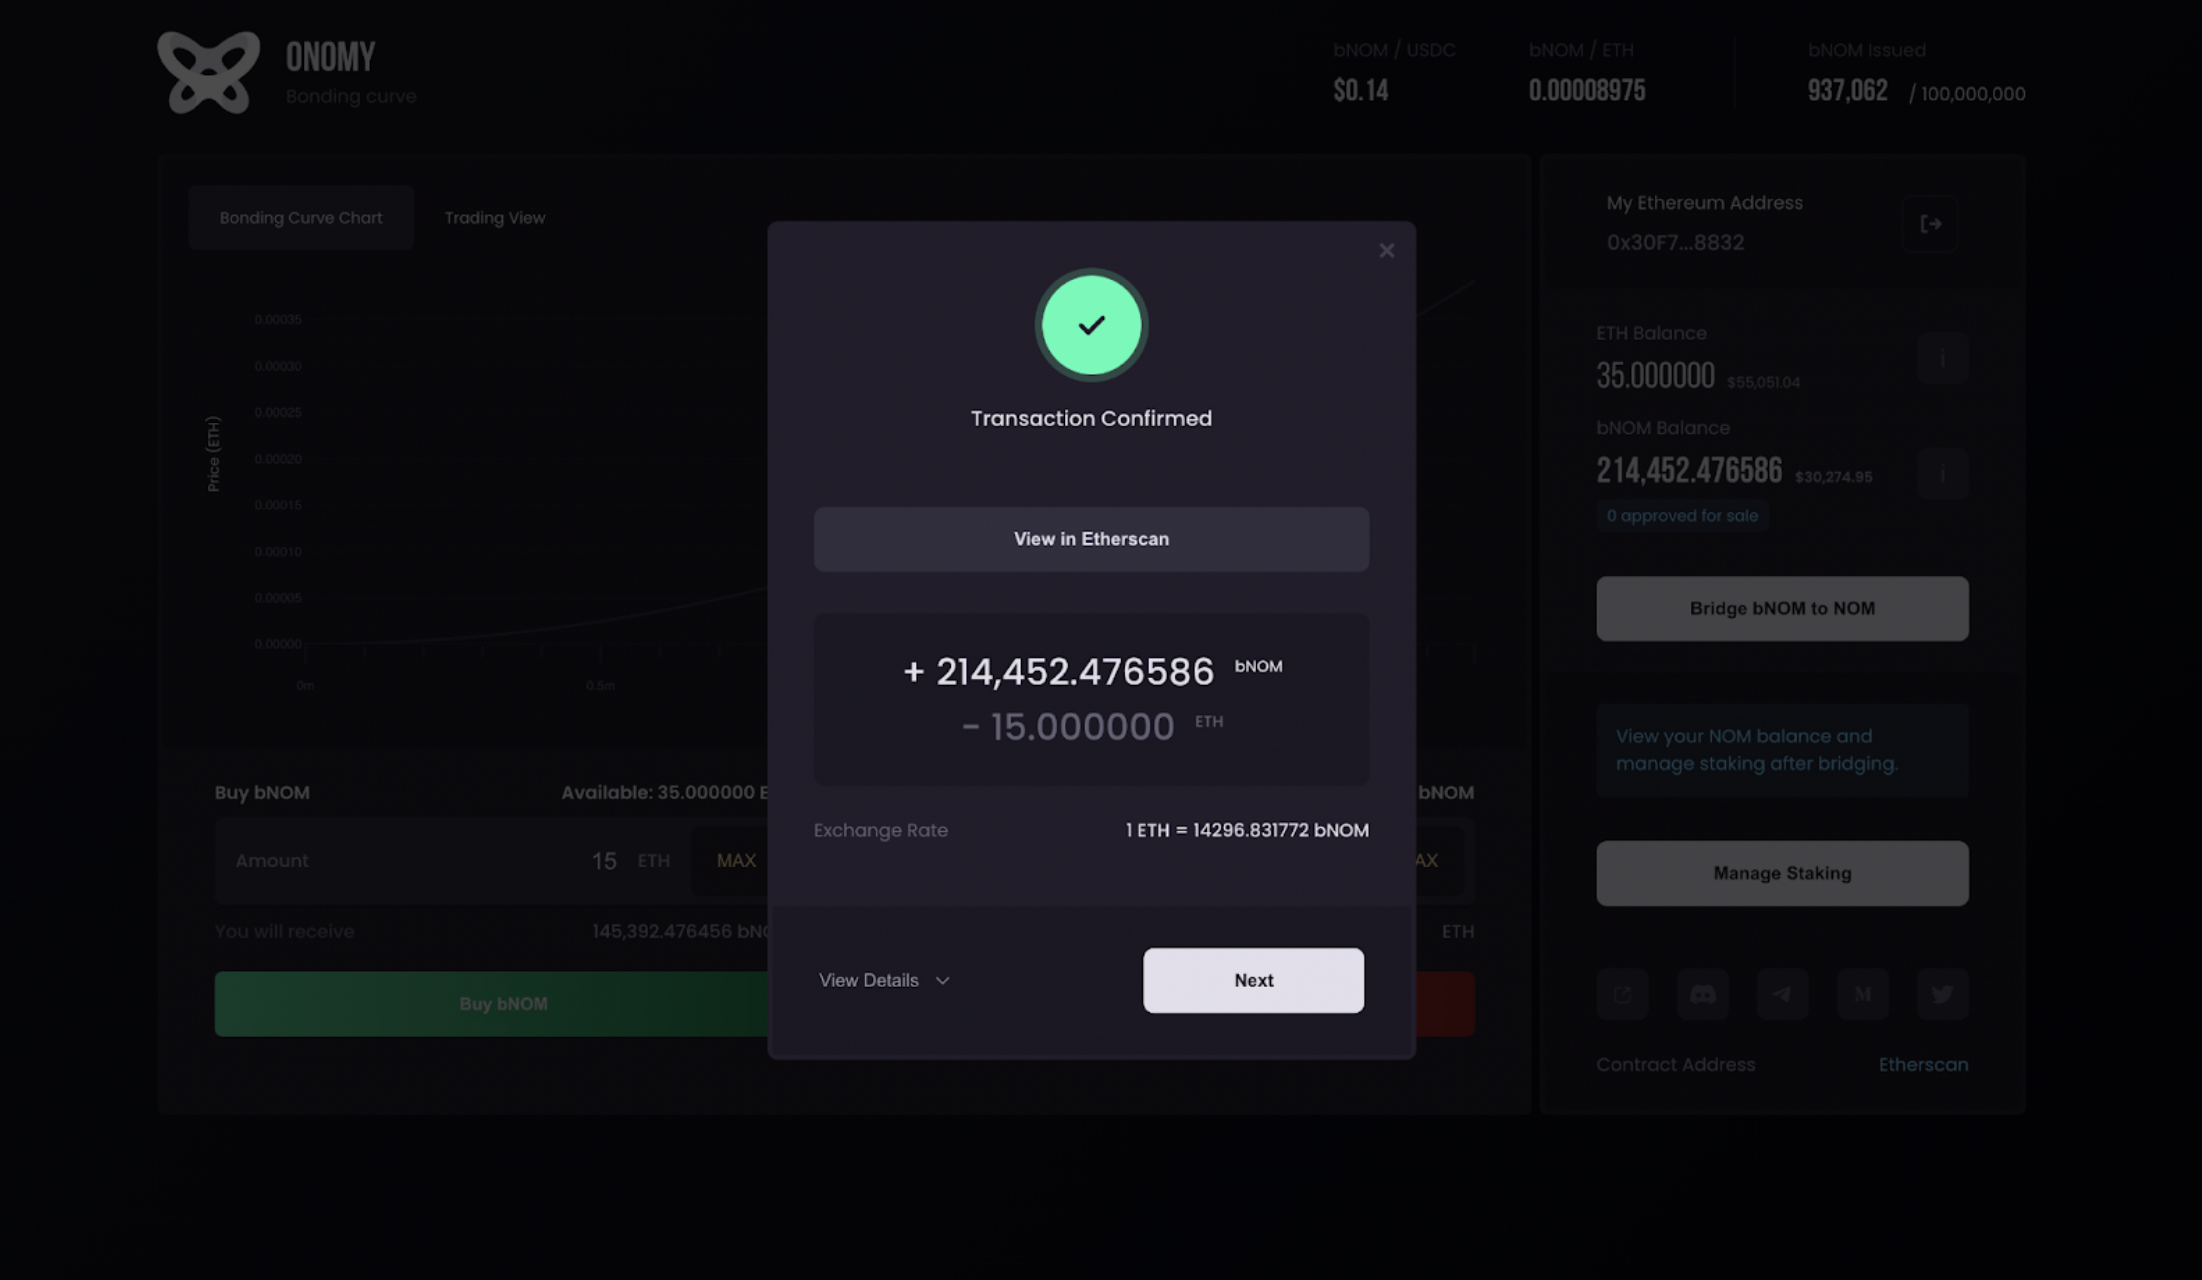
- If you’ve done everything right up to this point, the transaction should confirm within a few minutes. Keep in mind that transactions might fail due to gas rates or slippage limits. If so, simply try again. If your transaction was successful, you should see this confirmation.
Your balance should now reflect the amount of bNOM that you have purchased. The same process can be followed to sell your bNOM back to the Bonding Curve, with you needing to approve the transactions via Metamask. Mind that you’re only able to sell bNOM that has not yet been bridged to the Onomy Network via the Bonding Curve interface.
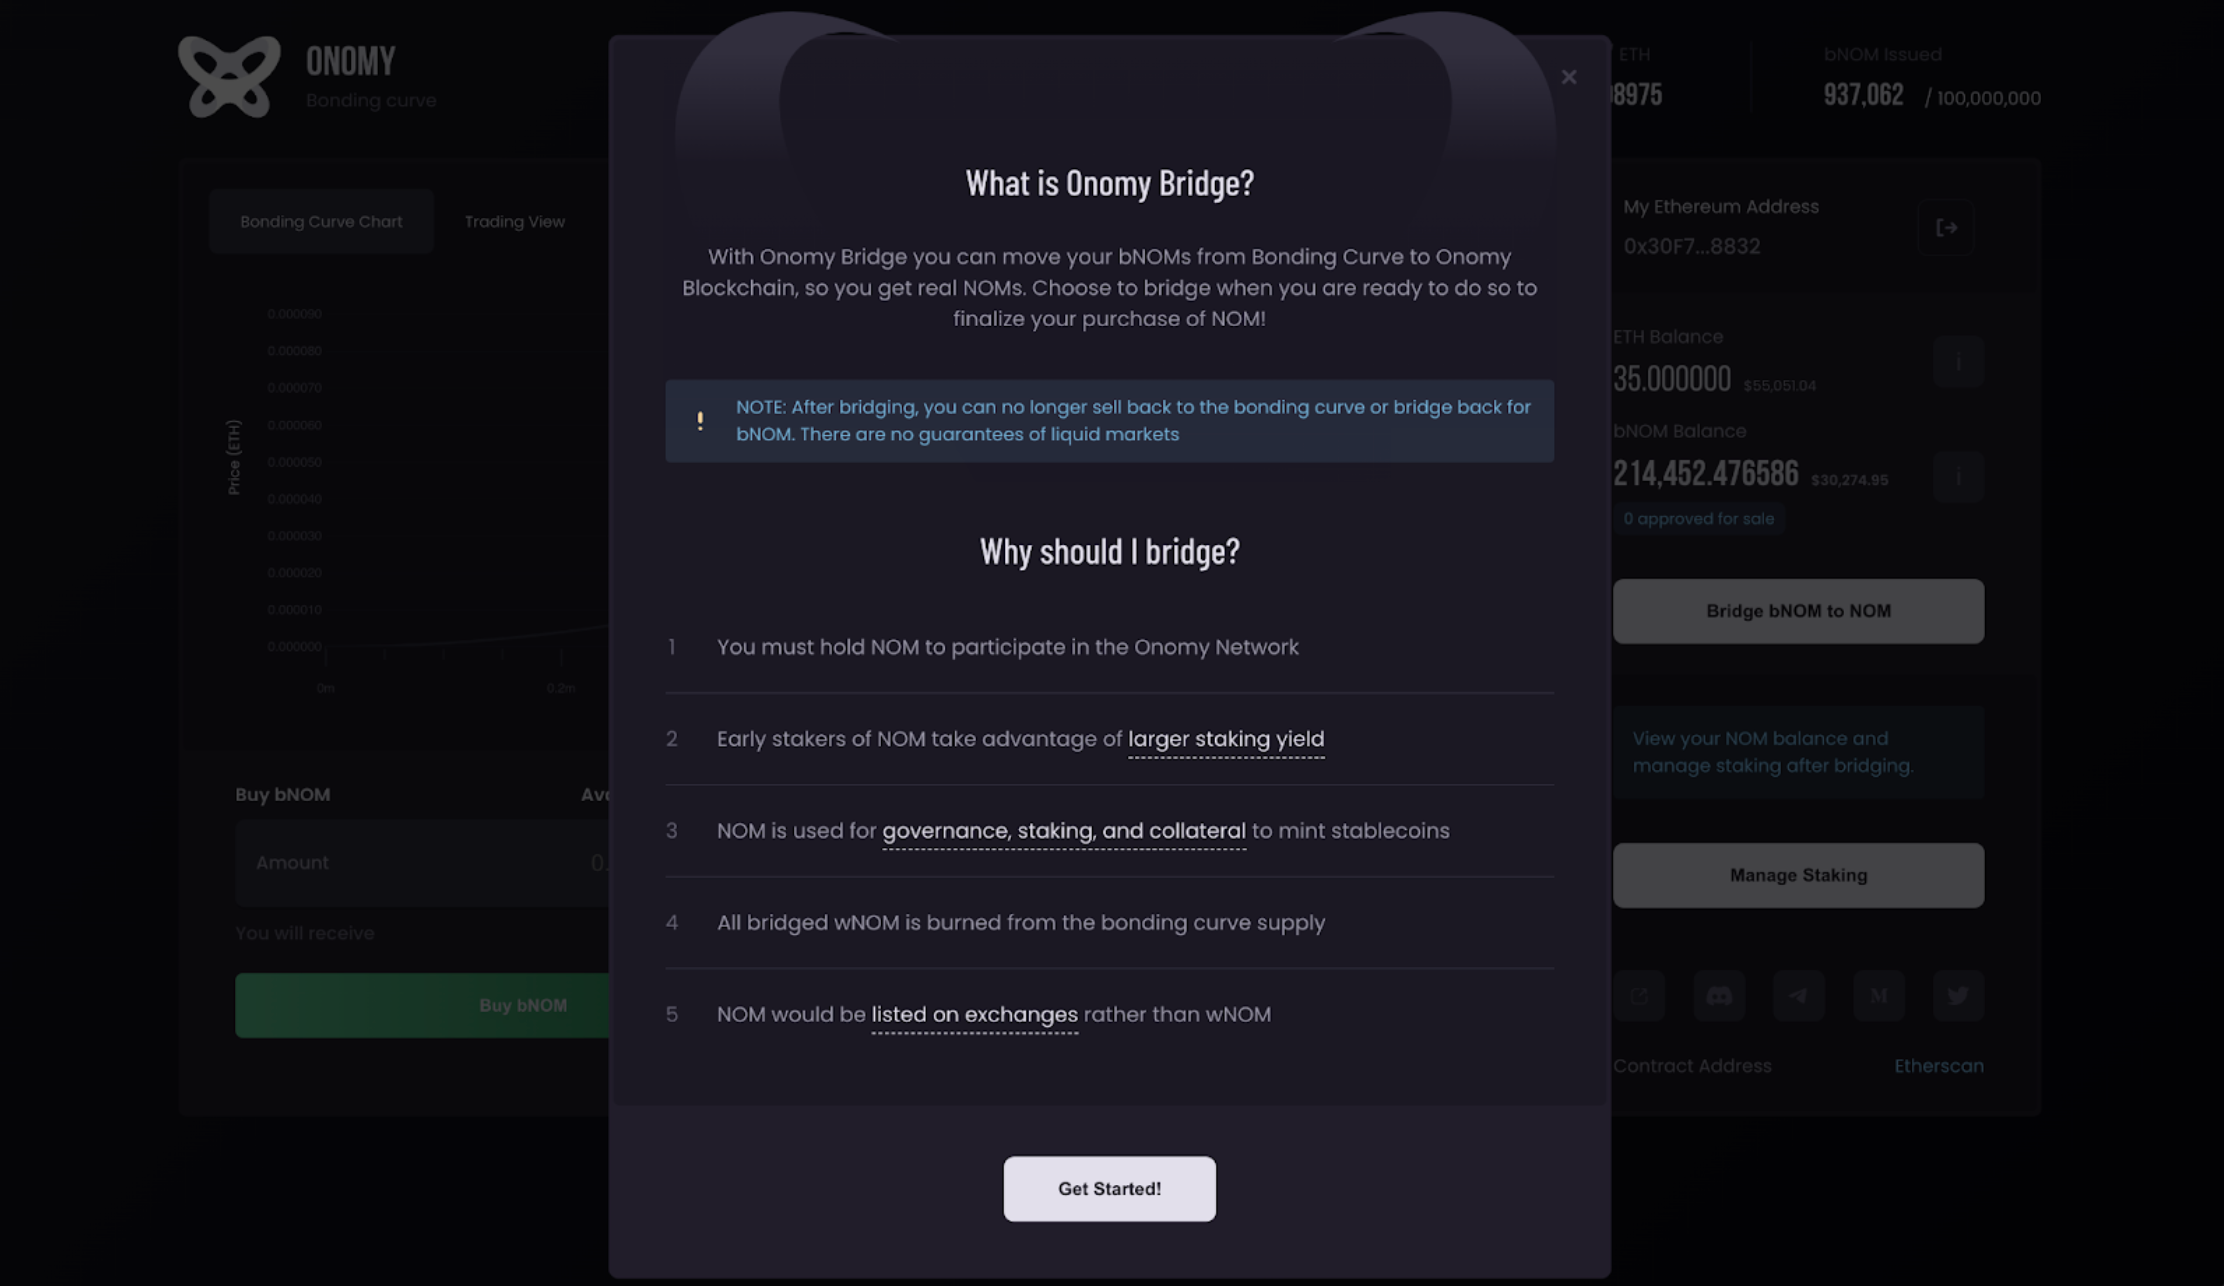
- После того, как вы нажмете « Далее», вам будет предложено открыть окно, которое позволит вам связать ваш bNOM с сетью Onomy, где вы сможете делегировать (застейкать) свой bNOM, связав его с валидатором. В основной сети мост разблокирует утилиту, представленную в нашей документации .
Read the terms associated with bridging. If you’re ready to move forward, click on Get Started. If you’d rather bridge later, you may simply close the prompt (upper-right corner X button).
7) How to bridge testnet bNOM to the Onomy Network
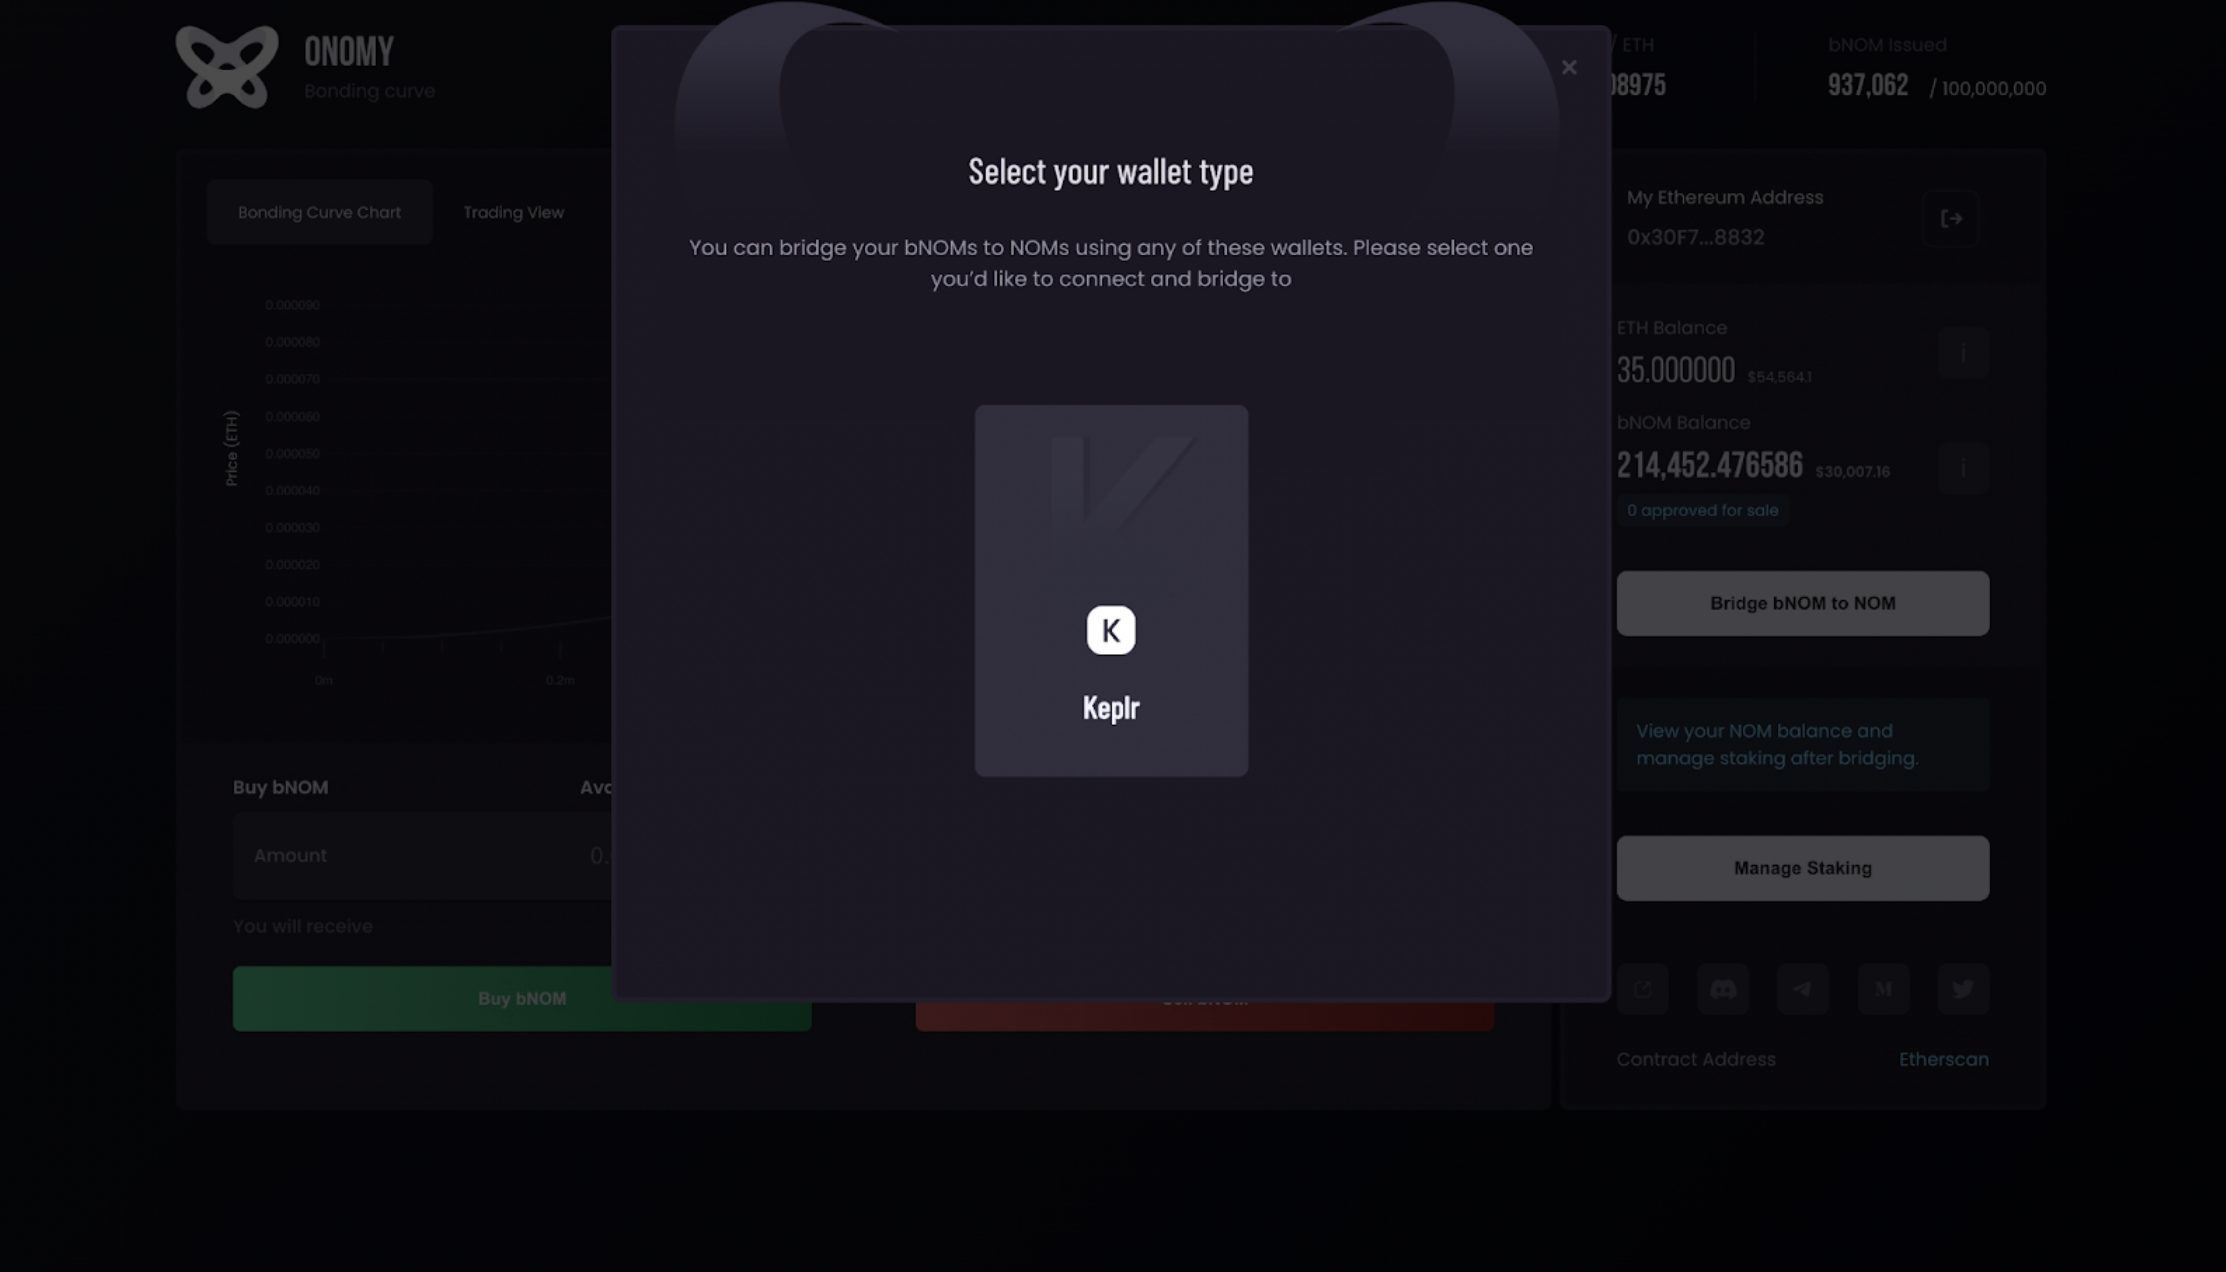
- If you haven’t exited the Bridge interface that popped up, simply click on Get Started.
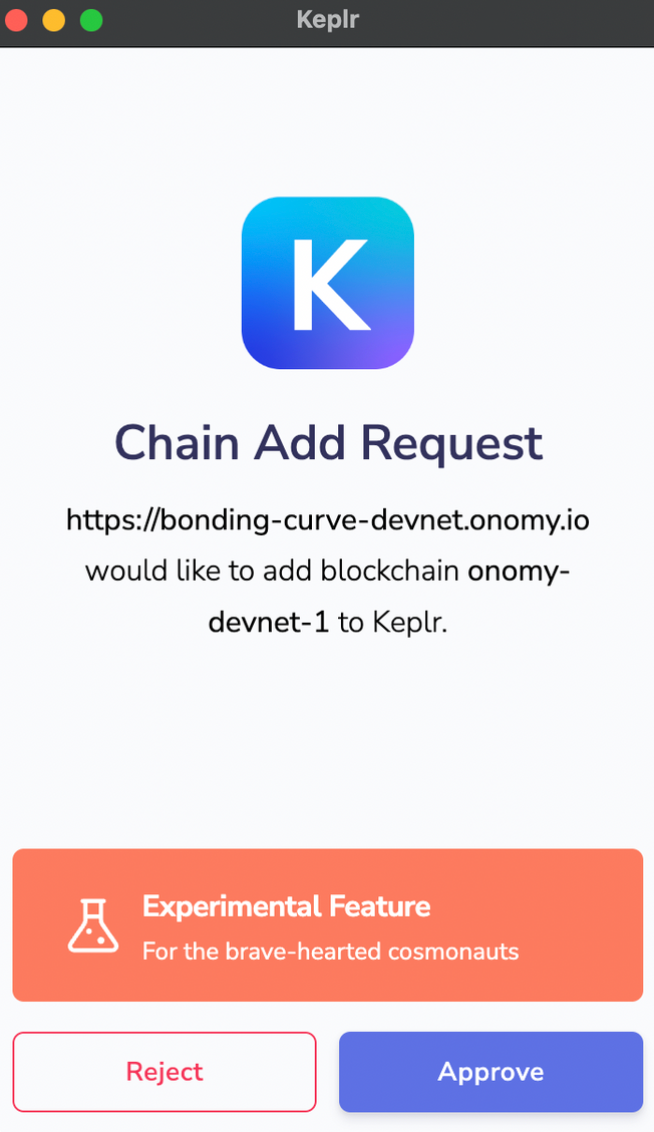
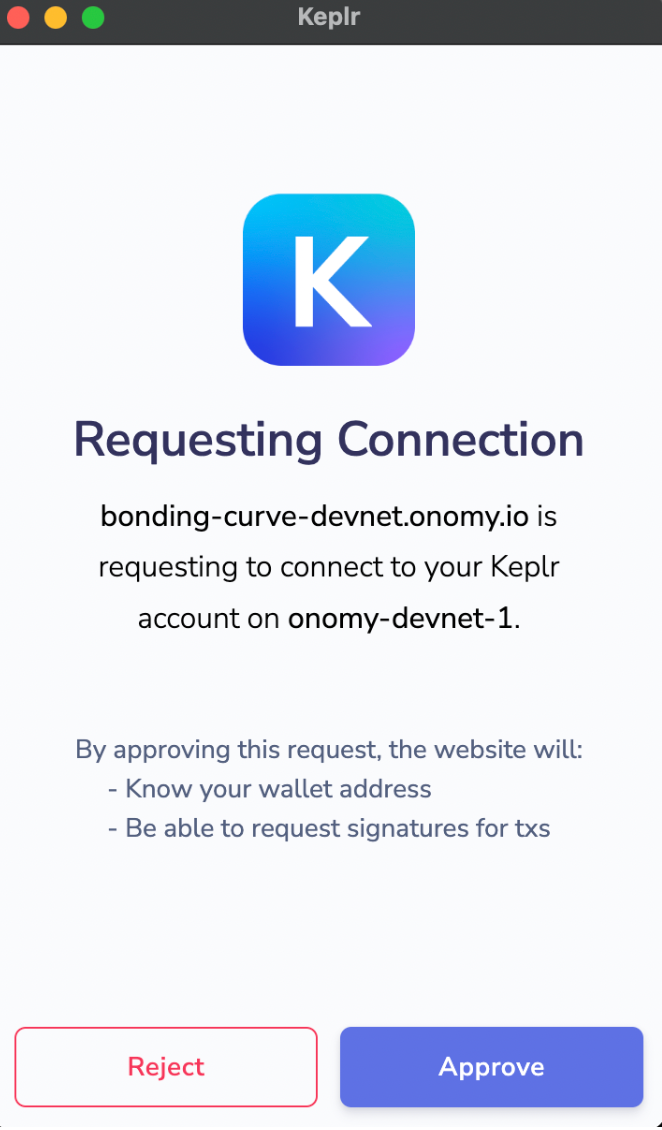
- You will now be prompted to connect your Keplr Cosmos wallet to the BCO interYour Keplr wallet will now be promoted so that the Onomy Network testnet can be automatically added to your wallet. Simply click on Approve.

- Затем Keplr предложит вам подключиться к кривой связи Ономи. Нажмите « Подтвердить» , чтобы войти в интерфейс моста!
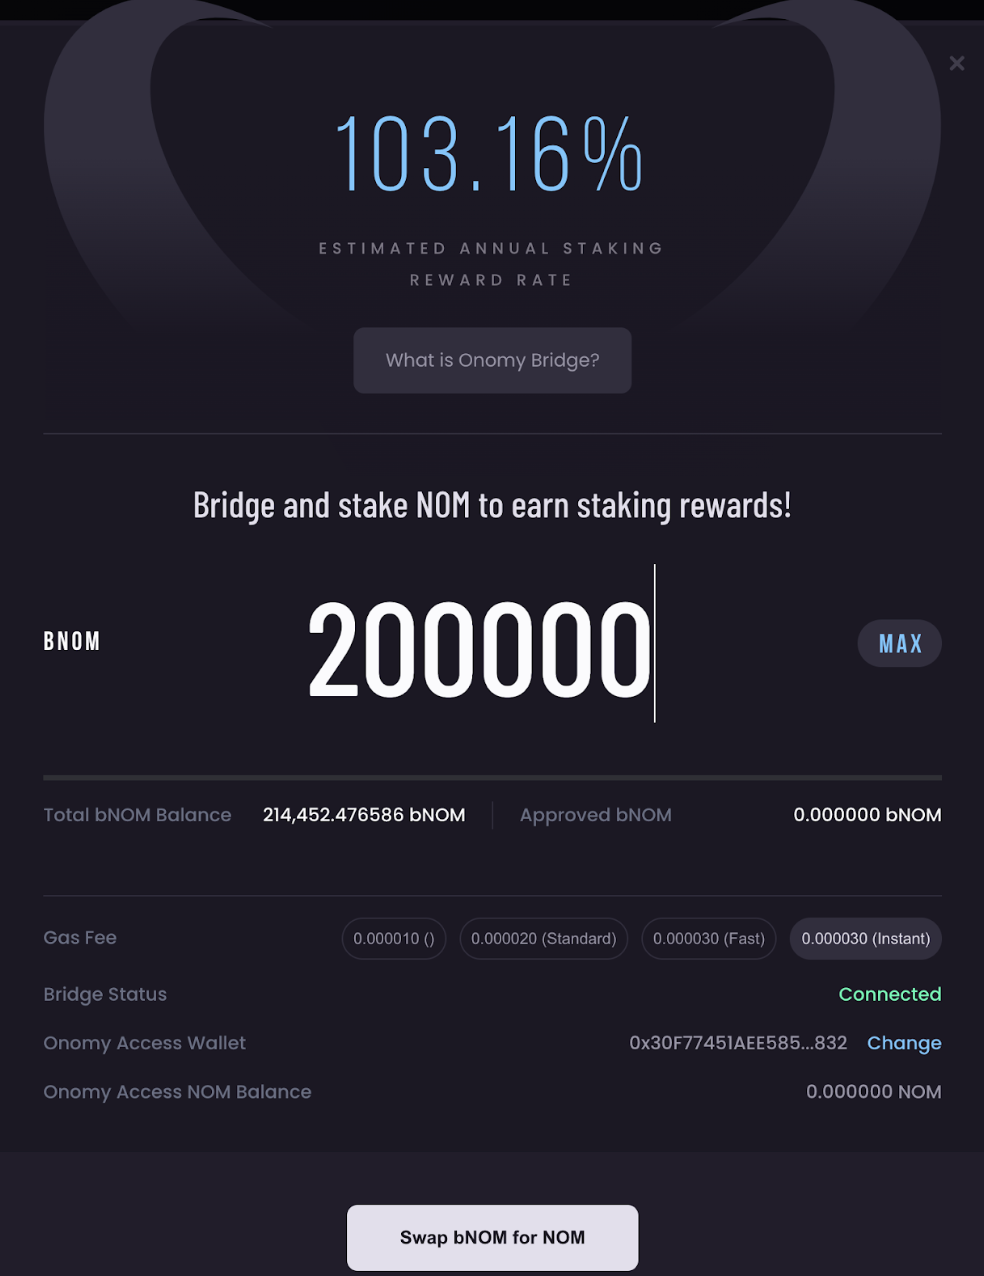
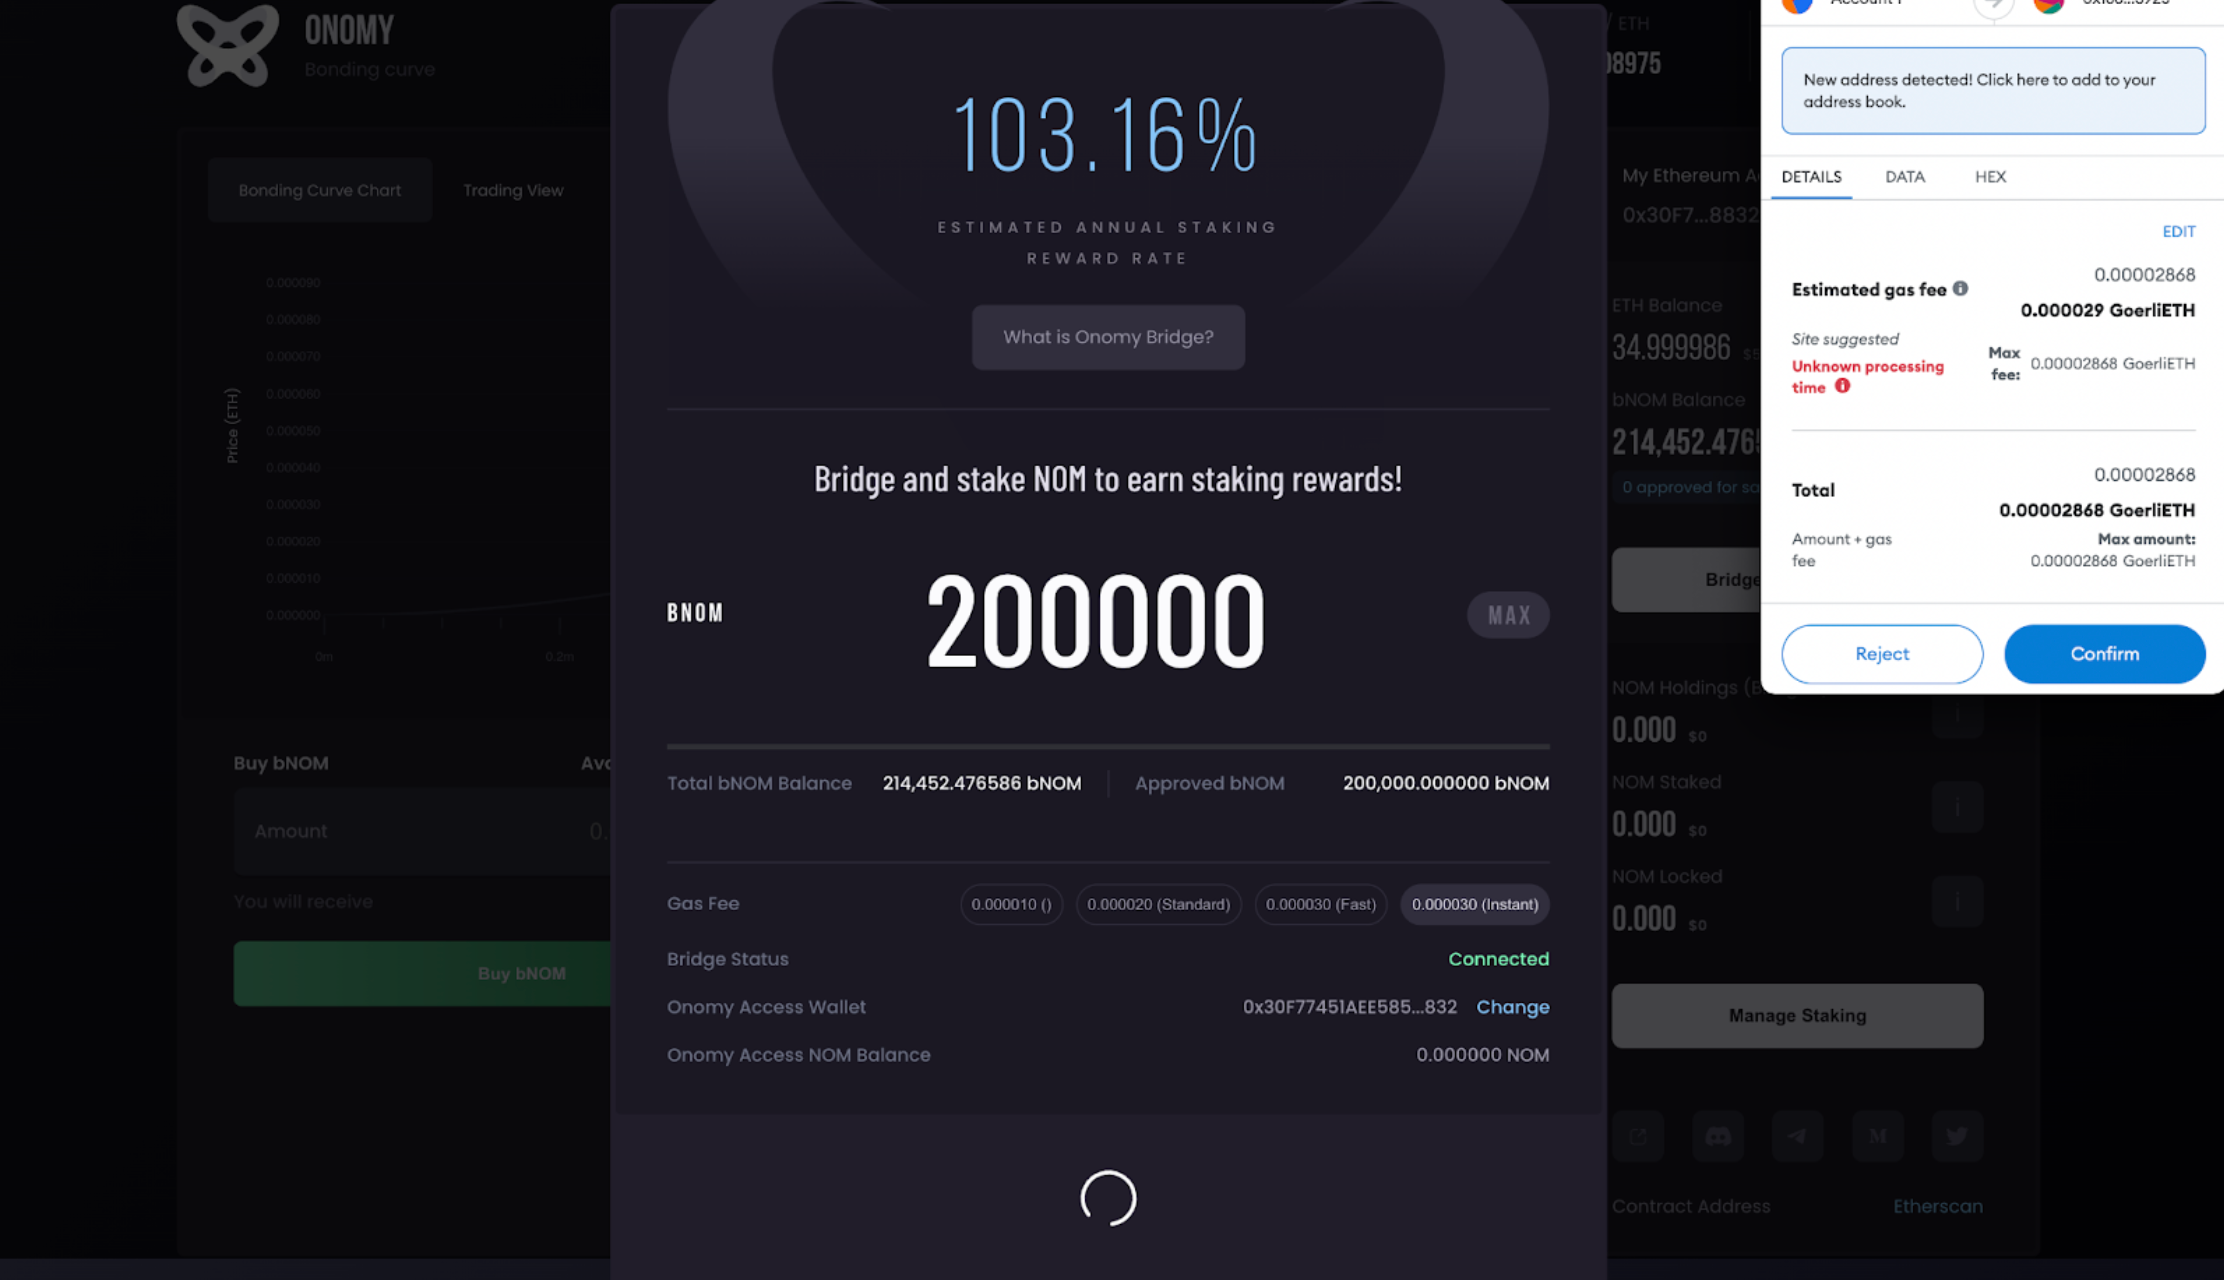
- Inside the Bridging Interface, enter the amount of bNOM you would like to swap for NOM deployed natively on the Onomy Network testnet.
Once you’ve entered the amount, click Swap bNOM for NOM.
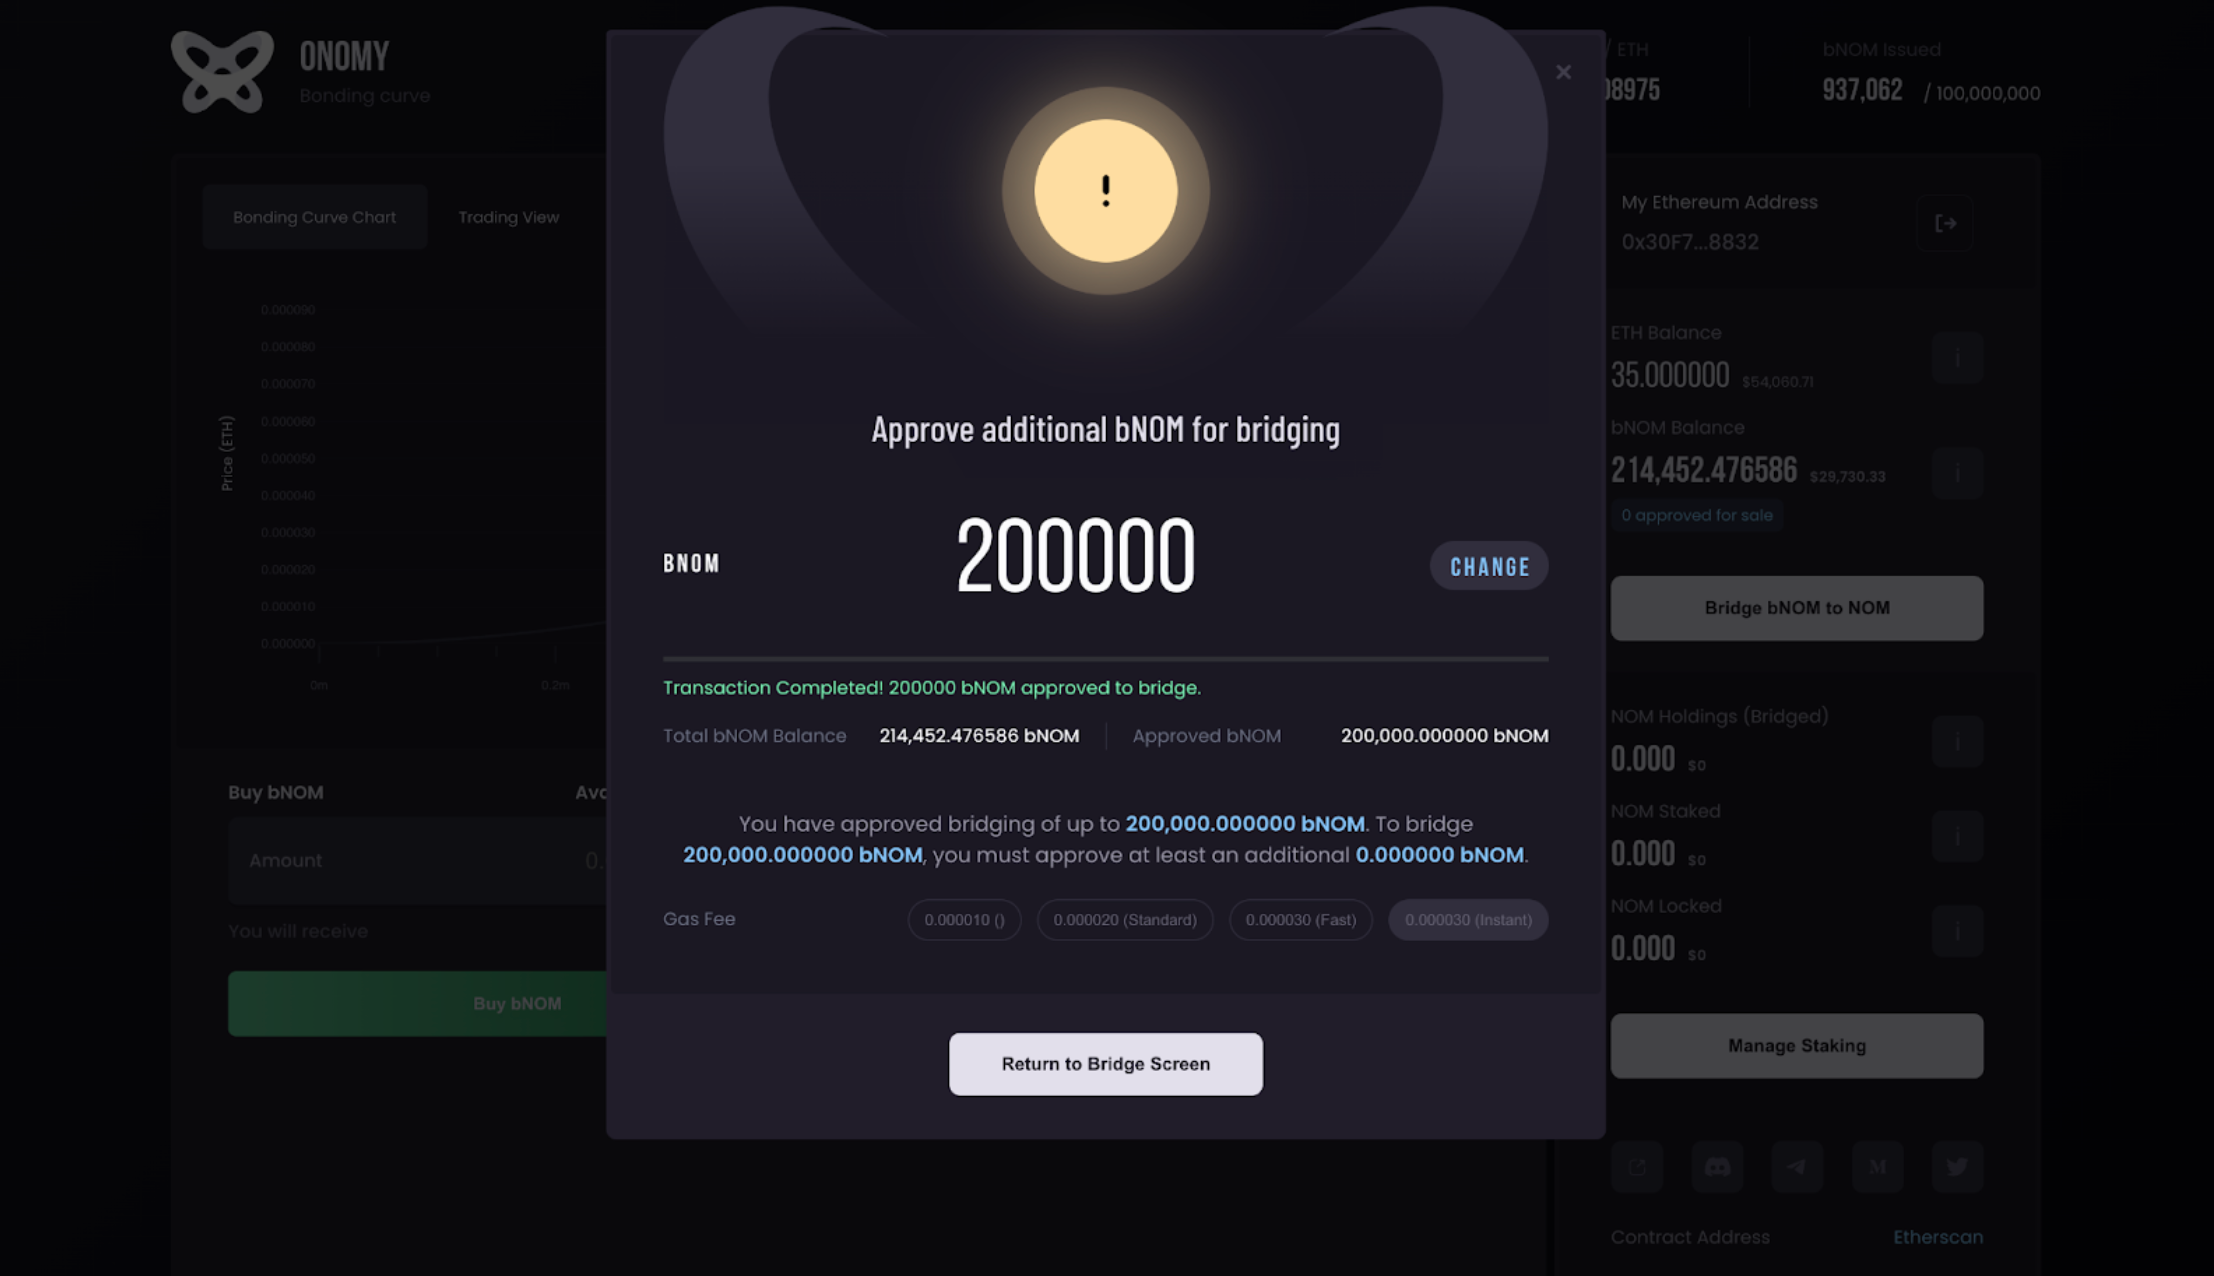
- The Bonding Curve interface and Metamask will now prompt you to approve the spending limit (the amount of bNOM that the contract will swap for NOM).
- On the Bonding Curve prompt, click on Approve for Bridging.
- On the follow-up Metamask prompt, click on Confirm.

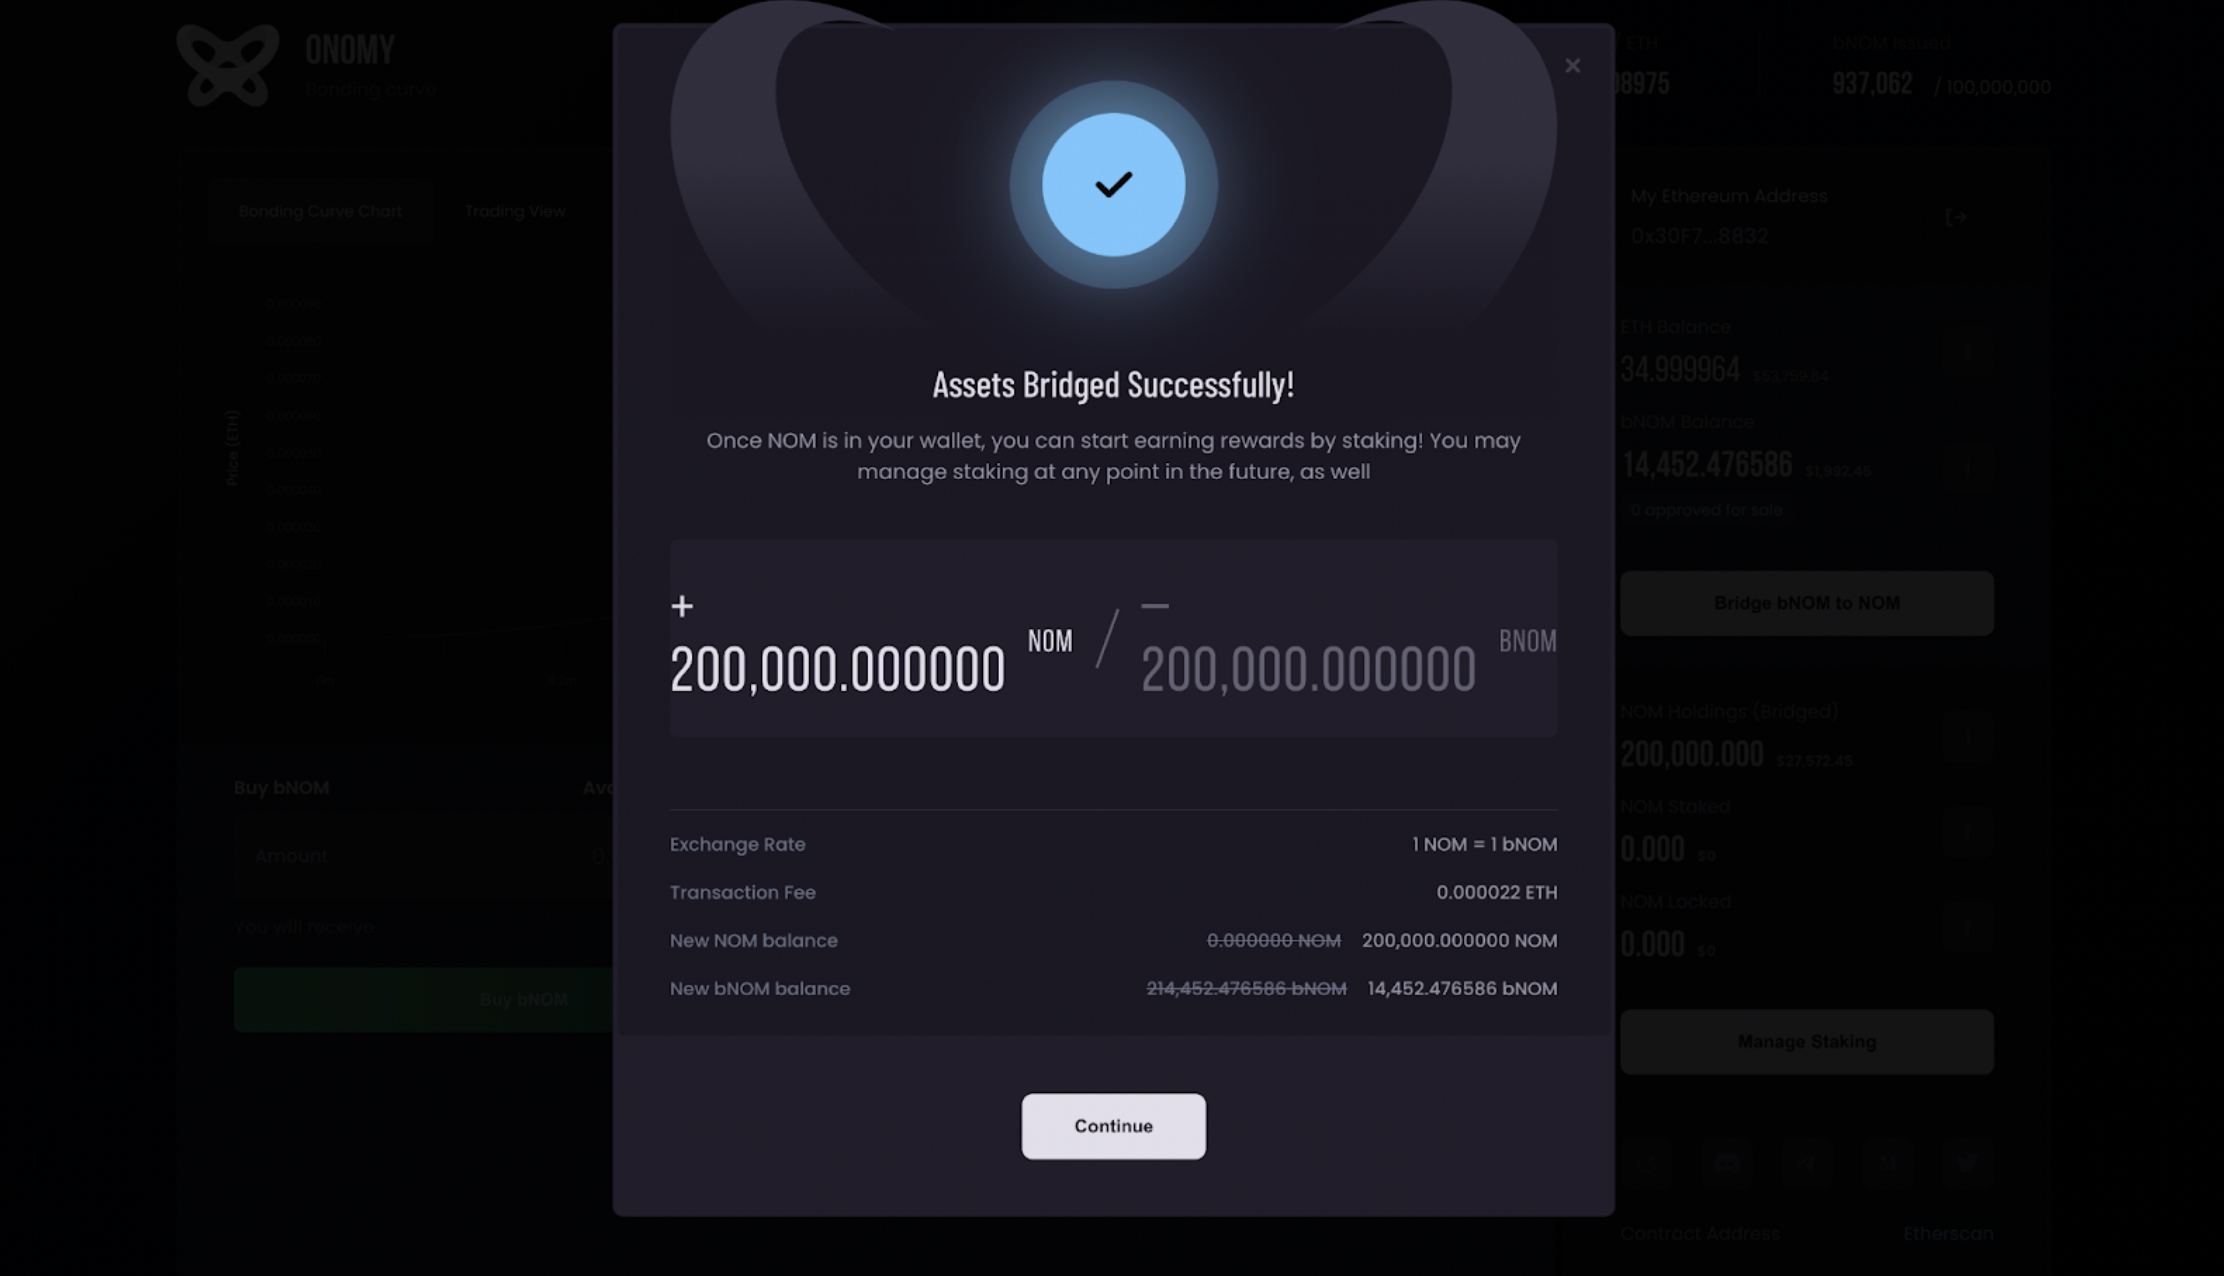
- You will now have to wait for a few seconds for the transaction to be processed. Once you get your confirmation, click on Return to Bridge Screen.
Now that you’re back on the Bridge Screen, click on Swap bNOM to NOM to initiate the transaction. Your Metamask will now be prompted, so just click on Confirm.
Once it’s been initiated, wait for the transaction to be processed for a few minutes. During this time, bNOM is being burned from the Bonding Curve and native NOM is being minted and sent to your wallet on the Onomy Network testnet.
We recommend you don’t navigate away from this screen.
Once the TX has been confirmed, the following confirmation screen will appear:
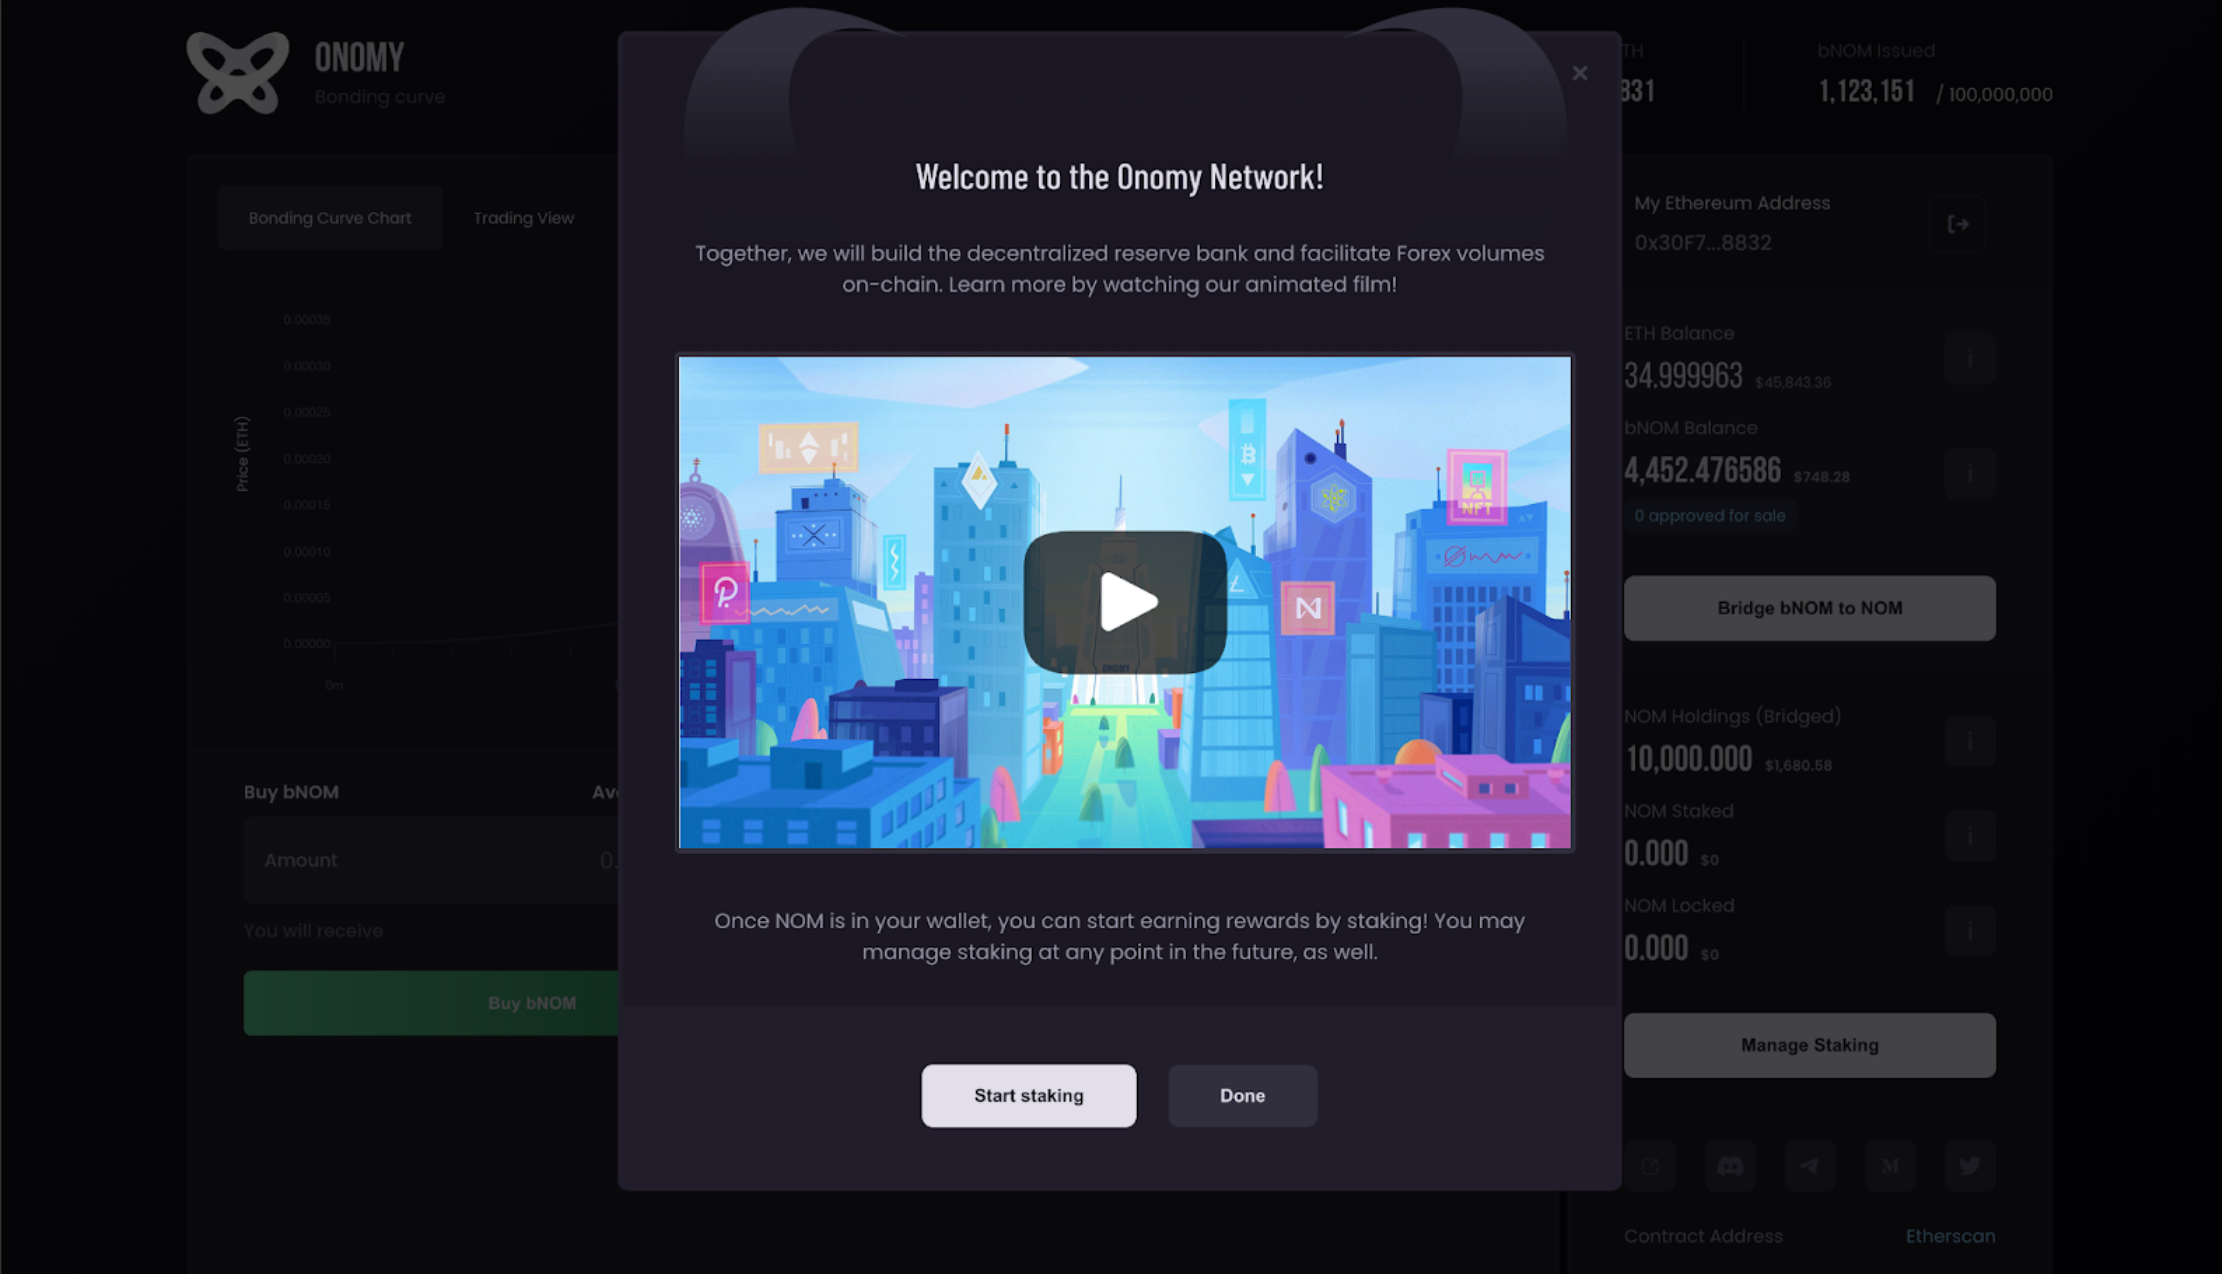
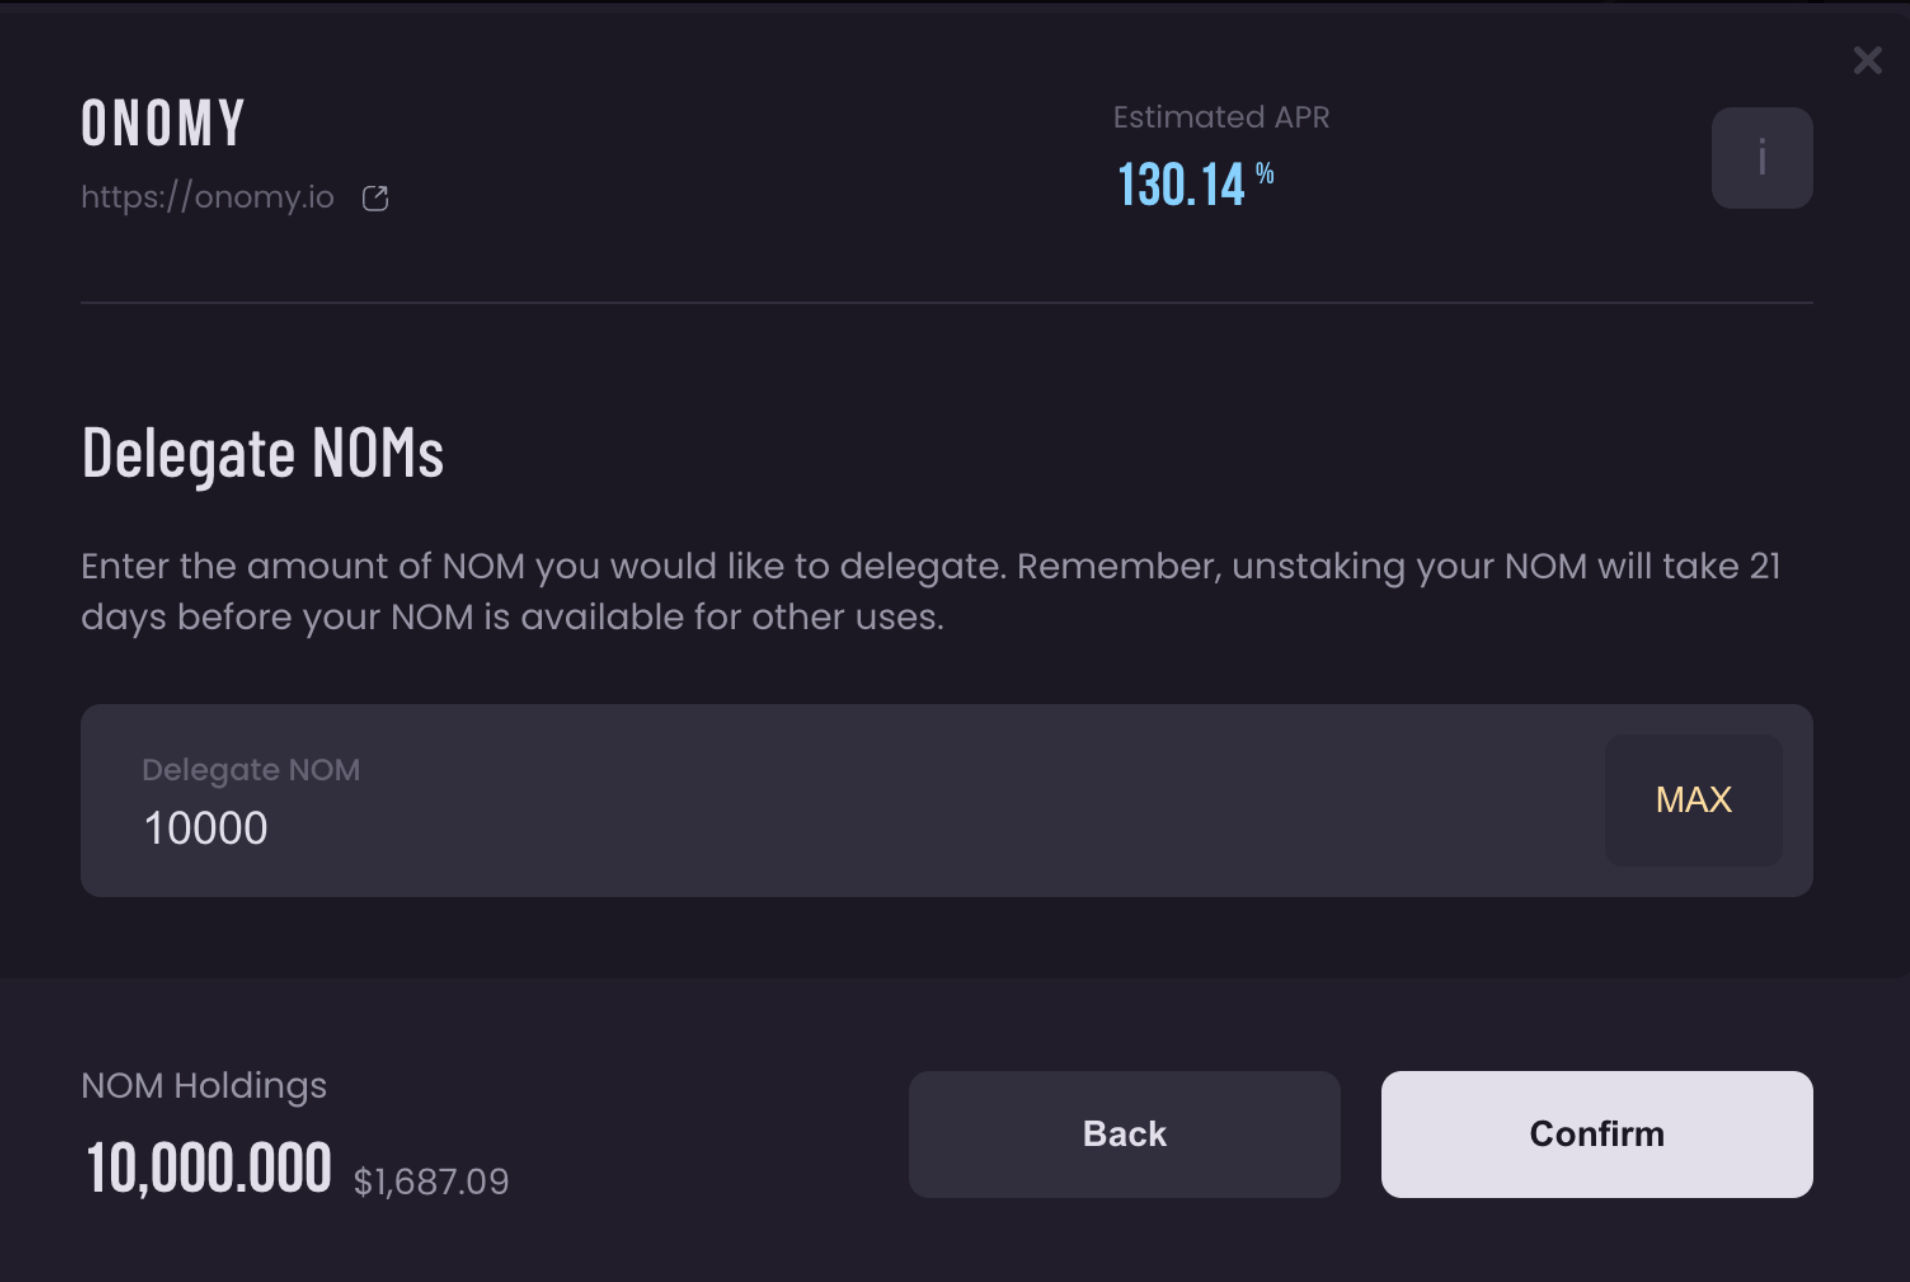
8) How to Stake NOM on the Onomy Network Testnet
Your bNOM has been successfully bridged for NOM native to the Onomy Network. It’s time to start staking now. By clicking continue in the interface, you’ll be prompted with the following screen. Simply click on start staking!
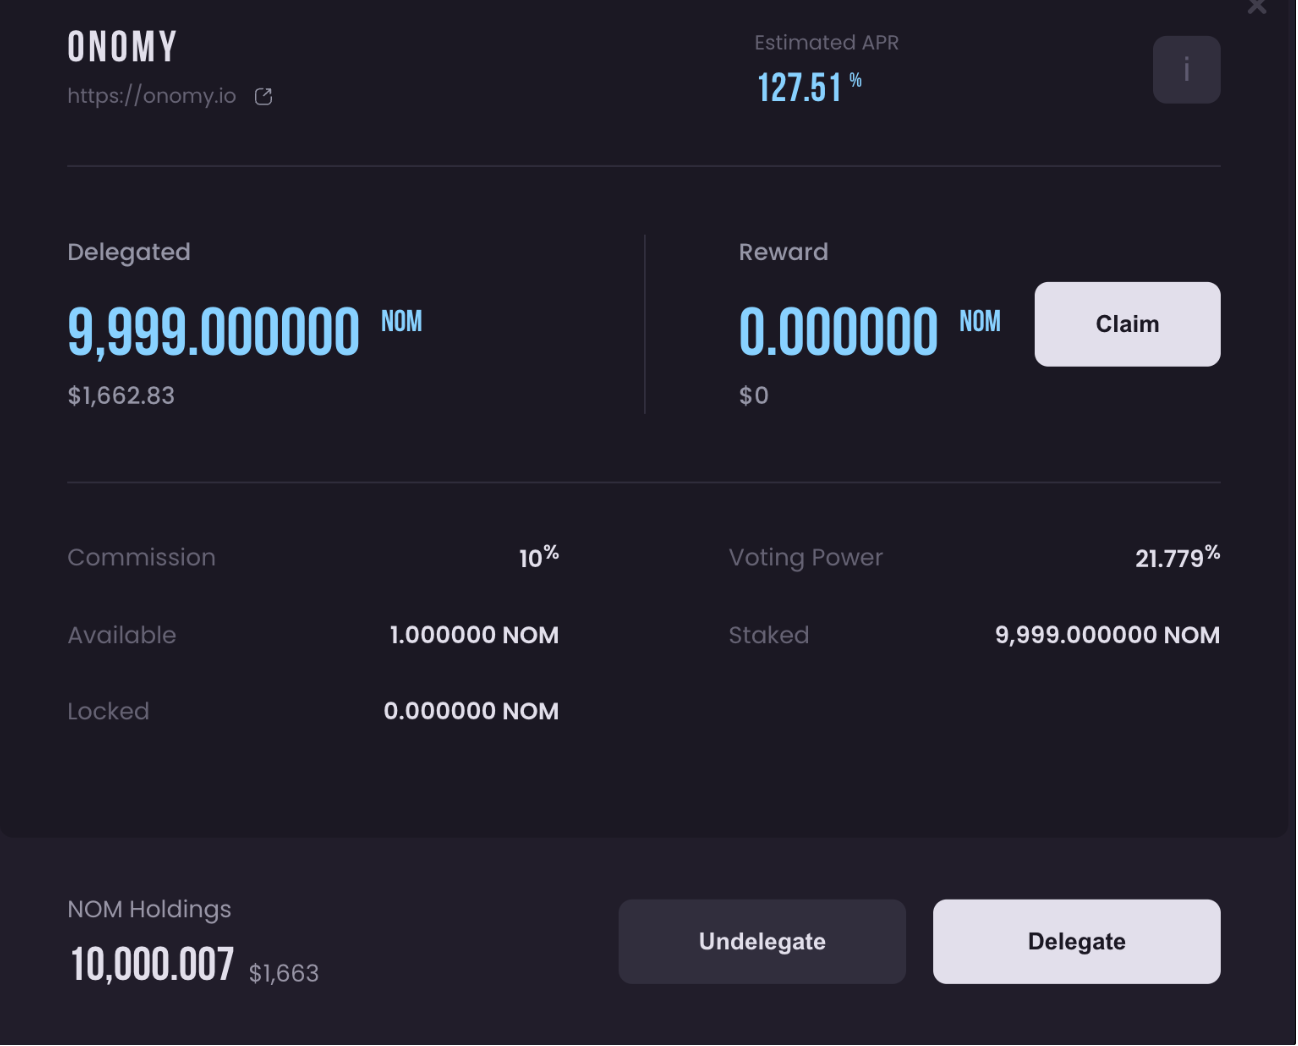
As a delegator, you are free to choose which validator to delegate your NOM holdings too. You may choose a familiar Cosmos-native validator, Onomy’s own validator, or any other from the list. Feel free to conduct due diligence and learn more about their tech, add-on services, and commission charges.
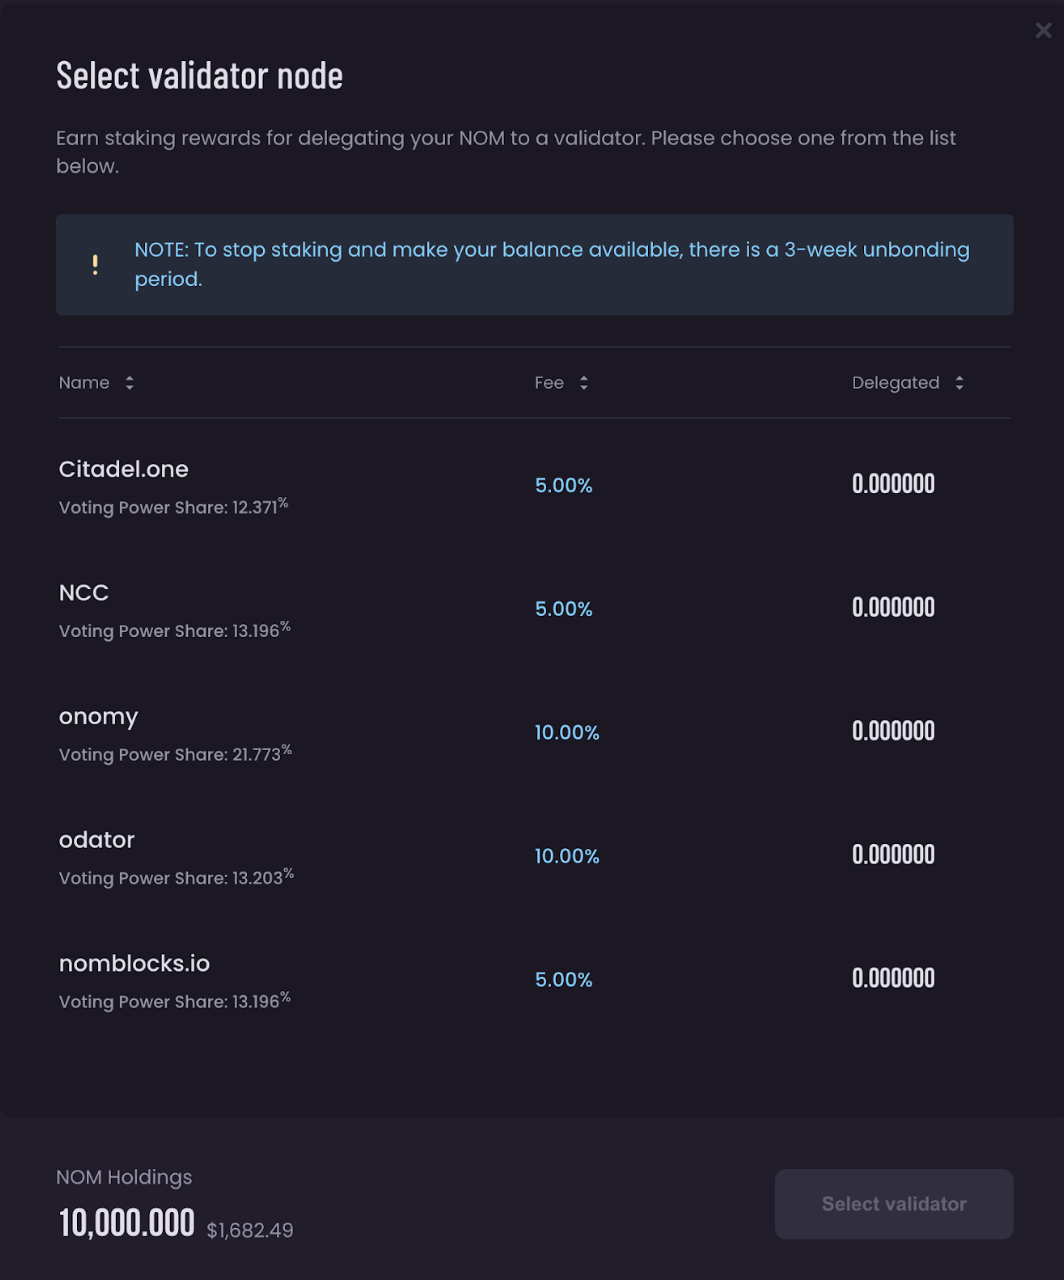
- Enter the amount of NOM you would like to stake (make sure you leave a small fraction to cover gas) and click confirm.
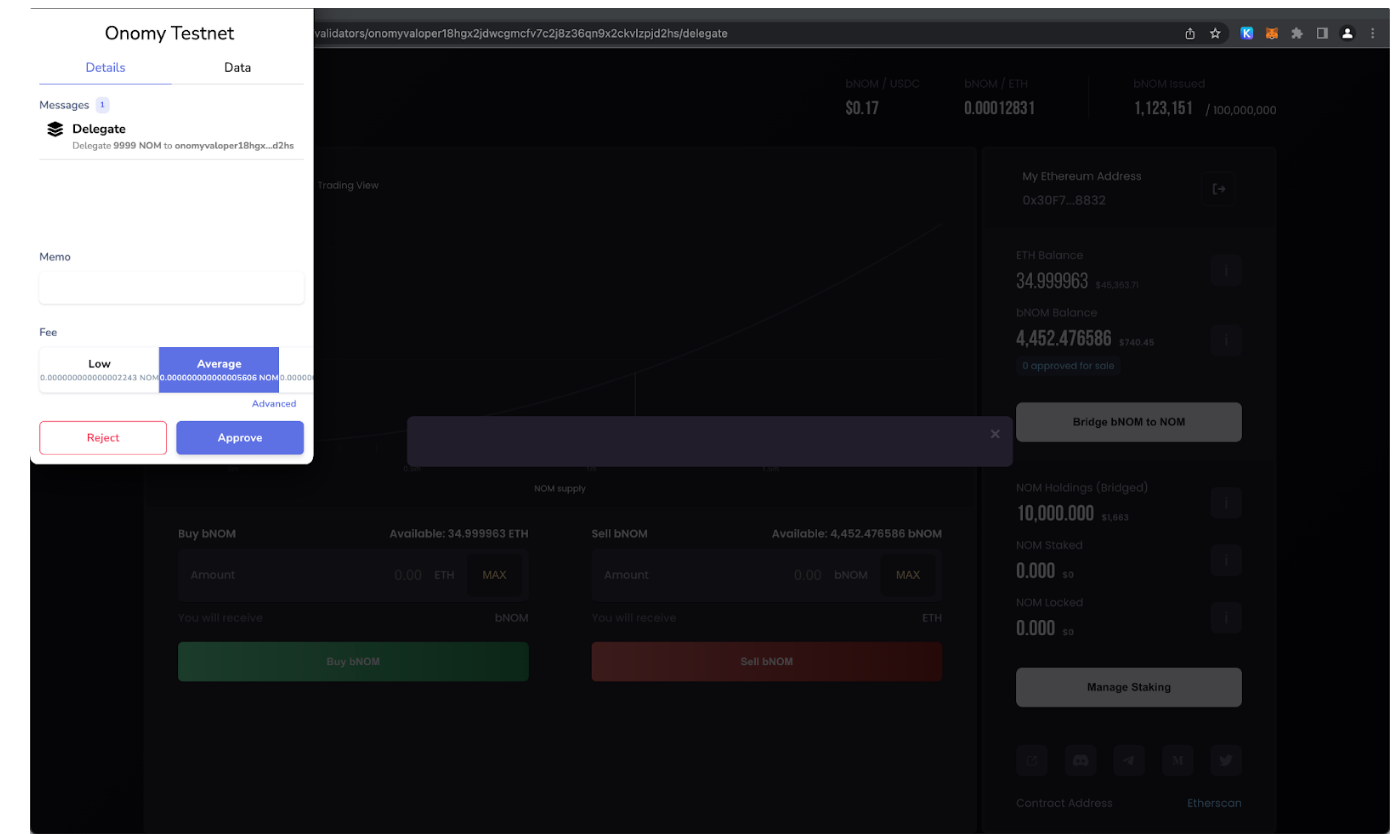
- Поздравляю! Вы успешно делегировали свой NOM валидатору.lzwsh6w Если у вас есть какие-либо вопросы или отзывы о продуктах, доступных в этой версии общедоступной тестовой сети, вы можете найти нас на специальном канале.
Discord или Telegram